
Introduction
Coolant is an important part of a car’s engine and is responsible for cooling down the engine and preventing it from overheating. If the coolant levels in your car are too low, your engine may overheat, leading to serious damage or even a complete breakdown. That’s why it’s important to keep an eye on your car’s coolant levels and make sure they are topped up regularly.
In this article, we’ll be exploring how to put coolant in your car. We’ll look at the step-by-step process of adding coolant to your car, as well as some essential advice for maintaining your vehicle’s coolant system. So if you’re looking to learn more about coolant, read on!
Step-by-Step Guide to Adding Coolant to Your Car
Adding coolant to your car is relatively simple, but it’s important to follow the correct steps to ensure that it is done properly. Here is a step-by-step guide to adding coolant to your car:
Step 1: Gather the Needed Supplies
Before you start, you’ll need to gather the supplies you’ll need for the job. You’ll need a coolant for your car, a funnel, and a pair of gloves. Make sure you buy the right kind of coolant for your car – different types of cars require different types of coolant.
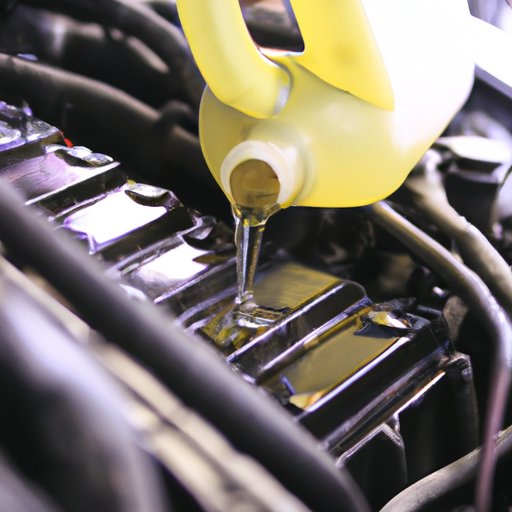
Step 2: Locate the Coolant Reservoir
The next step is to locate the coolant reservoir. This is usually a plastic container located near the radiator. The reservoir should have a cap with a dipstick or a fill line. Make sure you know which one your car has before you begin.
Step 3: Check the Fluid Level and Add Coolant
Once you’ve located the reservoir, open the cap and check the fluid level. If it is low, add coolant until it reaches the fill line or dipstick. Be careful not to overfill the reservoir, as this can cause damage to your car’s engine.
Step 4: Replace the Cap and Tighten It Properly
Once you’ve added the coolant, make sure you replace the cap and tighten it securely. If the cap isn’t tight enough, it could lead to leaks, which could damage your car’s engine.
Step 5: Dispose of the Used Coolant Safely
Finally, make sure you dispose of any used coolant safely. Do not pour it down the drain or into the environment, as it can be dangerous if ingested by animals or humans. Instead, take it to your local recycling center or hazardous waste disposal facility.
How to Put Coolant in Your Car: A Beginner’s Guide
If you’re new to putting coolant in your car, here is a beginner’s guide to help you out. These steps will walk you through the process of filling the coolant reservoir in your car:
Step 1: Identify the Type of Coolant Your Car Requires
Different types of cars require different types of coolant, so it’s important to identify the type of coolant your car requires before you start. Check your owner’s manual or ask your local mechanic for advice.
Step 2: Prepare the Coolant for Use
You’ll need to mix the coolant with water before use. Most coolants come with instructions on the packaging, so make sure you follow them carefully.
Step 3: Refill the Coolant Reservoir
Once you’ve prepared the coolant, you can refill the reservoir. Open the cap and slowly pour the coolant into the reservoir until it reaches the fill line or dipstick.
Step 4: Start the Engine and Check the Levels
Once you’ve refilled the reservoir, start the engine and let it run for a few minutes. Then turn it off and check the coolant levels again to make sure they are correct.
Step 5: Dispose of Any Remaining Coolant
Finally, make sure you dispose of any remaining coolant safely. Do not pour it down the drain or into the environment, as it can be dangerous if ingested by animals or humans. Instead, take it to your local recycling center or hazardous waste disposal facility.

The Basics of Replacing Coolant in a Vehicle
Replacing coolant in your car is slightly more complicated than simply topping it up. Here is a brief overview of what you need to do when replacing coolant in your car:
Step 1: Drain the Old Coolant
The first step is to drain the old coolant from the system. Make sure you collect it in a safe container and dispose of it properly.
Step 2: Clean the System
Next, you’ll need to clean the system. This can be done using a special cleaning solution or a brush. Make sure you rinse the system thoroughly to remove any residue.
Step 3: Refill the System With New Coolant
Once the system is clean, you can refill it with new coolant. Make sure you use the right type of coolant for your car.
Step 4: Bleed the Air From the System
Once the system is filled with coolant, you’ll need to bleed the air out of it. This can be done by running the engine and checking the coolant levels periodically.
Step 5: Check for Leaks
Finally, once the air is bled from the system, check for leaks. Look around the coolant hoses and connections for any signs of leaking coolant.

What You Need to Know About Refilling Coolant in Your Car
When refilling coolant in your car, there are a few things you need to be aware of. Here is an overview of the most important points to consider:
Coolant Types and Their Benefits
Different types of coolant offer different benefits. Make sure you choose the right type for your car, as some types are better suited for certain types of engines.
Checking Coolant Levels Regularly
It’s important to check your car’s coolant levels regularly to make sure they are topped up. This will help prevent your engine from overheating.
When to Replace Coolant
Most coolants need to be replaced every two years. However, this can vary depending on the type of coolant and the type of car. Check your owner’s manual for more information.
Signs of a Coolant Leak
Look out for signs of a coolant leak, such as a sweet smell coming from the engine, white smoke from the exhaust, or a pool of liquid under the car. If you notice any of these signs, get your car checked immediately.
Common Causes of Coolant Leaks
Coolant leaks can be caused by a number of factors, such as a cracked hose, a loose connection, or a worn gasket. Make sure you inspect your car regularly for any signs of a leak.
Tips for Refilling Your Vehicle’s Coolant System
Refilling your car’s coolant system can be a tricky task. Here are some tips to help make the process easier:
Read the Owner’s Manual
Make sure you read the owner’s manual before attempting to refill the coolant system. It will provide valuable information about the type of coolant your car requires and how to fill the system correctly.
Use the Right Type of Coolant
Different types of cars require different types of coolant, so make sure you use the right type. Using the wrong type of coolant can cause damage to your car’s engine.
Wear Protective Gear When Working on the System
When working on the coolant system, make sure you wear protective gear such as gloves and goggles. This will help protect you from any splashes of coolant.
Don’t Overfill the Reservoir
Make sure you don’t overfill the reservoir. Too much coolant can cause damage to your car’s engine.
Check for Leaks After Filling
Once you’ve filled the system, make sure you check for leaks. Look around the coolant hoses and connections for any signs of leaking coolant.
DIY: How to Safely Add Coolant to Your Car
If you want to try adding coolant to your car yourself, here is a step-by-step guide to help you out:
Step 1: Park the Car on a Flat Surface
Park your car on a flat surface to make sure it doesn’t roll while you are working on it.
Step 2: Open the Hood
Open the hood and locate the coolant reservoir. It should be a plastic container located near the radiator.
Step 3: Locate the Coolant Reservoir
Once you’ve located the reservoir, open the cap and check the fluid level. If it is low, add coolant until it reaches the fill line or dipstick.
Step 4: Check the Fluid Level and Add Coolant
Be careful not to overfill the reservoir, as this can cause damage to your car’s engine.
Step 5: Replace the Cap and Tighten it Properly
Once you’ve added the coolant, make sure you replace the cap and tighten it securely. If the cap isn’t tight enough, it could lead to leaks.

An Overview of Coolant Maintenance for Your Vehicle
Maintaining your car’s coolant system is essential for keeping your engine running smoothly. Here are some tips for keeping your car’s coolant system in good condition:
Regularly Inspect Coolant Hoses
Make sure you inspect your car’s coolant hoses regularly for any signs of wear or damage. If you notice any cracks or holes, replace the hose immediately.
Check for Signs of Coolant Leaks
Look out for signs of a coolant leak, such as a sweet smell coming from the engine, white smoke from the exhaust, or a pool of liquid under the car. If you notice any of these signs, get your car checked immediately.
Inspect the Radiator for Blockages
Make sure you inspect the radiator for any blockages. If you notice any debris or sludge, flush the system with a special cleaning solution.
Change the Coolant Every Two Years
Most coolants need to be replaced every two years. However, this can vary depending on the type of coolant and the type of car. Check your owner’s manual for more information.
Flush the System Periodically
Flushing the system periodically will help keep it free of debris and sludge. Make sure you use a special cleaning solution designed for use in car coolant systems.
Conclusion
In conclusion, adding coolant to your car is a relatively straightforward process, but it’s important to follow the correct steps to ensure that it is done properly. We’ve looked at the step-by-step process of adding coolant to your car, as well as some essential advice for maintaining your vehicle’s coolant system. Hopefully, this article has provided you with all the information you need to keep your car’s coolant system in tip-top shape.
Remember, regular inspection and maintenance of your car’s coolant system is essential for keeping your engine running smoothly and avoiding costly repairs. So make sure you check your car’s coolant levels regularly and top up as needed.