
Introduction
Installing a bicycle chain is a relatively simple task that every cyclist should be able to do. It’s important to know how to put a chain on a bicycle in order to keep your bike running smoothly and safely. In this article, we’ll provide a step-by-step guide to putting a chain on a bicycle, along with a few tips and tricks to help you get the job done quickly and easily.
Overview of the Task
Putting a chain on a bicycle is a straightforward process that only requires a few basic tools and supplies. The first step is to gather all the necessary materials, which include a chain, chainring, cog, and lube. Once you have everything you need, the next step is to remove the old chain and clean the chainring and cog. After that, you can lubricate the new chain and attach it to the bicycle. Finally, you’ll need to check the chain tension to make sure it’s not too loose or too tight.

Benefits of Installing a Bicycle Chain
There are several benefits to installing a new bicycle chain. First of all, it ensures that your bike is running smoothly and efficiently. By replacing an old, worn out chain, you can reduce wear and tear on the other components of your bike, such as the chainring and cog. Additionally, a new chain will help improve your overall riding experience, as it will shift more smoothly and require less effort when pedaling.
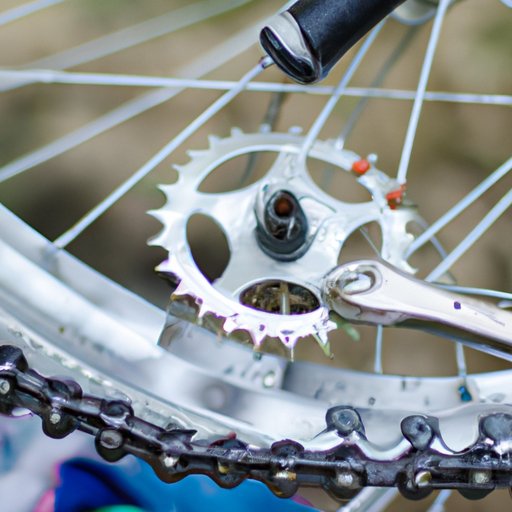
Step-by-Step Guide to Putting a Chain on a Bicycle
Preparation
Before you begin, it’s important to gather all the necessary materials, including a chain, chainring, cog, and lube. You’ll also need a few basic tools, such as a chain breaker, Allen wrenches, and pliers.
1. Gather Necessary Materials
Gather all the necessary materials, including a chain, chainring, cog, and lube. You’ll also need a few basic tools, such as a chain breaker, Allen wrenches, and pliers.
2. Remove Old Chain
Using the chain breaker, remove the old chain from the bicycle. Be sure to save the old chain, as it can be used for spare parts or recycled.
3. Clean Chainring and Cog
Once the old chain has been removed, use a rag and some degreaser to clean the chainring and cog. This will help ensure that the new chain attaches properly and shifts smoothly.
4. Lubricate Chain
Before attaching the new chain, it’s important to lubricate it. This will help reduce friction and ensure that the chain moves smoothly.
Installing the New Chain
1. Attach One End of the Chain
Using the chain breaker, attach one end of the chain to the chainring. Make sure the chain is routed around the chainring in the proper direction.
2. Route Chain Around the Chainring and Cog
Route the chain around the chainring and cog. Make sure the chain is properly seated in the grooves of both components.
3. Connect the Other End of the Chain
Connect the other end of the chain to the chainring using the chain breaker. Again, make sure the chain is routed around the chainring in the proper direction.
4. Check Chain Tension
Once the chain is attached, it’s important to check the chain tension. If the chain is too tight, it will cause excessive wear and tear on the chainring and cog. If the chain is too loose, it will slip off the chainring and cog.

Video Tutorial: How to Install a Bicycle Chain
Link to Video Tutorial
For a visual demonstration of the steps outlined above, check out this video tutorial on how to install a bicycle chain: How to Put a Bicycle Chain On in Five Easy Steps
Overview of Steps
The video tutorial covers the same steps outlined in this article, including gathering necessary materials, removing the old chain, cleaning the chainring and cog, lubricating the chain, attaching the chain, and checking the chain tension.

The Basics of Installing a Bicycle Chain
Tools and Supplies Needed
In order to install a bicycle chain, you’ll need the following tools and supplies: a chain, chainring, cog, lube, chain breaker, Allen wrenches, and pliers.
Preparing the Chain
Before installing the chain, it’s important to prepare it by lubricating it. This will help reduce friction and ensure that the chain moves smoothly.
Attaching the Chain
To attach the chain to the bicycle, use the chain breaker to attach one end of the chain to the chainring. Then route the chain around the chainring and cog and attach the other end of the chain to the chainring.
A Beginner’s Guide to Replacing a Bicycle Chain
Preparing Your Bike
Before you begin, it’s important to prepare your bike by gathering all the necessary materials, including a chain, chainring, cog, and lube. You’ll also need a few basic tools, such as a chain breaker, Allen wrenches, and pliers.
Removing the Old Chain
Using the chain breaker, remove the old chain from the bicycle. Be sure to save the old chain, as it can be used for spare parts or recycled.
Installing the New Chain
Once the old chain has been removed, use the chain breaker to attach one end of the new chain to the chainring. Then route the chain around the chainring and cog and attach the other end of the chain to the chainring.
Adjusting the Chain Tension
Once the new chain is installed, it’s important to check the chain tension. If the chain is too tight, it will cause excessive wear and tear on the chainring and cog. If the chain is too loose, it will slip off the chainring and cog.
How to Put a Bicycle Chain On in Five Easy Steps
Step 1: Gather Necessary Materials
Gather all the necessary materials, including a chain, chainring, cog, and lube. You’ll also need a few basic tools, such as a chain breaker, Allen wrenches, and pliers.
Step 2: Remove Old Chain
Using the chain breaker, remove the old chain from the bicycle. Be sure to save the old chain, as it can be used for spare parts or recycled.
Step 3: Clean Chainring and Cog
Once the old chain has been removed, use a rag and some degreaser to clean the chainring and cog. This will help ensure that the new chain attaches properly and shifts smoothly.
Step 4: Lubricate Chain
Before attaching the new chain, it’s important to lubricate it. This will help reduce friction and ensure that the chain moves smoothly.
Step 5: Connect the Two Ends of the Chain
Using the chain breaker, connect the two ends of the chain to the chainring. Make sure the chain is routed around the chainring in the proper direction.
Tips and Tricks for Installing a Bicycle Chain
Use the Right Tools
It’s important to use the right tools when installing a bicycle chain. A chain breaker is essential for connecting the two ends of the chain to the chainring. Additionally, Allen wrenches and pliers can be used to adjust the chain tension.
Clean and Lube the Chain Before Installation
Before installing the chain, it’s important to clean and lubricate it. This will reduce friction and ensure that the chain moves smoothly.
Check Chain Tension After Installation
Once the chain is installed, it’s important to check the chain tension. If the chain is too tight, it will cause excessive wear and tear on the chainring and cog. If the chain is too loose, it will slip off the chainring and cog.
Troubleshooting Common Issues When Putting a Chain on a Bicycle
Chain Too Loose
If the chain is too loose, it will slip off the chainring and cog. To fix this issue, use an Allen wrench or pliers to adjust the chain tension until it’s snug but not too tight.
Chain Too Tight
If the chain is too tight, it will cause excessive wear and tear on the chainring and cog. To fix this issue, use an Allen wrench or pliers to adjust the chain tension until it’s snug but not too tight.
Chain Slipping Off
If the chain is slipping off the chainring and cog, it’s likely due to inadequate tension. To fix this issue, use an Allen wrench or pliers to adjust the chain tension until it’s snug but not too tight.
Conclusion
Installing a bicycle chain is a relatively simple task that every cyclist should be able to do. In this article, we provided a step-by-step guide to putting a chain on a bicycle, along with a few tips and tricks to help you get the job done quickly and easily. We also included a link to a video tutorial for a visual demonstration of the steps. With the right tools and supplies, anyone can learn how to put a chain on a bicycle.
Installing a new bicycle chain offers several benefits, including improved performance and reduced wear and tear on other bike components. So if you’re looking to upgrade your bike, installing a new chain is a great place to start.
If you need further assistance, there are plenty of resources available online, including detailed tutorials and helpful videos. With the right knowledge and tools, you can successfully install a new chain on your bicycle.