
Introduction
A dryer belt is an essential component of any clothes dryer. It helps to move the drum and rotate the clothes inside. Without a working belt, the dryer won’t be able to do its job properly. If your dryer isn’t working correctly, it may be time to replace or install a new belt.
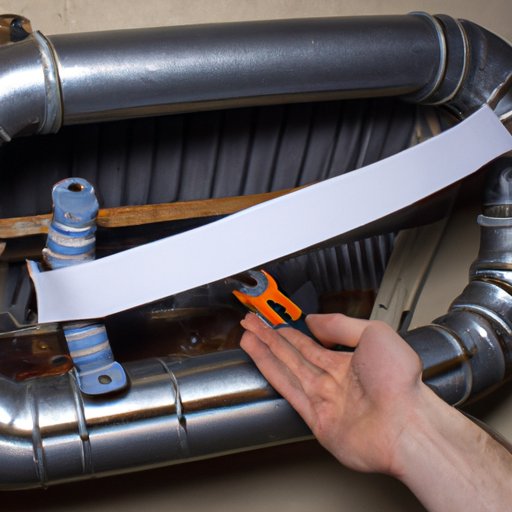
Step-by-Step Guide on How to Put a Belt on a Dryer
Before you begin, make sure you have all the necessary tools and materials. You’ll need a Phillips head screwdriver, pliers, a pair of scissors, and a new dryer belt. Additionally, make sure you’re wearing safety glasses and gloves to protect yourself from any debris that may fly during the installation process.
Once you’ve gathered everything you need, follow these steps to install your new dryer belt:
- Unplug the dryer from the wall outlet.
- Remove the back panel of the dryer.
- Locate the tension pulley and remove the old belt.
- Place the new belt around the drum and feed it through the tension pulley.
- Make sure the belt is aligned properly and the tension pulley is secure.
- Replace the back panel and plug the dryer back in.
DIY Tips for Installing a New Belt in Your Dryer
When installing a new belt in your dryer, it’s important to make sure you have the right size belt. Measure the circumference of the drum before purchasing a new belt to ensure you get the correct size. Additionally, double-check the measurements once you have the belt in hand to make sure it’s the right size.
You’ll also want to make sure all components are properly aligned when installing the belt. Make sure the belt is centered on the drum, not twisted, and the tension pulley is securely fastened. This will help ensure your dryer runs smoothly and safely.

How to Replace the Drive Belt in Your Dryer
If your dryer isn’t working properly, it may be time to replace the drive belt. Here’s how to do it:
- Unplug the dryer from the wall outlet.
- Remove the back panel of the dryer.
- Locate the drive pulley and remove the old belt.
- Feed the new belt around the drum and through the drive pulley.
- Make sure the belt is aligned properly and the drive pulley is secure.
- Replace the back panel and plug the dryer back in.

Troubleshooting Tips for Replacing a Dryer Belt
Installing a new dryer belt can be tricky, so it’s important to be prepared for any potential issues that may arise. Common issues include misaligned belts, incorrect belt sizes, and loose pulleys. If you encounter any of these issues, here are some troubleshooting steps to take:
- Check the belt size and make sure it is the correct size for your dryer.
- Check for any twists or kinks in the belt and make sure it is properly aligned.
- Check the tension pulley and make sure it is securely fastened.
- Check the drive pulley and make sure it is securely fastened.
A Beginner’s Guide to Installing a Dryer Belt
If you’re new to dryer belt installation, there are a few things to keep in mind. First, make sure you purchase the right size belt for your dryer. If it’s too big or too small, it won’t work correctly. Also, pay close attention to the alignment of the belt and the pulleys. Misalignment can cause the dryer to run inefficiently or even break down.
Finally, make sure you wear safety glasses and gloves to protect yourself from any debris that may fly during the installation process. Taking these precautions can help ensure a successful dryer belt installation.

How to Easily Change a Dryer Belt at Home
Changing a dryer belt at home is a relatively simple process. Before you start, make sure you prepare the area where you’ll be working. Clear away any items that may get in the way and lay down a drop cloth to protect the floor from any dust or debris. Then make sure you have all the necessary tools and materials, including a Phillips head screwdriver, pliers, a pair of scissors, and a new dryer belt.
Once you have everything you need, follow the steps outlined above to change the dryer belt. With patience and a steady hand, you should have your dryer up and running in no time!
Conclusion
Replacing or installing a dryer belt is a relatively simple process, but it’s important to take the necessary precautions to ensure it’s done correctly. Make sure you have the right size belt, double-check measurements, wear safety glasses and gloves, and take the time to properly align the belt and pulleys. With these tips in mind, you should be able to easily put a belt on your dryer.