
Introduction
Installing a bicycle chain is a necessary task for any cyclist. Whether you’re replacing an old, worn chain or installing a brand-new one, having the right tools and knowing the steps to take will make the job a breeze. In this article, we’ll provide a comprehensive guide on how to put a chain on a bike, from beginner tips to essential steps for experts. Read on to learn all you need to know about installing a bicycle chain.
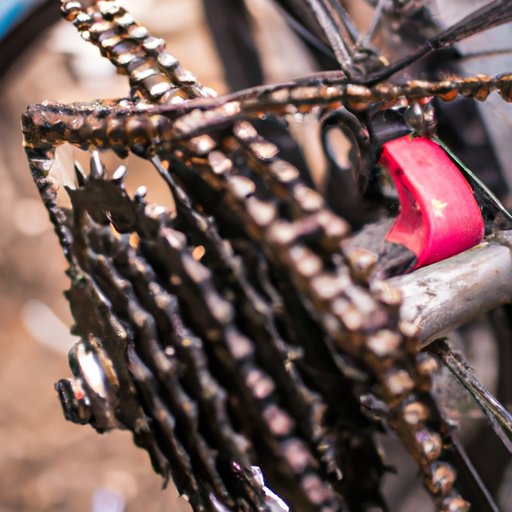
Step-by-Step Guide to Installing a Chain on Your Bicycle
When it comes to putting a chain on a bike, the process can be broken down into four main steps: gathering the necessary materials, preparing the bike, installing the chain, and adjusting the chain. Here’s a closer look at each of these steps.
What You Need
Before you begin, make sure you have the following items: a chain breaker tool, a pair of pliers, a rag, some lubricant, and, of course, a new chain. If you are just replacing the old chain, you may not need the lubricant and rag.
Preparing the Bike
Start by removing the rear wheel from the bike frame. This will give you better access to the chain and make the installation process easier. Once the wheel is removed, inspect the chainrings, cogs, and derailleurs for any signs of damage or wear. Replace any damaged parts as needed.
Installing the Chain
Now it’s time to install the new chain. Start by feeding one end of the chain through the rear derailleur, then run it through the rear cog. Connect the two ends of the chain together using the chain breaker tool. Make sure the connection is tight and secure.
Adjusting the Chain
Once the chain is installed, you’ll need to adjust it for proper tension. To do this, turn the pedals until the chain is taut. Then, use the barrel adjuster on the rear derailleur to fine-tune the tension. Finally, check the chain for any kinks or twists, and make sure it moves freely along the cogs and chainrings.
How to Properly and Safely Put a Chain on Your Bike
Putting a chain on your bike isn’t just about following the steps outlined above. It’s also important to make sure you’re taking the right safety precautions and using the right tools. Here are some tips for properly and safely installing a bicycle chain.
Using the Right Tools
One of the most important steps in installing a chain on your bike is using the right tools. Make sure you have a good quality chain breaker tool, as well as a pair of pliers and a rag. Don’t try to use a screwdriver or any other makeshift tool — these can cause more harm than good.
Checking for Wear and Tear
Before you install the chain, check it for any signs of wear and tear. Look for stretched links, frayed edges, and bent pins. If you find any of these, it’s best to replace the chain rather than trying to repair it.
Lubricating the Chain
Once the chain is installed, it’s important to lubricate it. This will help reduce friction and protect against corrosion. Apply a few drops of lubricant to the inner and outer plates of the chain, then wipe off any excess with a rag.
A Beginner’s Guide to Installing a Bicycle Chain
If you’re a beginner when it comes to installing a bicycle chain, here’s a step-by-step guide to help get you started.
Identifying the Type of Chain
The first step is to identify the type of chain you need. Most modern bikes use a “derailleur” chain, which is designed to fit multiple gears. If you’re not sure, consult your bike’s manual or bring it to a local bike shop for assistance.
Removing the Old Chain
If you’re replacing an old chain, start by loosening the bolts that hold the chain in place. Then, use the chain breaker tool to disconnect the two ends. Once the old chain has been removed, discard it.
Installing the New Chain
Now it’s time to install the new chain. Start by threading one end of the chain through the rear derailleur and the rear cog. From there, connect the two ends of the chain together using the chain breaker tool. Make sure the connection is tight and secure.

How to Replace a Broken Bicycle Chain
If your chain has snapped or become otherwise damaged, you’ll need to replace it. Here’s a quick guide on how to replace a broken bicycle chain.
Locating the Break
The first step is to locate the break in the chain. If you’re unable to find it, gently pull back the chain until you feel resistance. This is where the break is located.
Removing the Old Chain
Once you’ve found the break, use the chain breaker tool to disconnect the two ends of the chain. Then, remove the old chain from the bike and discard it.
Installing the New Chain
Now it’s time to install the new chain. Start by threading one end of the chain through the rear derailleur and the rear cog. From there, connect the two ends of the chain together using the chain breaker tool. Make sure the connection is tight and secure.

Tips for Replacing a Worn Bicycle Chain
Replacing a worn bicycle chain is slightly different than replacing a broken one. Here are some tips to keep in mind when replacing a worn chain.
Inspecting the Chain
Start by inspecting the chain for any signs of wear and tear, such as stretched links, frayed edges, and bent pins. If you find any of these, it’s best to replace the chain rather than trying to repair it.
Cleaning the Chain
Next, clean the chain with a rag and some degreaser. This will help remove any dirt and grime that has built up over time.
Adding Lubricant
Once the chain is clean, apply some lubricant to the inner and outer plates. This will help reduce friction and protect against corrosion.

Essential Steps for Installing a Bicycle Chain
Finally, here are the essential steps for installing a bicycle chain.
Measuring the Length of the Chain
Before you begin, measure the length of the chain and make sure it’s the correct size for your bike. Most modern bikes use a standard 1/2″ x 3/32″ chain.
Attaching the Chain to the Rear Cog
Start by attaching one end of the chain to the rear cog. Use the chain breaker tool to secure the connection.
Connecting the Two Ends of the Chain
Once the chain is attached to the rear cog, thread the other end through the rear derailleur. Finally, connect the two ends of the chain together using the chain breaker tool. Make sure the connection is tight and secure.
Conclusion
Installing a bicycle chain doesn’t have to be a difficult task. With the right tools and knowledge, you can easily and safely put a chain on your bike. Just remember to gather the necessary materials, prepare the bike, install the chain, adjust the chain, and lubricate the chain. Following these steps will ensure that your bike is running smoothly and efficiently.