
Introduction
Plastering is an ancient art form that has been used for centuries by craftsmen around the world. It involves using a special mixture of materials such as gypsum, lime or cement to create a smooth surface on walls and ceilings. Plastering can be used to give walls and ceilings a finished look, and it can also be used to level out uneven surfaces. In this article, we will explore the process of plastering a ceiling in detail, so you can get a better understanding of the process.
Step-by-Step Guide to Plastering a Ceiling
Before you start plastering your ceiling, there are a few key steps you should take to ensure the job goes smoothly. Here’s a step-by-step guide to help you through the process:
Preparing the Room
The first step in the process is to prepare the room. This involves removing any furniture and other items from the area and ensuring the walls and ceiling are free of dust and debris. Once the room is clear and clean, you can begin applying the plaster.
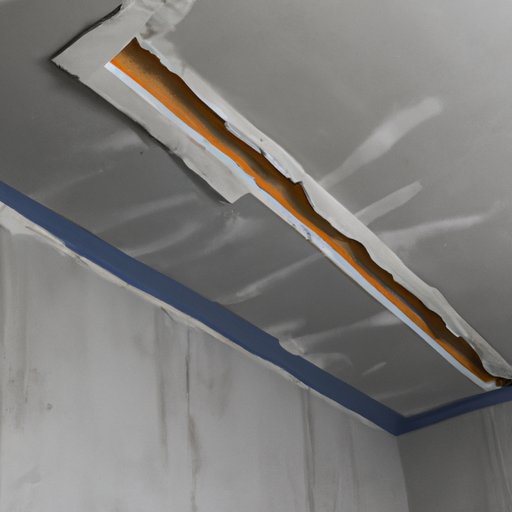
Applying the First Coat
Once the room is ready, you can start applying the first coat of plaster. The best way to do this is to use a trowel to spread the plaster evenly across the ceiling. Make sure to apply the plaster in thin, even layers and use a damp cloth to wipe away any excess plaster. Allow the first coat to dry before moving onto the second coat.
Applying the Second Coat
Once the first coat has dried, you can start applying the second coat. Again, use a trowel to spread the plaster evenly and make sure you cover all areas. This coat should be slightly thicker than the first coat, but still relatively thin. Allow the second coat to dry before moving onto the finishing touches.
Finishing Touches
Once the second coat has dried, you can start adding the finishing touches. This can include sanding down any rough edges and smoothing out any imperfections. You may also want to add a decorative finish such as stucco or paint to give the ceiling a finished look. Once you’re done, you can sit back and admire your handiwork.

How to Avoid Common Mistakes When Plastering a Ceiling
When plastering a ceiling, it’s important to avoid common mistakes that could lead to costly repairs. Here are some tips to help you avoid these mistakes:
Measure Twice, Cut Once
Before you start applying the plaster, make sure you measure the area accurately. This will help you to avoid having to cut the plaster to fit, which can be difficult and time consuming. It’s also important to make sure you have the right amount of plaster for the job, as too little or too much can affect the quality of the finish.
Don’t Rush
It’s important to take your time when plastering a ceiling. Rushing can lead to sloppy work and mistakes, which can be difficult to fix. Take your time to ensure that you get the best results possible.
Choose the Right Materials
When choosing materials for plastering, it’s important to pick the right ones. Make sure you choose high-quality materials that are designed specifically for plastering. Cheap materials may seem like a good idea at the time, but they could cause problems down the line.

Tips and Tricks for Beginners on Plastering a Ceiling
If you’re new to plastering, here are some tips and tricks to help you get started:
Use Mesh Tape
Mesh tape is a great way to help keep the plaster in place while it dries. Simply attach the mesh tape to the ceiling and then apply the plaster over the top. This will help to ensure that the plaster sticks and doesn’t crack or peel.
Sand Between Coats
When applying multiple coats of plaster, it’s important to sand between each coat. This will help to ensure that the coats stick together and create a smooth, even finish.
Begin at the Corners
When applying the plaster, it’s important to start at the corners and work your way out. This will help to ensure that the plaster is evenly applied and creates a professional-looking finish.
A Comprehensive Guide to Plastering a Ceiling
Plastering a ceiling can be a tricky task, but with the right tools and knowledge, anyone can do it. Here’s a comprehensive guide to help you through the process:
Choosing the Right Tools
The first step in plastering a ceiling is to choose the right tools. You’ll need a trowel for spreading the plaster, a damp cloth for wiping away excess plaster, and a sander for smoothing out any imperfections. You may also want to invest in protective gear such as gloves and a face mask to protect yourself from any dust or debris.
Understanding Different Types of Plaster
There are several different types of plaster available, and it’s important to understand the differences between them. Gypsum-based plasters are the most common and are suitable for most applications. Lime-based plasters are more flexible and are often used for outdoor projects. Cement-based plasters are more durable and are often used in commercial buildings.
Applying the Plaster
Once you have chosen the right type of plaster, you can start applying it. Start by applying a thin layer of plaster to the ceiling and use a trowel to spread it evenly. Make sure to apply the plaster in thin layers and use a damp cloth to wipe away any excess. Allow each layer to dry before applying the next.

What You Need to Know Before Plastering Your Ceiling
Before you start plastering, there are a few things you should know to ensure a successful project. Here are a few tips to keep in mind:
Ensure Proper Ventilation
It’s important to make sure the room is properly ventilated when plastering. This will help to prevent any fumes from building up and ensure the plaster dries properly.
Clean Up Thoroughly
Once you’ve finished plastering, make sure you clean up thoroughly. This will help to prevent any dust or debris from settling on the newly plastered ceiling.
Protect Your Furniture
If you have any furniture or other items in the room, make sure you cover them with a sheet or plastic to protect them from any plaster splatter. This will help to ensure that your furniture stays in good condition.
Conclusion
Plastering a ceiling is a great way to give your home a finished look. With the right tools and knowledge, anyone can do it. Just remember to take your time, measure twice and cut once, and choose the right materials. By following these steps, you’ll be well on your way to creating a beautiful, professionally finished ceiling.