
Introduction
Unfinished cabinets are a great way to add style and character to any room in your home. However, if you’re looking for a more polished look, painting them can transform the entire space. Painting unfinished cabinets may seem like a daunting task, but with the right supplies and a few simple steps, you can easily achieve a perfect finish.
Overview of the Problem
When it comes to painting unfinished cabinets, there are several things to consider. First, you need to make sure that the cabinets are properly prepared before you begin painting. This means sanding, priming, and cleaning the surfaces to ensure that the paint adheres properly. Once the cabinets are prepped, you need to select the right paint, brushes, and other supplies for the job. Finally, you must apply multiple coats of paint and seal the finish once you’re done to ensure that the paint lasts for years to come.

Reasons to Paint Unfinished Cabinets
Painting unfinished cabinets is an easy and cost-effective way to update the look of any room in your home. Whether you’re looking for a modern, contemporary look or a classic, timeless design, painting your cabinets is a great way to achieve the look you’re going for. It’s also a great way to make old, worn-out cabinets look brand new again. Plus, it’s a relatively quick and easy project that anyone can do without the help of a professional.
Step-by-Step Guide to Painting Unfinished Cabinets
Painting unfinished cabinets doesn’t have to be intimidating. With the right supplies and a few simple steps, you can easily create a professional-looking finish. Here’s a step-by-step guide to help you get started:
Preparing the Cabinets for Painting
The first step in painting unfinished cabinets is to prepare the surface. Begin by removing all hardware from the cabinets and cleaning the surfaces with a damp cloth. Next, use a fine-grit sandpaper to lightly sand the cabinet doors and frames to remove any imperfections. This will help the paint adhere better and create a smoother finish. Once you’ve finished sanding, wipe the cabinets down with a damp cloth to remove any dust or debris.
Choosing and Applying the Paint
Once the cabinets are prepped, it’s time to choose the right paint. Latex paint is a good option for unfinished cabinets as it is easy to apply and provides a durable finish. For best results, use a high-quality paintbrush and primer to ensure that the paint adheres properly. Start by applying a thin coat of primer and allow it to dry completely before applying the paint. Once the primer is dry, apply two coats of paint, allowing each coat to dry thoroughly before applying the next. If necessary, you can use a fine-grit sandpaper between coats to smooth out any imperfections.
Finishing Touches
Once the paint has dried completely, you can add the finishing touches. Use a foam brush to apply a clear polyurethane sealant over the paint for added protection. This will help to protect the paint from scratches, chips, and fading. Allow the sealant to dry completely before replacing the cabinet hardware. And voila! You now have a beautiful, freshly painted set of cabinets.
Get the Look of a Professional Paint Job on Unfinished Cabinets
If you want to get the look of a professional paint job on your unfinished cabinets, it’s important to take the extra steps of sanding and priming. Start by using a medium-grit sandpaper to sand the surfaces of the cabinets. This will help to create a smooth surface and ensure that the primer and paint adhere properly. Once the cabinets are sanded, use a high-quality primer to cover any imperfections and create a uniform finish. Allow the primer to dry completely before applying the paint.
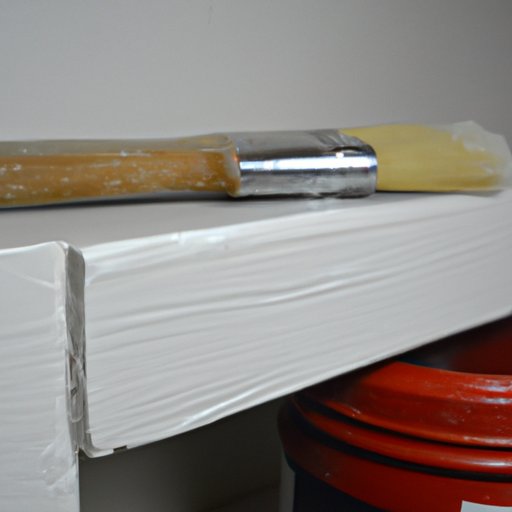
Selecting the Right Brush
To get the best results when painting unfinished cabinets, it’s important to select the right brush. A high-quality brush with soft bristles will help to ensure that the paint is evenly applied and will help to prevent streaks and brush marks. For best results, use a brush that is specifically designed for painting cabinets.
Finishing With Polyurethane
Once the paint has dried completely, it’s important to seal the finish with a clear polyurethane sealant. This will help to protect the paint from scratches, chips, and fading. Use a foam brush to apply the sealant in even strokes and allow it to dry completely before replacing the cabinet hardware.
How to Transform Unfinished Cabinets with a Fresh Coat of Paint
Painting unfinished cabinets is a great way to give your home a fresh new look. To get started, you’ll need to prepare the surface of the cabinets. Begin by removing all hardware from the cabinets and cleaning the surfaces with a damp cloth. Once the cabinets are clean, use a fine-grit sandpaper to lightly sand the surfaces to remove any imperfections. Once the cabinets are prepped, it’s time to choose the right paint, brushes, and other supplies for the job.
Preparing the Surface
Before you begin painting, it’s important to make sure that the cabinets are properly prepared. Begin by wiping down the cabinets with a damp cloth to remove any dust or debris. Next, use a fine-grit sandpaper to lightly sand the surfaces to remove any imperfections. This will help the paint adhere better and create a smoother finish. Once you’ve finished sanding, wipe the cabinets down with a damp cloth to remove any dust or debris.
Applying the Paint
Once the cabinets are prepped, it’s time to choose the right paint. Latex paint is a good option for unfinished cabinets as it is easy to apply and provides a durable finish. For best results, use a high-quality paintbrush and primer to ensure that the paint adheres properly. Start by applying a thin coat of primer and allow it to dry completely before applying the paint. Once the primer is dry, apply two coats of paint, allowing each coat to dry thoroughly before applying the next.
Sealing the Finish
Once the paint has dried completely, use a foam brush to apply a clear polyurethane sealant over the paint for added protection. This will help to protect the paint from scratches, chips, and fading. Allow the sealant to dry completely before replacing the cabinet hardware.

Achieving a Beautiful Finish When Painting Unfinished Cabinets
Painting unfinished cabinets doesn’t have to be intimidating. With the right supplies and a few simple steps, you can easily create a beautiful, professional-looking finish. Here are some tips to help you achieve a perfect finish:
Creating a Smooth Finish
To get the best results when painting unfinished cabinets, it’s important to create a smooth finish. Begin by using a medium-grit sandpaper to sand the surfaces of the cabinets. This will help to create a smooth surface and ensure that the primer and paint adhere properly. Once the cabinets are sanded, use a high-quality primer to cover any imperfections and create a uniform finish. Allow the primer to dry completely before applying the paint.
Applying Multiple Coats
For best results, it’s important to apply multiple coats of paint. Start by applying a thin coat of primer and allow it to dry completely before applying the paint. Once the primer is dry, apply two coats of paint, allowing each coat to dry thoroughly before applying the next. If necessary, you can use a fine-grit sandpaper between coats to smooth out any imperfections.
Final Touches
Once the paint has dried completely, you can add the finishing touches. Use a foam brush to apply a clear polyurethane sealant over the paint for added protection. This will help to protect the paint from scratches, chips, and fading. Allow the sealant to dry completely before replacing the cabinet hardware. And voila! You now have a beautiful, freshly painted set of cabinets.
DIY Tips for Painting Unfinished Cabinets
Painting unfinished cabinets is a great DIY project that anyone can do. Here are some tips to help you get started:
Choosing the Right Tools
When it comes to painting unfinished cabinets, it’s important to choose the right tools for the job. For best results, use a high-quality paintbrush and primer to ensure that the paint adheres properly. You’ll also need a medium-grit sandpaper for sanding the surfaces and a fine-grit sandpaper for smoothing out any imperfections. And don’t forget to use a foam brush to apply the polyurethane sealant.
Taking Safety Precautions
It’s also important to take safety precautions when painting unfinished cabinets. Wear a dust mask to avoid inhaling any particles while sanding, and wear gloves to protect your hands from the paint. Also, make sure to work in a well-ventilated area to avoid inhaling any fumes from the paint or sealant.
Cleaning Up Afterward
Finally, it’s important to clean up after you’ve finished painting. Use a damp cloth to wipe down the cabinets and remove any paint or sealant that may have gotten on the surfaces. Discard any used rags and brushes, and store any unused paint and sealant in a cool, dry place.

Quick and Easy Steps to Refresh Unfinished Cabinets with Paint
Painting unfinished cabinets is a great way to give your home a fresh new look. Here are some quick and easy steps to help you get started:
Choosing the Right Paint
The first step in painting unfinished cabinets is to choose the right paint. Latex paint is a good option for unfinished cabinets as it is easy to apply and provides a durable finish. For best results, use a high-quality paintbrush and primer to ensure that the paint adheres properly.
Preparing the Cabinets
Before you begin painting, it’s important to make sure that the cabinets are properly prepared. Begin by removing all hardware from the cabinets and cleaning the surfaces with a damp cloth. Once the cabinets are clean, use a fine-grit sandpaper to lightly sand the surfaces to remove any imperfections. This will help the paint adhere better and create a smoother finish. Once you’ve finished sanding, wipe the cabinets down with a damp cloth to remove any dust or debris.
Applying the Paint
Once the cabinets are prepped, it’s time to apply the paint. Start by applying a thin coat of primer and allow it to dry completely before applying the paint. Once the primer is dry, apply two coats of paint, allowing each coat to dry thoroughly before applying the next. If necessary, you can use a fine-grit sandpaper between coats to smooth out any imperfections.
Conclusion
Painting unfinished cabinets can be an easy and cost-effective way to give your home a fresh new look. With the right supplies and a few simple steps, you can easily create a professional-looking finish. Start by preparing the cabinets for painting, choosing the right paint, and applying multiple coats. Finally, finish off with a clear polyurethane sealant to protect the paint from scratches, chips, and fading. With these tips, you’ll be able to achieve a perfect finish on your unfinished cabinets.