
Introduction
Painting a popcorn ceiling can be an intimidating task, but it doesn’t have to be. With the proper supplies and a few simple steps, you can successfully paint your popcorn ceiling with a roller. But before we get started, let’s review what exactly a popcorn ceiling is.
Definition of Popcorn Ceiling
Popcorn ceilings are also known as “acoustic ceilings” or “cottage cheese ceilings.” They are a textured ceiling finish made up of sprayed-on Styrofoam pellets that were popular in homes built between the 1950s and 1980s. The texture is often used to hide imperfections on the ceiling and to help absorb sound.
Overview of Painting Process
Painting a popcorn ceiling requires patience and attention to detail. The process involves several steps, from prepping the room to applying primer and paint to the ceiling and finishing with a brush. Once you’ve completed the project, you should also take care to regularly vacuum and spot clean your ceiling.

Preparing the Room for Painting
The first step in the painting process is to prepare the room for painting. This includes setting up a work area, covering furniture and floors, and removing dust and debris.
Setting Up Work Area
Before you begin painting, it’s important to set up a work area. You’ll need a ladder, drop cloths, painter’s tape, and other supplies. Make sure that the area around the ladder is clear and free of obstructions so you can move around safely.
Covering Furniture and Floors
Next, you’ll want to cover any furniture and floors in the room that you don’t want to get paint on. Place drop cloths over furniture and taped plastic sheeting to the floor. Be sure to tuck the edges of the sheeting under the furniture to keep paint from dripping onto the floor.
Removing Dust and Debris
Before you start painting, use a vacuum to remove any dust and debris from the ceiling. This will help ensure that the paint adheres properly to the surface.
Applying Primer to the Ceiling
Once you’ve prepped the room, you can begin applying primer to the ceiling. Primer helps the paint adhere better and provides a smooth, even surface for the paint to stick to.
Selecting Appropriate Primer
When selecting a primer, make sure to choose one that is specifically designed for popcorn ceilings. Look for a product that is labeled “water-based” or “low-VOC” (volatile organic compounds). These types of primers are less likely to cause health problems.
Applying Primer with Roller
Once you’ve chosen a primer, you’re ready to apply it to the ceiling. Dip the roller into the primer and then roll it across the ceiling in long, even strokes. Start at one corner of the room and work your way across the ceiling in sections. Make sure to overlap each stroke slightly to ensure even coverage.
Mixing Paint and Water
Now that the primer has been applied, you can begin mixing the paint and water together. This will help thin out the paint, making it easier to apply with a roller.
Choosing Appropriate Paint
When selecting paint for your popcorn ceiling, look for a low-odor, low-VOC paint. This type of paint is less likely to emit harmful fumes and will provide better coverage than standard paint.
Mixing Paint and Water
To mix the paint and water, add one part paint to two parts water. Stir the mixture until it is completely blended. Once the paint is mixed, you’re ready to apply it to the ceiling.

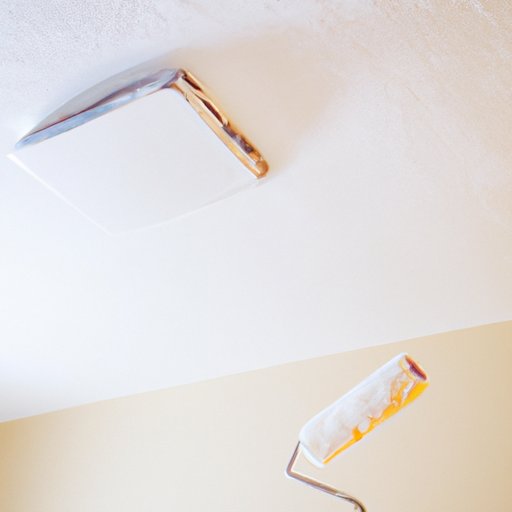
Using a Roller to Apply Paint
Dip the roller into the paint and then roll it across the ceiling in long, even strokes. Start at one corner of the room and work your way across the ceiling in sections. Make sure to overlap each stroke slightly to ensure even coverage.
Finishing with a Brush
Once you’ve applied the paint with a roller, you can finish the job by using a brush to touch up any areas that may have been missed. Use a small brush to apply paint to corners and edges, and then allow the paint to dry completely.
Cleaning Up After Painting
Once the paint has dried, it’s time to clean up. Remove the drop cloths and tape, and then clean up the brushes and rollers. Be sure to dispose of all paint rags and materials properly.

Maintenance and Care of Painted Popcorn Ceiling
To maintain your painted popcorn ceiling, vacuum it regularly to remove any dust and debris. Spot clean as needed with a mild detergent and warm water. Avoid using abrasive cleaners or brushes, as this could damage the texture of the ceiling.
Conclusion
Painting a popcorn ceiling with a roller is an easy and inexpensive way to update the look of your home. By following these steps, you can successfully paint your popcorn ceiling with minimal effort. Remember to prep the room beforehand, apply primer and paint with a roller, and finish with a brush. Regularly vacuum and spot clean your ceiling to keep it looking its best.