
Introduction
Painting kitchen cabinets can be a great way to upgrade the look of your kitchen without breaking the bank. However, one of the most common mistakes that DIY painters make is leaving behind brush marks in the paint. Brush marks can be unsightly, and detract from the overall look of the cabinets. In this article, you’ll learn how to paint your kitchen cabinets without leaving brush marks.
But first, let’s define what brush marks are. Brush marks occur when the brush leaves visible ridges or lines in the paint. They are usually caused by an uneven application of paint, or by using too much pressure when applying the paint. If you want a smooth, professional-looking finish on your cabinets, it’s important to know how to avoid brush marks.

Using a Roller and Foam Brush
One of the easiest and most cost-effective ways to paint your cabinets is to use a roller and foam brush. This method is especially useful if you have a lot of cabinets to paint, as it is quick and easy to apply the paint evenly. Here’s how to do it:
Choosing the Right Paint
The first step is to choose the right paint for your project. Oil-based paints are the best choice for painting kitchen cabinets, as they are durable and resistant to moisture. Latex paints will work, but they may not last as long and may require more frequent touch-ups.
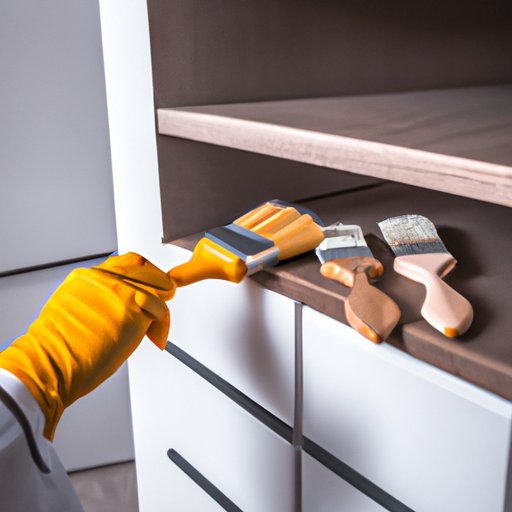
Preparing the Cabinets
Before you start painting, make sure to prepare the cabinets by removing any old paint or varnish and sanding down the surface. This will help ensure that the paint adheres properly and lasts longer.
Rolling on the Paint
Once the cabinets are prepared, it’s time to start painting. Start by using a roller to apply a thin layer of paint to the cabinet doors. Then, use a small foam brush to fill in the corners and crevices. Make sure to move quickly, so the paint doesn’t have time to dry before you’re done with each door.
Tips for Avoiding Brush Marks with a Roller and Foam Brush
To avoid brush marks, make sure to use light, even strokes when applying the paint. Don’t press too hard on the brush, and don’t go back over areas that you have already painted. Also, make sure to clean the brush between each coat of paint, as this will help keep the bristles soft and flexible.
Spraying with an Airless Sprayer
If you’re looking for a faster, more efficient way to paint your cabinets, you might want to consider using an airless sprayer. Airless sprayers are great for large projects, as they allow you to cover large areas quickly and evenly. Here’s how to do it:
Preparation
Before you start spraying, make sure to thoroughly prepare the cabinets by removing any old paint or varnish and sanding down the surface. Also, make sure to cover any surfaces that you don’t want to get paint on, such as countertops and floors.
Applying the Paint
Once the cabinets are prepared, you can start spraying. Hold the sprayer 6-8 inches away from the cabinet surface, and move in a steady, circular motion. Make sure to overlap each pass slightly, to ensure an even coverage. After you’ve finished spraying each cabinet, let it dry completely before moving on to the next one.
Tips for Avoiding Brush Marks with an Airless Sprayer
To avoid brush marks when using an airless sprayer, make sure to use light, even strokes when spraying the paint. Also, make sure to hold the sprayer far enough away from the cabinet surface to prevent the paint from pooling. Finally, make sure to clean the sprayer after each use, as this will help keep the nozzle clear and free of clogs.
Applying a Gel Stain
Another great way to paint your cabinets is to use a gel stain. Gel stains are easy to apply and provide a beautiful, glossy finish. Here’s how to do it:
Preparation
Before you start staining, make sure to prepare the cabinets by removing any old paint or varnish and sanding down the surface. Also, make sure to cover any surfaces that you don’t want to get stained on, such as countertops and floors.
Applying the Gel Stain
Once the cabinets are prepared, you can start staining. Use a foam brush to apply the gel stain in even strokes. Make sure to move quickly, so the stain doesn’t have time to dry before you’re done with each door. Let the stain dry completely before moving on to the next one.
Tips for Avoiding Brush Marks with a Gel Stain
To avoid brush marks when using a gel stain, make sure to use light, even strokes when applying the stain. Don’t press too hard on the brush, and don’t go back over areas that you have already stained. Also, make sure to clean the brush between each coat of stain, as this will help keep the bristles soft and flexible.
Wiping on a Glaze
If you want to add a bit of color or texture to your cabinets, you can use a glaze. Glazes are easy to apply and provide a beautiful, subtle finish. Here’s how to do it:
Preparation
Before you start glazing, make sure to prepare the cabinets by removing any old paint or varnish and sanding down the surface. Also, make sure to cover any surfaces that you don’t want to get glazed on, such as countertops and floors.
Applying the Glaze
Once the cabinets are prepared, you can start glazing. Use a damp cloth to wipe the glaze onto the cabinets in even strokes. Make sure to move quickly, so the glaze doesn’t have time to dry before you’re done with each door. Let the glaze dry completely before moving on to the next one.
Tips for Avoiding Brush Marks with a Glaze
To avoid brush marks when using a glaze, make sure to use light, even strokes when wiping the glaze onto the cabinets. Don’t press too hard on the cloth, and don’t go back over areas that you have already glazed. Also, make sure to clean the cloth between each coat of glaze, as this will help keep the fabric soft and flexible.
Sanding between Coats
Finally, it’s important to sand between each coat of paint or stain. Sanding helps to smooth out any brush marks or bumps in the paint, and gives the cabinets a professional-looking finish. Here’s how to do it:
The Importance of Sanding
Sanding is an important part of the painting process, as it helps to smooth out any imperfections in the paint. It also helps to create a strong bond between the paint and the cabinet surface.
How to Sand between Coats
Before you start sanding, make sure to use a vacuum to remove any dust or debris from the cabinets. Once the cabinets are clean, you can start sanding. Use a medium-grit sandpaper and sand in a circular motion. Make sure to move quickly, so the paint doesn’t have time to dry before you’re done with each door. After you’ve finished sanding, use a clean cloth to wipe away any dust or debris.
Conclusion
Painting kitchen cabinets can be a great way to upgrade the look of your kitchen without breaking the bank. However, it’s important to know how to avoid brush marks in order to achieve a professional-looking finish. In this article, we’ve explored how to paint kitchen cabinets without leaving brush marks, using a variety of methods including a roller and foam brush, an airless sprayer, a gel stain, a glaze, and sanding between coats. By following these tips, you’ll be able to achieve a smooth, flawless finish on your cabinets.
We hope this article has been helpful in teaching you how to paint kitchen cabinets without leaving brush marks.