
Introduction
Candle painting is an easy and fun way to add a unique touch to your home décor. Whether you’re looking to spruce up a plain white candle or create something entirely new, painting candles is a great way to get creative. With just a few materials and some basic steps, you can create beautiful painted candles that will add a special touch to any room.
Overview of Candle Painting
Candle painting is the process of applying paint to a candle in order to give it a different look. The type of paint used and the techniques employed will depend on the desired end result. For example, if you’re looking to achieve a marble effect, you’ll need to use different paints and techniques than if you’re looking for a more uniform color. Additionally, you can use different materials such as glitter, beads, and decals to further customize your painted candles.
Benefits of Painting Candles
Painting candles has many benefits. It’s a great way to add a personal touch to any space. Plus, it’s an affordable way to decorate. You can easily find all the materials you need at your local craft store. Painting candles can also be a fun activity to do with friends or family. It’s a great way to spend time together while creating something beautiful.
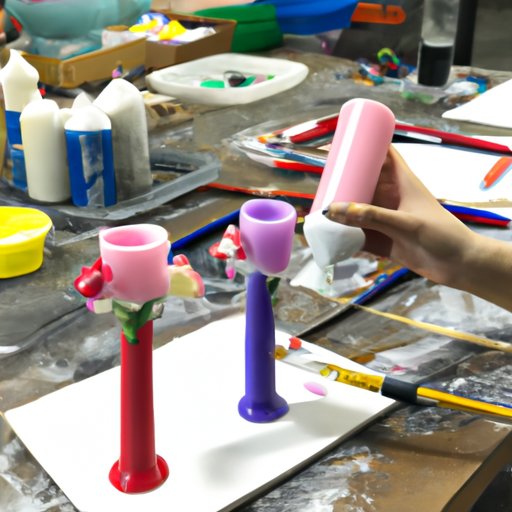
Step-by-Step Tutorial on Painting Candles
Painting candles is easier than you think. Here’s a step-by-step guide to help you get started:
Preparing the Candle
The first step is to prepare the candle. Start by wiping down the surface of the candle with a damp cloth to remove any dirt or dust. Next, apply a coat of clear primer to the surface of the candle. This will help the paint adhere better and will also help prevent smudging and running. Allow the primer to dry completely before proceeding.
Applying Paint to the Candle
Once the primer is dry, it’s time to apply the paint. If you’re using acrylic paint, mix it with a small amount of water to thin it out. This will help the paint spread more evenly and give you a smoother finish. Apply the paint in thin layers, allowing each layer to dry completely before adding the next one. If you’re using a different type of paint, such as spray paint, follow the instructions on the packaging.
Finishing Touches
Once you’ve applied the desired amount of paint, you can add any finishing touches you’d like. This can include things like glitter, decals, or beads. If you’re using glitter, be sure to apply a sealant to prevent it from rubbing off. Once you’ve finished, allow the candle to dry completely before lighting it.
Creative Ideas for Decorating Candles with Paint
Painting candles is a great way to get creative and express yourself. Here are a few ideas to get you started:
Color Blocking
Color blocking is a popular trend in home décor. To achieve this look, choose two or three colors and apply them in blocks on the candle. You can use tape to create clean lines between the colors or freehand it for a more organic look.
Ombré Effect
The ombré effect is another popular trend in home décor. To achieve this look, start by painting the top of the candle one color. Then, gradually blend the color down the candle until you reach the desired shade. This technique works best with lighter shades such as pastels or whites.
Painted Patterns
If you’re feeling adventurous, you can try painting patterns onto the candle. This could be anything from polka dots to stripes. Use craft paint or acrylic paint to create the desired pattern. You can also use a stencil for a more precise look.

Tips and Tricks for Painting Candles
Here are some tips and tricks to help you get the most out of your candle painting experience:
Choose Quality Materials
When painting candles, it’s important to choose quality materials. Invest in good-quality paint and brushes to ensure a professional-looking finish. Additionally, make sure to use a primer to help the paint adhere better and prevent smudging and running.
Use a Primer
As mentioned above, it’s important to use a primer when painting candles. This will help the paint adhere better and will also help prevent smudging and running. Make sure to allow the primer to dry completely before applying the paint.
Work in a Well-Ventilated Area
When painting candles, it’s important to work in a well-ventilated area. Paint fumes can be dangerous, so make sure to open windows and doors to allow fresh air to circulate. Additionally, avoid painting in direct sunlight as this can cause the paint to dry too quickly and crack.

How to Achieve Different Effects with Candle Painting Techniques
Painting candles is a great way to add a special touch to any space. Here are a few techniques you can use to achieve different effects:
Faux Marble
For a faux marble effect, you’ll need to use a combination of light and dark paints. Start by applying a base coat of light paint. Then, use a brush to swirl darker paint into the light paint. Finally, use a damp cloth to smooth out the surface. This technique works best with white candles.
Glitter Accents
Adding glitter to a painted candle is a great way to add sparkle and shine. Start by applying a base coat of paint. Then, sprinkle glitter onto the wet paint. Once the paint is dry, apply a sealant to prevent the glitter from rubbing off.
Metallic Finish
If you’re looking for a metallic finish, you’ll need to use spray paint. Start by applying a thin coat of spray paint. Then, use painter’s tape to create stripes or other patterns. Once the paint is dry, carefully remove the tape to reveal the metallic finish.

The Basics of Painting Candles with Acrylics
Acrylic paints are a popular choice for painting candles. They come in a variety of colors and are easy to use. Here’s what you need to know about painting candles with acrylics:
Choosing the Right Paint
When choosing acrylic paint for your project, make sure to select a high-quality paint. This will ensure a professional-looking finish. Additionally, make sure to choose a paint that is compatible with the type of candle you’re using (e.g. wax or paraffin).
Prepping the Surface
Before applying the paint, make sure to prep the surface of the candle. Start by wiping down the surface with a damp cloth to remove any dirt or dust. Next, apply a coat of clear primer to the surface of the candle. This will help the paint adhere better and will also help prevent smudging and running.
Using the Correct Technique
When painting candles with acrylics, it’s important to use the correct technique. Start by mixing the paint with a small amount of water to thin it out. This will help the paint spread more evenly and give you a smoother finish. Apply the paint in thin layers, allowing each layer to dry completely before adding the next one.
Conclusion
Painting candles is an easy and fun way to add a unique touch to your home décor. With just a few materials and some basic steps, you can create beautiful painted candles that will add a special touch to any room. From color blocking to glitter accents, there are endless possibilities for customizing your candles. So grab your supplies and get creative!
Summary of the Steps
Painting candles is easier than you think. Start by preparing the candle with a coat of clear primer. Then, apply the paint in thin layers, allowing each layer to dry completely before adding the next one. Finally, add any finishing touches such as glitter or decals. Allow the candle to dry completely before lighting it.
Benefits of Candle Painting
Painting candles has many benefits. It’s an affordable way to decorate and it’s a great way to add a personal touch to any space. Plus, it’s a fun activity to do with friends or family.