
Introduction
A Razor scooter is a great way to get around and have fun. But if you’ve never opened one before, it can be a bit intimidating. This article will provide an easy step-by-step guide to help you open and assemble your Razor scooter with ease.
Step-by-Step Guide: How to Open a Razor Scooter
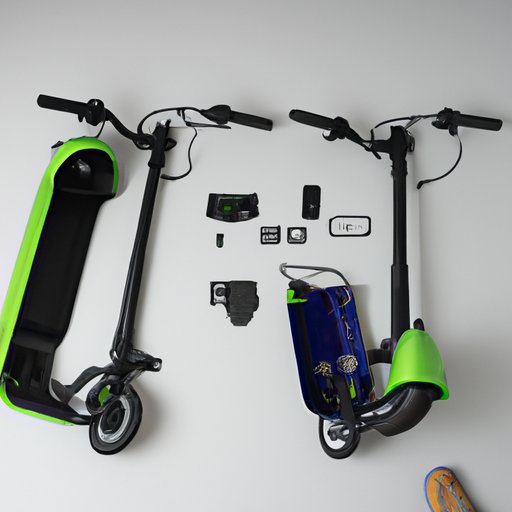
The first step in opening a Razor scooter is to unbox it. Unboxing a Razor scooter is fairly straightforward. You should find the scooter, handlebars, and other components all neatly packed inside the box. Once you’ve removed everything from the box, it’s time to start assembling the scooter.
The next step is to identify and unlock the locking mechanism. Most Razor scooters use a combination lock or keyed lock to secure the scooter. To unlock the mechanism, simply follow the instructions provided with the scooter. If you’re using a combination lock, make sure to remember the code so you can access the scooter later.
Once the locking mechanism has been unlocked, it’s time to start assembling the parts of the scooter. Depending on the model, this may include attaching the handlebars, connecting the wheel hubs, and tightening the screws. Make sure to follow the instructions provided with the scooter as you go along.
Unlocking the Secrets of Opening a Razor Scooter
Now that you know how to unlock and assemble the scooter, it’s important to understand the different types of locks and what tools you need to open them. Razor scooters typically use either a combination lock or a keyed lock. Combination locks are more secure but require you to remember the code in order to access the scooter. Keyed locks are less secure but may be easier to open if you don’t remember the code.
When it comes to tools, you’ll need a Phillips head screwdriver, a wrench, and possibly a pair of pliers depending on the model. It’s also a good idea to have some spare screws and nuts on hand, just in case something goes wrong during assembly.
Finally, it’s important to know how to troubleshoot any issues you may encounter while opening and assembling the scooter. If you’re having trouble unlocking the locking mechanism, try re-reading the instructions or double-checking that you’ve entered the correct code. If you’re having trouble putting the scooter together, make sure you’re using the correct tools and following the instructions carefully.
A Beginner’s Guide to Unboxing and Assembling a Razor Scooter
Now that you understand the basics of opening and assembling a Razor scooter, let’s take a closer look at each step. The first step is to prepare the area where you’ll be working. Make sure you have enough space to move around and that there’s nothing nearby that could interfere with the assembly process.
Next, you’ll need to identify the components of the scooter. Most Razor scooters come with a user manual that includes diagrams of each component and instructions on how to assemble them. Make sure to read through the manual before you start so you know exactly what you’re doing.
Once you’ve identified all the components, it’s time to put them together. Start by attaching the wheel hubs and then move on to the handlebars. Make sure to follow the instructions provided in the user manual and use the right tools for each task. When you’re finished, your scooter should be ready to go.

Get Rolling: A Tutorial on Opening Your Razor Scooter
Now that you’ve assembled the scooter, it’s time to get rolling. The first step is to prep the scooter. Make sure all the bolts and screws are tight and that the handlebars are in the correct position. Then, make sure the brakes are working correctly and that the wheels are properly inflated.
The next step is to unlock and open the scooter. If you’re using a combination lock, make sure to enter the correct code. If you’re using a keyed lock, make sure to insert the key correctly. Once the scooter is unlocked, you’re ready to start riding!
Finally, you may want to adjust the handlebars and other settings on the scooter. This is a personal preference and will depend on your height and riding style. Make sure to consult the user manual for instructions on how to adjust these settings.
Don’t Be Intimidated: An Easy Guide to Opening a Razor Scooter
Opening a Razor scooter doesn’t have to be intimidating. With the right tools and a little bit of patience, anyone can do it. The first step is to identify the type of lock you’re using. Most Razor scooters use either a combination lock or a keyed lock.
Once you’ve identified the lock, you’ll need to gather the right tools. You’ll usually need a Phillips head screwdriver, a wrench, and possibly a pair of pliers depending on the model. Once you have all the tools you need, it’s time to start unlocking and opening the scooter.
Make sure to follow the instructions provided with the scooter as you go along. Once the scooter is unlocked and open, you’ll need to set it up correctly. Make sure the handlebars are in the right position and that the brakes are working correctly. Once everything is set up, you’re ready to start riding!

Get Started Quickly: How to Easily Open a Razor Scooter
If you’re looking for a quick and easy way to open a Razor scooter, here’s what you need to do. First, prepare the area where you’ll be working. Make sure there’s enough space to move around and nothing nearby that could interfere with the assembly process.
Next, gain access to the lock mechanism. Most Razor scooters use either a combination lock or a keyed lock. Follow the instructions provided with the scooter to unlock the mechanism.
Finally, make sure everything is set up correctly. Adjust the handlebars and other settings according to the user manual. When you’re finished, your scooter should be ready to go.
Conclusion
Opening and assembling a Razor scooter doesn’t have to be difficult. With the right tools and a little bit of patience, anyone can do it. This article has provided an easy step-by-step guide to help you open and assemble your Razor scooter quickly and easily. So what are you waiting for? Get out there and start riding!