
Introduction
Installing a ceiling fan is an easy way to improve the look and function of your home. Not only do ceiling fans provide light and air circulation, but they can also help reduce energy costs. When choosing a ceiling fan, there are many factors to consider, such as size, color, features, and type. This article will provide a step-by-step guide on how to mount a ceiling fan safely, as well as essential tips for choosing the right fan for your space.
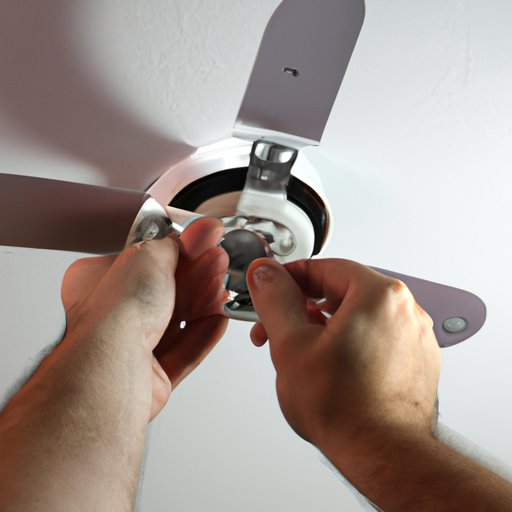
Step-by-Step Guide to Installing a Ceiling Fan
Before you start the installation process, it’s important to make sure you have all the necessary tools and materials. Here is a list of what you’ll need:
- Ceiling fan
- Mounting bracket
- Screwdriver
- Electrical tape
- Wire cutters
- Level
- Drill
- Hammer
- Power drill bit
- Ladder or stool
Once you have all the necessary tools and materials, you’re ready to start the installation process. Here are some tips to ensure a successful installation:
- Make sure the power is off before beginning the installation.
- Carefully read the instructions that come with your ceiling fan.
- Ensure that the mounting bracket is securely fastened to the ceiling.
- Check the weight of the fan to make sure it is compatible with the mounting bracket.
- Securely attach the fan to the mounting bracket.
- Connect the wires according to the instructions.
- Turn the power back on and test the fan.
If you encounter any issues when mounting your ceiling fan, here are some common troubleshooting tips:
- Check to make sure the power is turned off.
- Ensure that the mounting bracket is firmly attached to the ceiling.
- Check the wiring connections to make sure they are secure.
- Make sure the fan is properly balanced and securely attached to the mounting bracket.
Essential Safety Measures When Mounting a Ceiling Fan
When working with electricity, it’s important to take extra precautions to ensure your safety. Here are some essential safety measures to keep in mind:
- Always turn off the power before starting any electrical work.
- Wear protective clothing, such as gloves and goggles.
- Use a ladder or stool to reach high ceilings.
- Make sure the ladder or stool is stable and secure.

How to Choose the Right Ceiling Fan for Your Space
When choosing a ceiling fan, there are several factors to consider. Here are some tips to help you select the right fan for your space:
- Size – Measure the area where you plan to install the fan to determine the appropriate size.
- Color and Design – Choose a fan that complements the style of your room.
- Features – Consider the features you want, such as lighting, remote control, and adjustable speed.

Different Types of Ceiling Fans and How to Install Them
There are three main types of ceiling fans: standard ceiling fans, hugger ceiling fans, and low profile ceiling fans. Each type has its own set of installation instructions. Here is a brief overview of each type and how to install them:
Standard Ceiling Fans
Standard ceiling fans are the most common type of fan and are typically installed in 8-foot ceilings or higher. To install a standard ceiling fan, follow these steps:
- Attach the mounting bracket to the ceiling using the included screws.
- Hang the fan from the mounting bracket and secure with the provided screws.
- Connect the wires according to the instructions.
- Turn on the power and test the fan.
Hugger Ceiling Fans
Hugger ceiling fans are designed to be installed in ceilings with a height of 8 feet or less. To install a hugger ceiling fan, follow these steps:
- Attach the mounting bracket to the ceiling using the included screws.
- Secure the fan to the mounting bracket with the provided screws.
- Connect the wires according to the instructions.
- Turn on the power and test the fan.
Low Profile Ceiling Fans
Low profile ceiling fans are designed to be installed in ceilings with a height of 8 feet or less. To install a low profile ceiling fan, follow these steps:
- Attach the mounting bracket to the ceiling using the included screws.
- Secure the fan to the mounting bracket with the provided screws.
- Connect the wires according to the instructions.
- Turn on the power and test the fan.
Conclusion
Installing a ceiling fan is a relatively simple task that can dramatically improve the look and functionality of your home. In this article, we provided a step-by-step guide on how to mount a ceiling fan safely, as well as essential tips for choosing the right fan for your space. We also discussed the different types of ceiling fans and how to install them. By following the tips outlined in this article, you can ensure a safe and successful installation.
For more information on installing a ceiling fan, visit your local hardware store or consult an electrician.