
Introduction
Candle wicks are an essential component of any candle. Without a wick, a candle would not be able to burn. A candle wick is a thin strip of material that transfers heat from the flame to the wax, causing it to melt and produce light and heat. Candle wicks come in many different sizes and materials, so it is important to choose the right one for your project.
This article will provide a step-by-step guide on how to make wicks for candles. We will cover the basics of candle wick making, from gathering materials to testing the finished product. Additionally, we will provide tips on DIY candle making, choosing the right wax and more.
Step-by-Step Guide on How to Make Wicks for Candles
Making your own candle wicks is a relatively simple process. Here is a step-by-step guide on how to make wicks for candles:
Gathering Materials
The first step in making wicks for candles is to gather the necessary materials. You will need wicking material (such as cotton or hemp), scissors, a ruler, a glue gun and some type of weight (such as a paper clip or washer).
Cutting and Measuring the Wick
Once you have gathered all of the necessary materials, the next step is to cut and measure the wick. Start by measuring the desired length of your wick, then use scissors to cut it to size. Make sure to leave a few extra inches in case you need to make adjustments later.
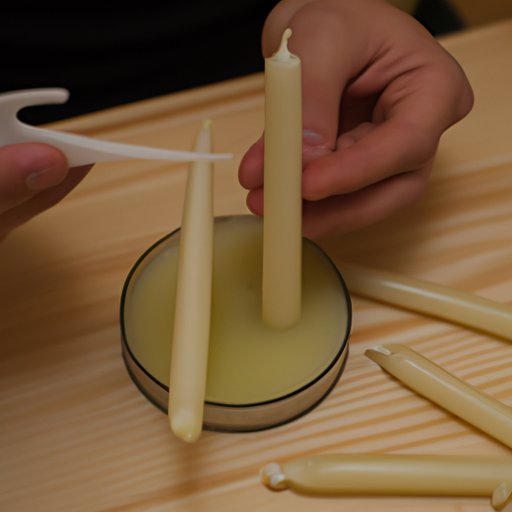
Attaching the Wick to the Candle
The next step is to attach the wick to the candle. Start by placing the wick in the center of the candle. Use a glue gun to secure the wick in place. Make sure the wick is centered and straight before proceeding.
Testing the Wick
Once the wick is securely attached to the candle, it is time to test it. Light the wick and observe how it burns. If it does not burn evenly or extinguishes quickly, you may need to adjust the length of the wick or choose a different type of wick material.

DIY Candle Making: Crafting Your Own Candle Wicks
If you are interested in making your own candles, crafting your own candle wicks is a great place to start. Here is a brief overview of the steps involved in DIY candle making:
Choosing the Right Wax
The first step in DIY candle making is to choose the right wax. Different types of waxes have different melting points, so it is important to choose a wax that is suitable for your particular project. Additionally, some waxes tend to produce more smoke than others, so consider this when making your selection.
Preparing the Wax
Once you have chosen the right wax, the next step is to prepare it. This involves melting the wax and adding any desired additives, such as fragrance or color. Depending on the type of wax you are using, the melting temperature may vary.
Adding Fragrance and Color
If you want your candle to have a pleasant scent or a specific color, now is the time to add these ingredients. Be sure to follow the directions carefully when adding fragrance or dye to ensure that the candle turns out the way you want it to.
Pouring the Wax into the Container
The next step is to pour the melted wax into the container of your choice. Make sure to follow the manufacturer’s instructions when pouring the wax to ensure that it is poured correctly and safely.
Adding the Wick
Once the wax has been poured into the container, the next step is to add the wick. Start by securing the wick at the bottom of the container using a small amount of hot glue. Then, carefully thread the wick through the top of the container.
Cooling and Curing
Once the wick is in place, the next step is to allow the candle to cool and cure. This process can take anywhere from a few hours to a few days, depending on the type of wax you are using. Once the candle is fully cured, it is ready to be used.
A Beginner’s Guide to Making Candle Wicks
If you are new to making candle wicks, here are a few tips to help you get started:
Tools Needed
The tools needed for making candle wicks are relatively simple. You will need wicking material (such as cotton or hemp), scissors, a ruler, a glue gun and some type of weight (such as a paper clip or washer).
Types of Wicks
There are several different types of wicks available, each with their own unique properties. It is important to choose the right type of wick for your project, as different types of wicks can produce different results.
Pre-waxed or Unwaxed Wicks?
When making wicks for candles, you can choose between pre-waxed and unwaxed wicks. Pre-waxed wicks are easier to use, as they do not require any additional preparation. Unwaxed wicks, however, tend to burn more efficiently and can produce better results.
Dipping vs. Rolling
When attaching the wick to the candle, you can choose between dipping and rolling. Dipping involves submerging the wick in the melted wax, while rolling involves wrapping the wick around the candle. Both methods work, but dipping tends to be faster and easier.
Creative Ways to Make Candle Wicks
Once you have mastered the basics of making wicks for candles, you can begin experimenting with more creative methods. Here are a few ideas to get you started:
Natural Fibers
Natural fibers such as jute, linen and cotton can be used to make wicks for candles. These materials tend to burn slowly and evenly, producing a pleasant aroma and a beautiful glow. Additionally, natural fibers are easy to work with and can be found at most craft stores.
Braided Wicks
Braided wicks can add a unique decorative touch to your candles. To create a braided wick, simply braid three strands of wicking material together and attach it to the candle. Braided wicks tend to burn slower and more evenly than traditional wicks.
Customized Wicks
You can also customize your wicks to suit your needs. For example, you can add weights to the bottom of the wick to keep it centered or use a specialized wick sustainer to regulate the rate of burning. Experimenting with different materials and techniques can help you create unique and interesting wicks.

How to Make Candle Wicks at Home
Making candle wicks at home is a simple and rewarding process. Here is a step-by-step guide on how to make wicks for candles at home:
Preparing a Spool
Start by preparing a spool of wicking material. Measure and cut the desired length of wicking material and tie it to the spool. Make sure to leave a few extra inches in case you need to make adjustments later.
Preparing a Tab
Next, prepare a tab for the wick by cutting a small piece of cardboard or other material. The tab should be slightly larger than the diameter of the wick. Attach the tab to the top of the wick using a small amount of hot glue.
Making the Wick
Now it is time to make the wick. Start by wrapping the wick around the spool, making sure to keep it as tight and even as possible. Once the entire length of the wick is wrapped, secure the end with a small amount of hot glue.
Adding Sustainers
Finally, add the sustainers to the wick. Sustainers are small pieces of metal or plastic that are placed at the base of the wick to help it stay centered and upright. Once the sustainers are in place, the wick is ready to be used.

The Secrets of Making Long Lasting Candle Wicks
Making long lasting candle wicks requires a bit of knowledge and skill. Here are a few tips to help you make the most of your wicks:
Choosing the Right Wax
The type of wax you use can have a big impact on the performance of your wick. Choose a wax that is suitable for your project and has a low melting point. Additionally, some waxes tend to produce more smoke than others, so consider this when making your selection.
Choosing the Proper Length
The length of the wick is also important. Too short and the candle will not burn properly; too long and the flame will be too large. A good rule of thumb is to measure the width of the container and subtract 1/4 inch from that number. This will give you an approximate length for the wick.
Securing the Wick in Place
It is important to make sure the wick is securely attached to the candle. Use a glue gun to secure the wick in place. Make sure the wick is centered and straight before proceeding.
Trimming the Wick
Finally, make sure to trim the wick after each use. This will help ensure that the wick burns properly and does not become clogged with soot. Additionally, trimming the wick will help prevent it from becoming too long.
Conclusion
Making wicks for candles is a relatively simple process. With a few basic tools and some practice, you can easily make your own wicks for candles. Just remember to choose the right wax, choose the proper length, secure the wick in place and trim the wick after each use for best results.