
Introduction
Paper bags are an indispensable part of everyday life. From groceries to gifts, these handy containers are used for a variety of purposes. Making your own paper bags is a great way to save money, reduce waste, and express your creativity. This article will take you through the basics of paper bag making, provide step-by-step instructions, and share some useful tips and tricks.

Overview of Paper Bag Making
Paper bag making is a fairly straightforward process that requires minimal materials and tools. The most common type of paper bag is made from a single sheet of paper, which is then folded and glued together. Depending on the size and shape of the paper bag, additional materials may be needed. For example, handles can be added to the paper bag to make it easier to carry.
Benefits of Making Paper Bags
Making your own paper bags has many advantages. First and foremost, it is much more economical than buying pre-made paper bags. Additionally, you have complete control over the design and size of the paper bags. You can also choose to use eco-friendly materials, such as recyclable or biodegradable paper, natural dyes and inks, and fabric embellishments.
Step-by-Step Guide to Making Paper Bags
The following steps will help you make your own paper bags with ease:
Gather Necessary Materials
Before you begin, you will need to gather the necessary materials for making paper bags. These include paper, scissors, ruler, glue, and any additional decorative materials you may want to use. It is important to choose the right kind of paper for your project. Cardstock, construction paper, and poster board are all suitable options.
Prepare the Paper for Cutting
Once you have gathered the materials, you need to prepare the paper for cutting. Start by measuring out the desired size of the paper bag. If you are using a template, place it on the paper and trace the outline. Otherwise, draw a rectangle on the paper with a ruler and marker.
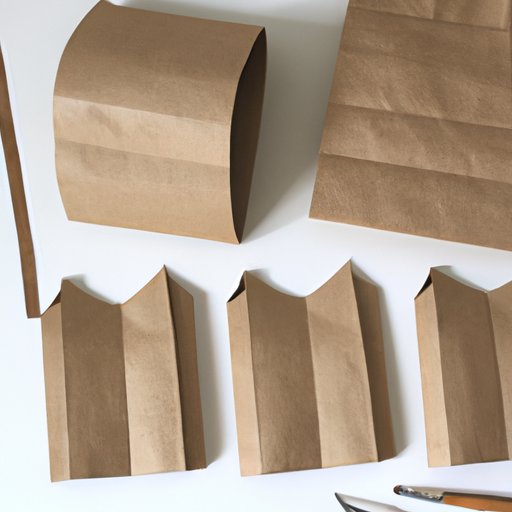
Cut the Paper into the Desired Size
Using a pair of scissors, carefully cut along the marked lines. It is important to ensure that the cuts are even and straight. Once the paper is cut, you are ready to assemble the paper bag.
Fold and Glue the Paper Bag Together
Place the paper on a flat surface and fold it in half lengthwise. Apply glue along the edges of the paper, then fold the edges inward to form the sides of the paper bag. Make sure to press down firmly so that the edges are securely glued together.

Crafting Your Own Paper Bags: A Comprehensive Tutorial
Now that you know the basics of paper bag making, let’s explore some tips and tricks for creating beautiful and unique paper bags. Read on for a comprehensive tutorial on crafting your own paper bags.
Selecting the Right Paper
Choosing the right paper is essential for making paper bags. Consider the weight, texture, and color of the paper when selecting the right paper for your project. Thicker paper is best for larger paper bags, while lighter paper is better suited for smaller paper bags. Furthermore, you can find paper in a variety of colors, textures, and patterns to suit your needs.
Deciding on the Shape and Size of the Paper Bag
Once you have selected the paper, you need to decide on the shape and size of the paper bag. Smaller paper bags are ideal for packaging gifts, while larger paper bags are great for carrying groceries or other items. You can also customize the shape of the paper bag by cutting it into a square, oval, or any other shape you desire.
Using a Template to Ensure Accuracy
If you want to ensure accuracy when cutting the paper, you can use a template. Templates are available online or you can make your own. Simply print out the template and trace it onto the paper before cutting. This will help you achieve more precise cuts.
Finishing Touches for a Professional Look
Once the paper bag is assembled, you can add finishing touches to give it a professional look. Embellish the paper bag with ribbons, lace, buttons, or any other decorative materials. You can also use paint or ink to customize the paper bag. Finally, consider adding handles to the paper bag for easy carrying.

DIY Paper Bag Creation: Tips and Tricks
Creating your own paper bags is a fun and creative activity. Here are some tips and tricks to help you craft beautiful paper bags:
Adding Handles to the Paper Bag
Adding handles to the paper bag is a great way to make it easier to carry. You can use a variety of materials to make handles, including string, ribbon, yarn, or fabric strips. Simply tie the handles to the sides of the paper bag or glue them in place.
Using Colorful and Decorative Materials
To add a touch of flair to your paper bags, you can use colorful and decorative materials. Ribbons, lace, buttons, beads, and sequins are all great options for embellishing your paper bags. You can also use stencils and stamps to create interesting patterns and designs.
Creating Custom Designs with Paper
You can also use paper to create custom designs and patterns on your paper bags. For example, you can cut out shapes from scrapbook paper and glue them onto the paper bag. You can also use rubber stamps to add text or images to the paper bag.
How to Create Custom Paper Bags with Simple Materials
It is possible to create custom paper bags with simple materials. For example, cardboard can be used as an alternative material for making paper bags. You can also use paint or markers to customize the paper bag. Furthermore, you can embellish the paper bag with fabric or other decorative materials.
Using Cardboard as an Alternative Material
Cardboard is a great alternative material for making paper bags. It is sturdy and durable, and can easily be cut and shaped into any desired size or shape. To make a cardboard paper bag, simply cut a piece of cardboard into the desired size, then fold and glue it together.
Applying Paint and Other Decorations
Paint and other decorations can be used to customize the paper bag. For example, you can use acrylic paint to add a pop of color to the paper bag. You can also use stickers, stamps, and other embellishments to decorate the paper bag.
Embellishing the Paper Bag with Fabric
Fabric can also be used to embellish the paper bag. Cut out shapes from fabric and glue them onto the paper bag. You can also use fabric to make handles or straps for the paper bag. This is a great way to add a unique touch to your paper bags.
An Introduction to Making Paper Bags at Home
Making paper bags at home is a great way to save money and express your creativity. Here is a quick introduction to making paper bags at home:
Understanding the Basics of Paper Bag Construction
The first step to making paper bags is understanding the basics of paper bag construction. As mentioned earlier, paper bags are typically made from a single sheet of paper, which is then folded and glued together. Depending on the size and shape of the paper bag, additional materials may be needed.
Identifying the Materials Needed
Once you understand the basics of paper bag construction, you need to identify the materials needed for the project. The most common materials needed are paper, scissors, ruler, glue, and any additional decorative materials. Choose the right paper for your project and gather the necessary materials before you start.
Utilizing Simple Tools and Techniques
Finally, you need to utilize simple tools and techniques to make your paper bags. Measure and cut the paper, fold and glue it together, and embellish the paper bag with decorations. With the right materials and tools, you can easily make your own paper bags at home.
Designing and Constructing Eco-Friendly Paper Bags
Making eco-friendly paper bags is a great way to reduce waste and promote sustainability. Here are some tips for designing and constructing eco-friendly paper bags:
Choosing Recyclable or Biodegradable Materials
When selecting materials for your paper bags, opt for recyclable or biodegradable materials. For example, use paper that is made from recycled materials or choose paper that is biodegradable. You can also use fabric scraps or other upcycled materials to embellish the paper bags.
Utilizing Natural Dyes and Inks
In addition to choosing eco-friendly materials, you can also use natural dyes and inks to customize the paper bags. For example, you can use vegetable dyes to color the paper bags or plant-based inks to add decorative elements. Natural dyes and inks are safer for the environment and less toxic than synthetic dyes and inks.
Ensuring Proper Disposal of Paper Bags
Finally, it is important to ensure proper disposal of paper bags. When you are done with the paper bags, make sure to recycle or compost them. This will help reduce waste and keep the environment clean.
Conclusion
Making paper bags is a great way to save money, reduce waste, and express your creativity. This article has provided an overview of paper bag making and a comprehensive tutorial on crafting your own paper bags. We have also shared tips and tricks for creating custom paper bags with simple materials and outlined the importance of eco-friendly design. With the right materials and tools, you can easily make your own paper bags at home.