
Introduction
Candle making is a popular hobby that has been around for centuries. Whether you’re looking to make candles for yourself or as gifts, creating molds for candles can be a fun and rewarding experience. With the right materials and knowledge, you can create beautiful and unique candle molds to suit any occasion.
There are many benefits to creating your own molds for candles. You can customize the size, shape, and color of your candles. You can also choose the type of wax and scent that you want to use. Additionally, using molds can help you save money by allowing you to reuse the same mold over and over again.
Research Different Types of Molds and Their Uses
When it comes to making molds for candles, there are several different types to choose from. Each type of mold has its own advantages and disadvantages, so it’s important to research each one before deciding which one is best for you.
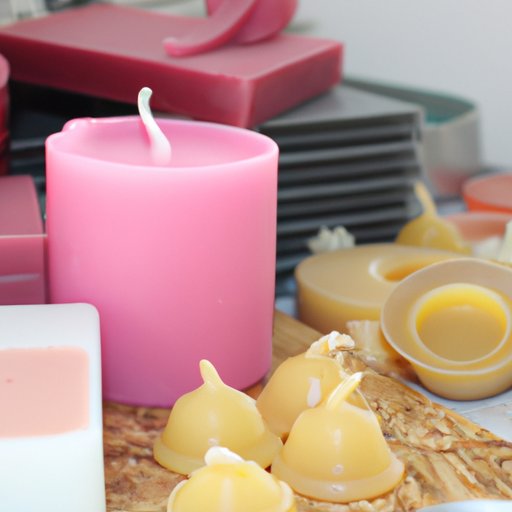
Silicone Molds
Silicone molds are one of the most popular types of molds for candle making. They are easy to use, durable, and non-toxic, making them safe for use in food products. Silicone molds are available in a variety of shapes and sizes, so you can easily find one that suits your needs. They are also great for making intricate designs, as they are flexible and allow for detailed work.
Plastic Molds
Plastic molds are another popular option for candle making. They are inexpensive and come in a variety of shapes and sizes. Plastic molds are not as durable as silicone molds, but they are still an effective option for creating simple, basic candle shapes. Additionally, plastic molds are easy to clean and reusable.
Metal Molds
Metal molds are the most durable type of molds for candle making. They are typically made of aluminum or steel, and are designed to withstand high temperatures. Metal molds are ideal for creating large candles, as they provide more stability than other types of molds. However, they are also more expensive than other types of molds.

Gather Materials Needed to Create a Mold
Once you have decided on the type of mold you would like to use, it’s time to gather the materials needed to create it. The materials you will need include wax, mold release, wicks, and containers.
Wax
The first material you will need is wax. There are several types of wax available, such as paraffin, soy, and beeswax. Each type of wax has its own unique properties, so it’s important to do your research to determine which type is best for your project.
Mold Release
Mold release is a substance that is applied to the inside of the mold before pouring the wax. This helps to ensure that the wax does not stick to the sides of the mold. Most mold releases are made of petroleum jelly or mineral oil.
Wicks
Wicks are used to keep the candle burning. They are usually made of cotton or paper, and are inserted into the center of the mold before pouring the wax. It is important to choose a wick that is the appropriate length and thickness for your mold.
Containers
Containers are used to hold the wax while it is melting. You can use a double boiler, a pot on the stove, or a microwave-safe container. It is important to choose a container that is heat-resistant and large enough to hold the amount of wax you plan to melt.

Learn How to Prepare the Mold for Pouring Wax
Once you have gathered all of the materials needed to create your mold, it’s time to prepare it for pouring wax. The first step is to apply the mold release to the inside of the mold. This helps to ensure that the wax does not stick to the sides of the mold. Once the mold release is applied, you can then insert the wicks into the center of the mold.
Practice Melting Wax for Candle Making
Before you begin pouring wax into the mold, it is important to practice melting the wax. This will help you understand the consistency of the melted wax and the temperature at which it should be poured. Melting wax can be done using a double boiler, or by placing a pot of wax on the stove.
Using a Double Boiler
Using a double boiler is the safest and most efficient method for melting wax. To use a double boiler, fill the bottom pan with water and place the wax in the top pan. Place the double boiler over medium heat and stir the wax until it has completely melted. Be sure to monitor the temperature of the wax to ensure that it does not get too hot.
Working with Large Batches
If you are working with large batches of wax, it is important to use a slow cooker or electric hot plate instead of a double boiler. These methods are safer and more efficient for melting larger amounts of wax. To use a slow cooker, fill it with water and place the wax in the top section. Turn the temperature to low and stir the wax until it has completely melted.
Understand the Best Temperature for Pouring Wax into a Mold
Once the wax has melted, it is important to understand the best temperature for pouring it into the mold. For most types of wax, the ideal pouring temperature is between 140 and 160 degrees Fahrenheit. If the wax is too hot, it can cause the candle to crack. If the wax is too cold, it can cause the candle to sink or have an uneven surface.
Cooler Temperatures
If you are pouring wax at cooler temperatures, it is important to pour slowly and evenly. You may also need to use a spoon or spatula to spread the wax evenly over the sides of the mold. Additionally, it is important to wait for the wax to cool before attempting to remove the candle from the mold.
Hotter Temperatures
If you are pouring wax at hotter temperatures, it is important to move quickly and carefully. Hot wax can cause burns, so it is important to wear protective clothing and use caution when handling it. Additionally, you may need to use a spoon or spatula to spread the wax evenly over the sides of the mold.

Explore Different Aromas and Colors for Candles
Once the wax has cooled, you can then explore different aromas and colors for your candles. Essential oils are a great way to add fragrance to your candles, and there are many different types available. You can also experiment with adding dye to create colorful candles. Be sure to follow the instructions on the package for the correct amounts and application.

Discover How to Remove the Candle from the Mold
Once the wax has cooled and hardened, it’s time to remove the candle from the mold. The first step is to let the wax fully cool before attempting to remove the sides of the mold. After the sides of the mold have been removed, you can then carefully pull out the wick. Finally, you can remove the candle from the mold and enjoy your creation.
Conclusion
Making molds for candles is a fun and rewarding experience. With the right materials and knowledge, you can create beautiful and unique candles for any occasion. When making molds for candles, it is important to research different types of molds, gather the necessary materials, learn how to prepare the mold for pouring wax, practice melting wax, understand the best temperature for pouring wax, explore different aromas and colors, and discover how to remove the candle from the mold.