
Introduction
Lipstick is a makeup product that has been used for centuries to enhance one’s appearance. It is made from a combination of waxes, oils, butters, and colorants. Lipstick can be found in a variety of colors and textures, ranging from sheer and glossy to rich and matte. While most people purchase lipstick from stores, it is also possible to make lipstick at home.
Why Make Lipstick at Home?
Making lipstick at home can provide several benefits. For starters, it allows you to customize the color and texture of your lipstick. You can experiment with various shades, as well as create unique colors that cannot be found in stores. Additionally, you can adjust the recipe to suit your needs, such as adding more oils or butters for extra hydration. Lastly, making lipstick at home is cost-effective, as it requires fewer supplies than purchasing pre-made lipsticks.
Step-by-Step Tutorial: How to Make Lipstick at Home
Making lipstick at home is easier than you think! All you need are a few simple ingredients and a few steps, and you’ll be on your way to crafting your own custom lipstick. Here’s a step-by-step guide on how to make lipstick at home.
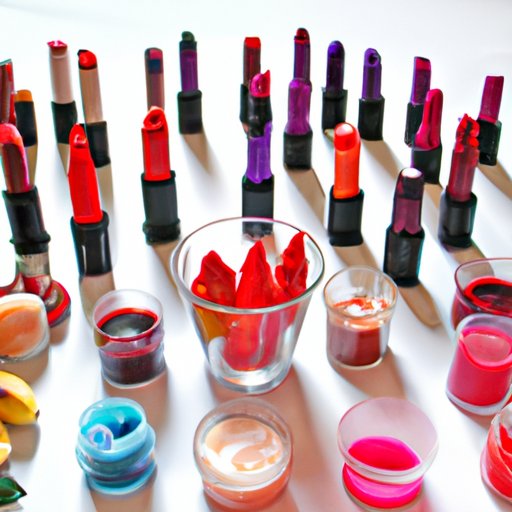
Gather Your Supplies
The first step to making your own lipstick is to gather all the necessary supplies. You will need beeswax, candelilla wax, carnauba wax, castor oil, Shea butter, and a lipstick mold. You will also need colorants, such as mica powder, FD&C dyes, or iron oxides.
Melt Your Wax
Once you have all of your supplies, you will need to melt your waxes. Place your beeswax, candelilla wax, and carnauba wax into a double boiler and heat until they are completely melted. Stir the mixture occasionally to ensure that everything is melting evenly.
Add Colorants
Once the waxes have melted, add your colorants. Depending on the type of colorant you are using, the amount you add will vary. For example, if you are using mica powder, you will want to add 1 teaspoon per ounce of wax. For FD&C dyes, you will want to add 1/8 teaspoon per ounce of wax.
Mix in Oils and Butters
Once the colorants have been added, mix in the oils and butters. Start by adding 1 tablespoon of castor oil and 1 tablespoon of Shea butter per ounce of wax. If you would like a more hydrating lipstick, you can add more oils and butters.
Pour the Mixture into a Mold
Once everything is mixed together, it’s time to pour the mixture into a lipstick mold. Be sure to fill the mold completely and tap it on the counter to remove any air bubbles. Let the mixture cool for about 30 minutes.
Let It Cool and Remove from the Mold
Once the lipstick has cooled, you can remove it from the mold. Carefully pop the lipstick out of the mold and place it on a piece of parchment paper. You can now store the lipstick in an airtight container or package it up for gifting.

Crafting Your Own Lipstick with Natural Ingredients
If you’re looking for a more natural approach to making lipstick, there are several ways to do so. Here are some tips for crafting your own lipstick with natural ingredients.
Choose Natural Waxes
When making your own lipstick, it’s important to choose natural waxes. Beeswax and carnauba wax are two of the most common types of wax used in lipstick. Both of these waxes are derived from plants, so they are a great option for those looking for an all-natural lipstick.
Choose Plant-Based Oils
In addition to natural waxes, it’s important to select plant-based oils when creating your own lipstick. Some of the best oils to use include jojoba oil, sweet almond oil, and coconut oil. These oils will help to hydrate and nourish the lips.
Select Organic Colorants
Lastly, you will need to select organic colorants for your lipstick. Organic colorants are derived from natural sources and are free from harsh chemicals. Some of the most popular organic colorants include mica powder, FD&C dyes, and iron oxides.
Get Creative: Making Unique Lipsticks with Food Coloring
If you’re looking to get creative with your lipstick, try experimenting with food coloring! This is a fun and easy way to create unique shades of lipstick. Here’s how to do it.
Pick Out Food Coloring
The first step is to pick out food coloring. There are several different types of food coloring available, including liquid, gel, and powder. Choose whichever type you prefer, but keep in mind that liquid food coloring will yield the brightest colors.
Adjust the Recipe Accordingly
Once you’ve chosen your food coloring, you will need to adjust the recipe accordingly. When using food coloring, you will need to reduce the amount of wax in the recipe and increase the amount of oil. This will help to ensure that the color spreads evenly throughout the lipstick.
Experiment with Different Colors
Now comes the fun part: experimenting with different colors! Start off with a small amount of food coloring and add more as needed. Remember to mix everything thoroughly and pour the mixture into a mold to let it cool. Once the lipstick has cooled, you can remove it from the mold and voila—you have your own unique shade of lipstick!
Go Organic: Creating an All-Natural Lipstick Recipe
If you’re looking for an all-natural lipstick recipe, here’s what you need to do.
Choose Natural Waxes
For an all-natural lipstick, you will need to choose natural waxes. Beeswax and carnauba wax are both great options. They are derived from plants and are free from harsh chemicals.
Select Organic Oils and Butters
Next, you will need to select organic oils and butters for your lipstick. Some of the best oils to use include jojoba oil, sweet almond oil, and coconut oil. These oils are all derived from plants and are free from harsh chemicals.
Use Natural Colorants
Finally, you will need to use natural colorants. Organic colorants are derived from natural sources and are free from harsh chemicals. Some of the most popular organic colorants include mica powder, FD&C dyes, and iron oxides.

DIY Lipstick: An Easy Recipe for Bright and Bold Colors
If you’re looking for a bright and bold lipstick color, then this recipe is for you! Here’s what you need to do.
Choose Pigments or Powders
The first step is to choose pigments or powders for your lipstick. Pigments and powders are available in a variety of colors and will yield a brighter and more vibrant color than food coloring. You can find pigments and powders at most craft stores.
Melt Waxes and Butters Together
Once you have chosen your pigments or powders, you will need to melt the waxes and butters together. Place your beeswax, candelilla wax, carnauba wax, castor oil, and Shea butter into a double boiler and heat until they are completely melted. Stir the mixture occasionally to ensure that everything is melting evenly.
Mix in Oils and Pigments
Once the waxes and butters have melted, add the oils and pigments. Start by adding 1 tablespoon of castor oil and 1 teaspoon of pigment per ounce of wax. You can add more oils or pigments as needed to achieve the desired color.
Pour the Mixture into a Mold
Once everything is mixed together, it’s time to pour the mixture into a lipstick mold. Be sure to fill the mold completely and tap it on the counter to remove any air bubbles. Let the mixture cool for about 30 minutes.
Let It Cool and Remove from the Mold
Once the lipstick has cooled, you can remove it from the mold. Carefully pop the lipstick out of the mold and place it on a piece of parchment paper. You can now store the lipstick in an airtight container or package it up for gifting.
Conclusion
Making lipstick at home is easier than you think! With a few simple ingredients and a few steps, you can craft your own custom lipstick. Whether you’re looking for an all-natural recipe, a unique color, or a bright and bold shade, there are plenty of ways to make your own lipstick. So grab your supplies and get started on creating your own perfect shade of lipstick!