
Introduction
Do you want to build your own custom fishing rod? If so, you’ve come to the right place. This article will provide a step-by-step guide on how to make your own fishing rod from start to finish. We’ll cover what materials you need, how to choose the right type of rod, and how to assemble, wrap, finish, and care for it. By the end, you’ll have the knowledge and confidence to craft your own custom fishing rod.
Step-by-Step Guide to Making Fishing Rods
Making your own fishing rod is a rewarding project that can save you money in the long run. Here’s a step-by-step guide on how to make one:
1. Gather Materials Needed
Before you start building your rod, you’ll need to gather all the necessary materials. These include a rod blank, guides, thread, glue, and finishing supplies. You can find these items at most fishing supply stores or online.
2. Choose the Right Type of Fishing Rod
The type of rod you choose depends on your preferences and the type of fishing you plan to do. The most common types are spinning rods, casting rods, and fly fishing rods. You should also consider the size, strength, and action of the rod to ensure it’s appropriate for the type of fish you’re targeting.
3. Cut and Assemble the Rod Blank
Once you’ve chosen your rod blank, you’ll need to cut it to the proper length and assemble it. This involves securing the handle and reel seat in place and joining the two pieces of the rod blank together. Be sure to use quality tools and take your time when assembling the blank to ensure a secure connection.
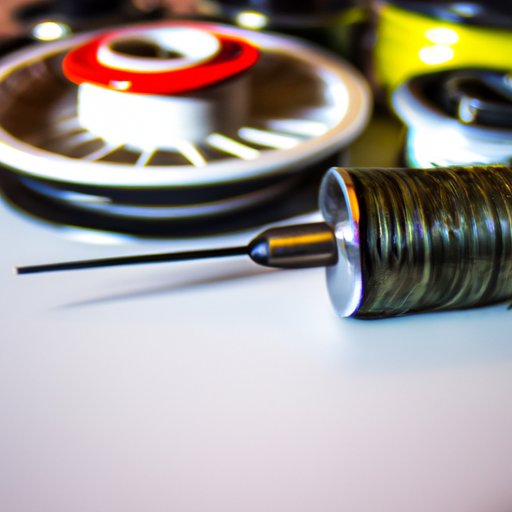
4. Wrap Rod Guides
Once the rod blank is assembled, you’ll need to wrap the guides onto the rod. This involves measuring and cutting the thread, installing the guides, and securing them with glue. Be sure to follow the manufacturer’s instructions carefully when wrapping the guides.
5. Finish and Care for the Rod
Once the guides are securely in place, you’ll need to finish and care for the rod. This involves sanding, varnishing or epoxying, and cleaning the rod before storage. Taking the extra time to properly care for your rod will extend its life and ensure it performs well when you’re out fishing.
Materials Needed to Make Fishing Rods
To make your own fishing rod, you’ll need the following materials:
Rod Blank: This is the main component of the rod and is usually made of graphite or fiberglass. The length and action of the rod blank will depend on the type of fishing you plan to do.
Guides: These are metal rings that line the rod blank and guide the line. The number and size of guides will depend on the type of rod you’re making.
Thread: This is used to wrap the guides onto the rod blank. Nylon thread is the most commonly used type, but there are other options available.
Glue: This is used to secure the guides in place. Epoxy is the most commonly used type of glue for this purpose.
Finishing Supplies: Once the rod is assembled, you’ll need to finish and care for it. This involves sanding, varnishing or epoxying, and cleaning the rod before storage.

Different Types of Fishing Rods and How to Choose the Right One
When choosing the type of rod to make, you should consider the type of fishing you plan to do. Here are some of the most common types of fishing rods and how to choose the right one for your needs:
Spinning Rods: These are ideal for light tackle and are best suited for small to medium sized fish. They are lightweight and easy to use, making them a great choice for beginner anglers.
Casting Rods: These are heavier and more powerful than spinning rods, making them better suited for larger fish. They are also more accurate and require more skill to use.
Fly Fishing Rods: These are designed specifically for fly fishing and are usually longer and lighter than other types of rods. They require more precision and skill to use, making them better suited for experienced anglers.
Matching Rods to Your Fishing Style: When choosing a rod, be sure to match it to the type of fishing you plan to do. Consider the size, strength, and action of the rod to ensure it’s appropriate for the type of fish you’re targeting.

Benefits of Building Your Own Fishing Rod
Building your own fishing rod has many benefits, including customization, quality, and cost savings. Here are some of the advantages of making your own fishing rod:
Customization: When you make your own rod, you can customize it to meet your exact needs and preferences. You can choose the type of rod blank, guides, and thread to ensure you get exactly what you want.
Quality: Home-made fishing rods are usually of higher quality than store-bought rods. This is because you can choose the exact materials and take your time to ensure a secure connection between the components.
Cost Savings: Making your own rod can save you money in the long run. Buying the materials separately is often cheaper than buying a pre-made rod, and you won’t have to pay for labor costs associated with having someone else build it.

Process for Wrapping Fishing Rod Guides
Wrapping the guides onto the rod is an important step in the process of making a fishing rod. Here’s how to do it:
Prepare the Thread: Start by measuring and cutting the thread to the desired length. Be sure to leave enough slack to wrap around the guides several times.
Install the Guides: Next, install the guides onto the rod blank. Be sure to place them evenly spaced along the length of the rod.
Secure with Glue: Once the guides are in place, secure them with glue. Allow the glue to dry completely before continuing.
Tips on Finishing and Caring for Home-Made Fishing Rods
Taking the extra time to properly care for your rod will ensure it lasts for years to come. Here are some tips on how to finish and care for your home-made fishing rod:
Sanding: After the rod is assembled, you should sand it to remove any rough edges or imperfections. This will help ensure a smooth finish.
Varnish or Epoxy: Once the rod is sanded, you should apply a coat of varnish or epoxy to protect it from moisture and wear. Be sure to allow the finish to dry completely before using the rod.
Cleaning and Storage: After each use, you should clean the rod and store it in a cool, dry place. This will help ensure the rod stays in good condition for years to come.
Conclusion
Making your own fishing rod is a rewarding project that can save you money in the long run. This article provided a step-by-step guide on how to make a fishing rod from start to finish, including what materials you need, how to choose the right type of rod, and how to assemble, wrap, finish, and care for it. With the knowledge and confidence gained from this article, you’ll be able to craft your own custom fishing rod.