
Introduction
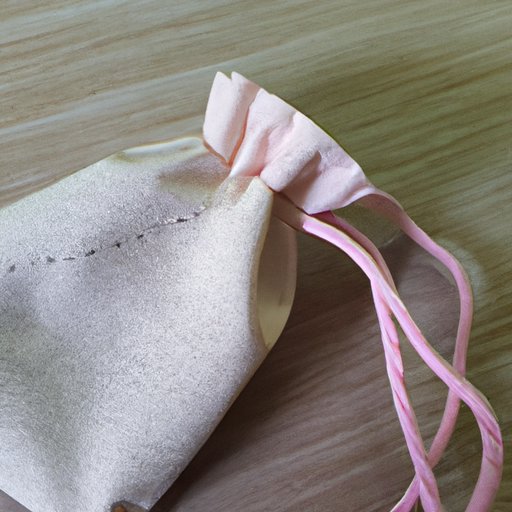
A drawstring bag is a type of bag or pouch that is closed at the top with two strings or cords. It can be used for carrying items such as books, clothes, or other items. Drawstring bags are popular because they are easy to make and use. In this article, we will explore how to make a drawstring bag, from gathering materials to testing the finished product.
Step-by-Step Guide to Making a Drawstring Bag
Making a drawstring bag is an easy and fun project that anyone can do. Here is a step-by-step guide to help you get started:
Gather Your Materials
To make a drawstring bag, you will need fabric, thread, a pair of scissors, and two drawstrings (such as cord or ribbon). You may also want to have pins and a sewing machine on hand if you plan to use them. Make sure to measure your fabric before cutting it to ensure that you have enough for your project.
Cut Fabric Pieces
Once you have gathered your materials, you will need to cut the fabric into the pieces you need for your bag. The size of the pieces will depend on the size of your bag. Once you have cut out the pieces, lay them out on a flat surface and pin them together to keep them in place.
Sew Together Your Fabric Pieces
Next, you will need to sew the pieces of fabric together. If you are using a sewing machine, follow the instructions that came with your machine to set up and use it properly. If you are sewing by hand, use a basic running stitch to join the pieces. Make sure to backstitch at the beginning and end of each seam to secure the stitching.
Attach Drawstrings
Once you have sewn the pieces together, you will need to attach the drawstrings. To do this, you will need to create two small channels at the top of the bag. Fold the top edge of the fabric over twice to create the channel and then sew along the fold. Once the channels are complete, thread the drawstrings through the channels and tie them securely.
Test Your Drawstring Bag
Before you finish your project, you should test your drawstring bag to make sure it works properly. Put some items in the bag and close it using the drawstrings. Pull the drawstrings to make sure they are secure and that the bag closes properly. If everything looks good, your drawstring bag is ready to use!
Sewing 101: How to Make a Drawstring Bag
If you are new to sewing and are not sure how to make a drawstring bag, here is a brief introduction to the basics of sewing. Sewing is the process of joining two pieces of fabric together with thread. To do this, you will need to use a needle and thread, and there are several different types of stitches you can use depending on the type of fabric and project you are working on.
Basics of Sewing
When sewing, it is important to remember to use the right type of thread and needle for the fabric you are using. Different fabrics require different types of threads and needles, so it is important to read the label and choose the right ones. Additionally, it is important to start and finish each seam with a backstitch to secure the stitching.
Types of Stitches
There are many different types of stitches used in sewing. The most common stitch is the running stitch, which is used for basic seams. Other types of stitches include the zigzag stitch, the blanket stitch, and the buttonhole stitch. Each type of stitch has its own purpose and should be used appropriately for the best results.
Basic Tools and Supplies
In addition to thread and needles, there are several other tools and supplies that you may need when sewing. These include pins, scissors, a measuring tape, and a seam ripper. Having these tools on hand will make it easier to sew and will help you achieve professional-looking results.

Crafting an Easy Drawstring Bag with Simple Materials
If you are looking for an easy way to make a drawstring bag, you can craft one with just a few simple materials. All you will need is fabric, thread, and two drawstrings. Choose a lightweight fabric such as cotton or linen for best results. Cut the fabric into two pieces and sew them together using a basic running stitch. Once the pieces are sewn together, attach the drawstrings to the top of the bag and you are done!

DIY Drawstring Bag Tutorial for All Levels of Crafters
Whether you are a beginner or experienced crafter, making a drawstring bag is a great project for all levels. Here are some tips and tricks for crafting a unique drawstring bag:
Beginner Tips and Tricks
If you are a beginner, start with a simple pattern and fabric. Choose a lightweight fabric such as cotton or linen and a basic pattern such as a rectangle or square. This will make it easier to sew and will allow you to practice the basic techniques of sewing without becoming overwhelmed.
Intermediate or Advanced Techniques
If you are an intermediate or advanced crafter, you can try more complex patterns and fabrics. Try using a more difficult stitch such as the zigzag stitch or the blanket stitch. You can also experiment with different fabrics such as velvet or leather for a unique look. Have fun and let your creativity shine!
Tips for Creating a Unique Drawstring Bag
To create a truly unique drawstring bag, consider adding embellishments such as buttons, patches, or embroidery. You can also add pockets or other features to make your bag even more special. Have fun and let your imagination run wild!

Create a Unique Drawstring Bag with Just a Few Supplies
Making a unique drawstring bag is easier than you think. With just a few simple supplies, you can create a one-of-a-kind bag that is perfect for carrying your belongings. Here are the steps to get started:
Choose Your Design
The first step is to choose a design for your bag. Consider the shape, size, and style of the bag you want to make. Do you want a rectangular bag or a round one? Do you want a simple design or something more intricate? Decide what type of bag you want to make and then sketch out the design.
Select Fabric, Thread, and Drawstrings
Once you have chosen a design, it’s time to select the fabric, thread, and drawstrings for your bag. Choose a fabric that is suitable for the type of bag you are making, and make sure to pick a thread and drawstrings that match the fabric. Most fabric stores will have a wide selection of fabric, thread, and drawstrings to choose from.
Assemble the Bag
Now it’s time to assemble the bag. Follow the steps outlined in the “Step-by-Step Guide to Making a Drawstring Bag” section of this article to put your bag together. Once the bag is assembled, add any embellishments or features you want, such as pockets or buttons. Finally, attach the drawstrings and your bag is ready to use!
Conclusion
Making a drawstring bag is a fun and easy project that anyone can do. With the right supplies and a bit of patience, you can create a unique bag that is perfect for carrying your everyday items. Follow the steps outlined in this article to make your own drawstring bag and enjoy the satisfaction of creating something special with your own hands.