
Introduction
Cornhole is a popular backyard game that’s been around for generations, and it’s easy to see why! Whether you’re playing with family and friends or just having fun in your own backyard, cornhole is a great way to get outside and have some good, old-fashioned fun. And what’s a game of cornhole without cornhole bags?
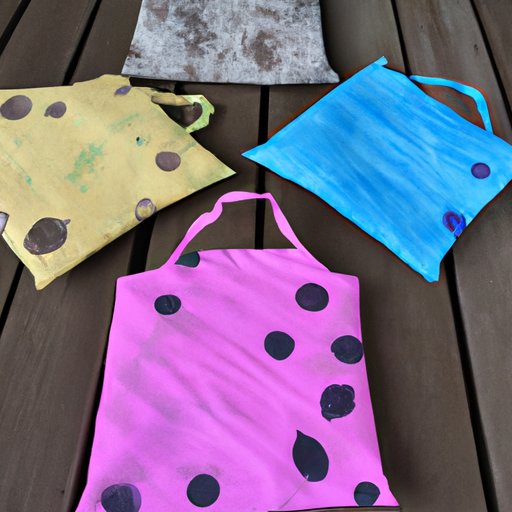
Cornhole bags are filled fabric bags that are used to play the game. They come in all sorts of sizes, shapes, and colors, and they can be made out of almost any fabric. Whether you’re looking to buy pre-made bags or make your own, there are lots of options out there. This article will explore the different methods for making cornhole bags, from using simple materials to upcycling old items.
Step-by-Step Guide to Making Cornhole Bags
Making your own cornhole bags is actually quite simple. Here’s a step-by-step guide to help you get started:
Gather Materials
The first step is to gather all the materials you need. You’ll need fabric, stuffing (such as polyester fiberfill or cotton batting), sewing supplies (needle, thread, etc.), and something to measure and mark the fabric (such as a ruler or tape measure). It’s also helpful to have a template of the bag pattern handy. You can find plenty of free templates online, or you can create your own.
Prepare the Fabric
Once you’ve gathered all your materials, it’s time to prepare the fabric. Start by cutting two pieces of fabric in the same size. Then, use the template to mark the lines where the seams should go. Finally, pin the fabric together and set aside.
Sew the Bags
Now it’s time to sew the bags! Using a sewing machine or hand stitch the seams, following the lines you marked earlier. Be sure to leave an opening at the top of the bag so you can fill it with stuffing. Once the seams are sewn, turn the bag inside out and fill it with stuffing.
Finishing Touches
Finally, it’s time to finish off the bags. Sew the opening shut and add any decorations or embellishments you like. You can even add a pocket for storing extra stuffing! Once you’re finished, your cornhole bags are ready to go.
DIY: How to Sew Cornhole Bags from Scratch
If you’re feeling ambitious, you can even sew your own cornhole bags from scratch. Here’s a step-by-step guide to help you get started:
Gather Materials
As with any DIY project, the first step is to gather all the materials you need. You’ll need fabric, stuffing, sewing supplies, and something to measure and mark the fabric. Additionally, you’ll need a pattern or template to use as a guide.
Cut the Fabric
Next, it’s time to cut the fabric. Lay the pattern on top of the fabric and trace around it with a pen or marker. Cut out two pieces of fabric in the same size. Then, use the template to mark the lines where the seams should go.
Sew the Bags
Now it’s time to sew the bags! Using a sewing machine or hand stitch the seams, following the lines you marked earlier. Be sure to leave an opening at the top of the bag so you can fill it with stuffing.
Finishing Touches
Finally, it’s time to finish off the bags. Sew the opening shut and add any decorations or embellishments you like. You can even add a pocket for storing extra stuffing! Once you’re finished, your cornhole bags are ready to go.

Crafting Cornhole Bags with Simple Materials
If you don’t have access to a sewing machine or don’t feel comfortable using one, you can still make your own cornhole bags with a few simple materials. Here’s how to do it:
Gather Materials
The first step is to gather all the materials you need. You’ll need fabric, glue (such as hot glue or fabric glue), stuffing, and something to measure and mark the fabric.
Glue the Pieces Together
Next, it’s time to assemble the pieces. Start by cutting two pieces of fabric in the same size. Then, use the template to mark the lines where the seams should go. Now, apply glue along the edges of one piece of fabric and press the other piece of fabric onto it. Allow the glue to dry completely.
Finishing Touches
Once the glue has dried, it’s time to finish off the bags. Cut a small hole in the top of each bag and fill them with stuffing. Then, sew or glue the opening shut and add any decorations or embellishments you like. Once you’re finished, your cornhole bags are ready to go.
The Beginner’s Guide to Making Cornhole Bags
If you’re new to crafting and want to give making cornhole bags a try, here’s a beginner-friendly guide to help you get started:
Gather Materials
As with any DIY project, the first step is to gather all the materials you need. You’ll need fabric, glue, stuffing, and something to measure and mark the fabric. Additionally, you’ll need a pattern or template to use as a guide.
Assemble the Pieces
Next, it’s time to assemble the pieces. Start by cutting two pieces of fabric in the same size. Then, use the template to mark the lines where the seams should go. Now, apply glue along the edges of one piece of fabric and press the other piece of fabric onto it. Allow the glue to dry completely.
Finishing Touches
Once the glue has dried, it’s time to finish off the bags. Cut a small hole in the top of each bag and fill them with stuffing. Then, sew or glue the opening shut and add any decorations or embellishments you like. Once you’re finished, your cornhole bags are ready to go.
Upcycling Old Stuff into Cornhole Bags
Have some old clothes or fabric lying around? Put them to good use by turning them into cornhole bags! Here’s how to do it:
Gather Materials
The first step is to gather all the materials you need. You’ll need fabric, stuffing, sewing supplies, and something to measure and mark the fabric. Additionally, you’ll need a pattern or template to use as a guide.
Prepare the Fabric
Next, it’s time to prepare the fabric. Start by cutting two pieces of fabric in the same size. Then, use the template to mark the lines where the seams should go. Finally, pin the fabric together and set aside.
Sew the Bags
Now it’s time to sew the bags! Using a sewing machine or hand stitch the seams, following the lines you marked earlier. Be sure to leave an opening at the top of the bag so you can fill it with stuffing. Once the seams are sewn, turn the bag inside out and fill it with stuffing.
Finishing Touches
Finally, it’s time to finish off the bags. Sew the opening shut and add any decorations or embellishments you like. You can even add a pocket for storing extra stuffing! Once you’re finished, your cornhole bags are ready to go.

Making Cornhole Bags with Kids: A Fun Family Activity
Making cornhole bags is a great way to get the whole family involved. Here’s a simple guide to help you get started:
Gather Materials
The first step is to gather all the materials you need. You’ll need fabric, stuffing, sewing supplies, and something to measure and mark the fabric. Additionally, you’ll need a pattern or template to use as a guide.
Sew the Bags
Now it’s time to sew the bags! Using a sewing machine or hand stitch the seams, following the lines you marked earlier. Be sure to leave an opening at the top of the bag so you can fill it with stuffing. Once the seams are sewn, turn the bag inside out and fill it with stuffing.
Finishing Touches
Finally, it’s time to finish off the bags. Sew the opening shut and add any decorations or embellishments you like. You can even add a pocket for storing extra stuffing! Once you’re finished, your cornhole bags are ready to go.

How to Make Cornhole Bags with Recycled Material
If you’re looking for a more sustainable way to make cornhole bags, then look no further! Here’s how to make cornhole bags with recycled material:
Gather Materials
The first step is to gather all the materials you need. You’ll need fabric, stuffing, sewing supplies, and something to measure and mark the fabric. Additionally, you’ll need a pattern or template to use as a guide.
Prepare the Fabric
Next, it’s time to prepare the fabric. Start by cutting two pieces of fabric in the same size. Then, use the template to mark the lines where the seams should go. Finally, pin the fabric together and set aside.
Sew the Bags
Now it’s time to sew the bags! Using a sewing machine or hand stitch the seams, following the lines you marked earlier. Be sure to leave an opening at the top of the bag so you can fill it with stuffing. Once the seams are sewn, turn the bag inside out and fill it with stuffing.
Finishing Touches
Finally, it’s time to finish off the bags. Sew the opening shut and add any decorations or embellishments you like. You can even add a pocket for storing extra stuffing! Once you’re finished, your cornhole bags are ready to go.
Conclusion
Making your own cornhole bags is actually quite simple. There are several methods for making your own cornhole bags, from using simple materials to upcycling old items. Whether you’re a beginner or an experienced crafter, you’re sure to find a method that works for you. So get creative and start crafting your own cornhole bags today!
Summary of the article
This article explored the different methods for making cornhole bags, from using simple materials to upcycling old items. It provided step-by-step guides on how to make your own cornhole bags, from sewing them from scratch to crafting them with simple materials. It also included tips for making cornhole bags with kids, as well as a guide on how to make them with recycled material.
Next Steps
Now that you know how to make your own cornhole bags, it’s time to get started! Gather your materials, choose a method, and start creating your own unique cornhole bags. Have fun and happy crafting!