
Introduction
Are you looking for a fun and creative way to store your favorite snacks? Making your own chip bags is an easy and affordable way to keep your chips fresh and organized! This article will provide a comprehensive guide on how to make chip bags, from gathering materials and preparing a work area to adding labels or decorations. Whether you’re a beginner or experienced crafter, this guide has all the information you need to create your own unique chip bags.
Step-by-Step Guide to Making Chip Bags
Making chip bags is a straightforward process that anyone can do with the right materials and a bit of patience. Here are the steps you should follow when making chip bags:
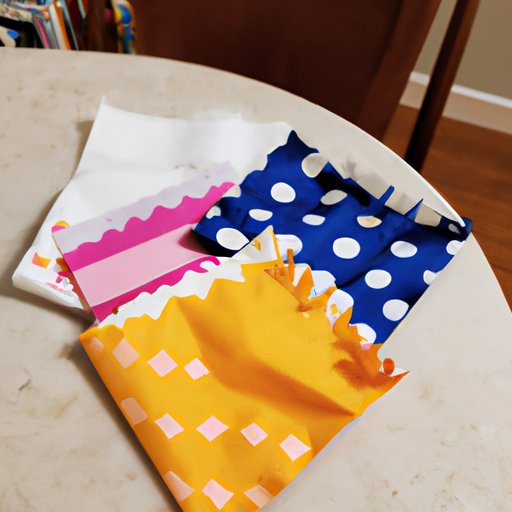
1. Gather materials needed: To get started, you’ll need to gather the materials needed for your project. You’ll need fabric, thread, scissors, a sewing machine (optional), and any other materials you want to use such as handles or straps, labels, or decorations.
2. Prepare work area: Before you start crafting your chip bag, it’s important to set up a clean, clutter-free work area. This will help ensure that all of your materials stay organized and nothing gets lost during the process.
3. Cut and shape fabric: Once you have your materials ready, you’ll need to measure and cut the fabric pieces that will become your chip bag. It’s best to use a ruler or measuring tape to make sure all of your cuts are even and precise.
4. Sew the pieces together: After cutting the fabric, you’ll need to sew the pieces together. If you’re using a sewing machine, be sure to read the instructions carefully before getting started. Otherwise, hand-sewing works just as well.
5. Add handles or straps: For added convenience, you can add handles or straps to your chip bag. There are a variety of ways to do this, so be sure to research different methods before getting started.
6. Add labels or decorations: Finally, you can add labels or decorations to your chip bag to give it a personal touch. You can use iron-on transfers, fabric paint, or even embroidery to make your chip bag stand out.
Crafting Your Own Chip Bags: A Beginner’s Guide
If you’re just getting started with making chip bags, there are a few things you should know. Here is a beginner’s guide to crafting your own chip bags:
1. Choosing the right fabric: The type of fabric you choose will determine the look and feel of your chip bag. Cotton, canvas, and denim are all great options for chip bags, but you can also use synthetic fabrics such as nylon or polyester. Be sure to consider factors such as durability, washability, and breathability when selecting a fabric.
2. Essential tools for a successful project: In addition to fabric, you’ll need a few other essential tools for your project. These include scissors, a ruler or measuring tape, pins, needle and thread, a sewing machine (optional), and any other materials you plan to use for your chip bag.
3. Tips for getting started: When starting your project, take some time to plan out what you want your chip bag to look like. Consider the size, shape, and design of the bag, as well as any labels or decorations you want to add. This will help make the process easier and more enjoyable.
How to Create Custom Chip Bags with Easy-to-Follow Instructions
Creating custom chip bags is a great way to express yourself and make something truly unique. Here are some tips for creating custom chip bags with easy-to-follow instructions:
1. Selecting a design: Before you start crafting your chip bag, decide what kind of design you want. Do you want a simple, classic look or something more intricate and detailed? Think about the colors and patterns you want to use, and sketch out a few ideas to help you visualize the final product.
2. Measuring and cutting materials: Once you’ve chosen a design, you’ll need to measure and cut the materials. Be sure to use a ruler or measuring tape to make sure all of your cuts are precise and even. Also, keep in mind that different fabrics may require different cutting techniques.
3. Attaching handles or straps: Depending on the design of your chip bag, you may want to add handles or straps. There are a variety of ways to attach handles or straps, so be sure to research different methods and choose the one that works best for you.
4. Finishing touches: Finally, you can add labels or decorations to your chip bag to give it a personal touch. Iron-on transfers, fabric paint, and embroidery are all great options for adding unique details to your chip bag.

DIY Chip Bag Tutorial: All the Tips and Tricks You Need to Know
Making chip bags is a fun and creative activity, but it does require some knowledge and skill. Here are some tips and tricks for making chip bags with ease:
1. Different types of chip bags: There are a variety of chip bag styles to choose from, including drawstring bags, zip-top bags, and totes. Consider the size and shape of your chips when selecting a bag style, as well as the type of closure (e.g. drawstring, zipper, etc.) you want to use.
2. Techniques for creating custom designs: Creating custom designs is a great way to make your chip bags stand out. Try using stencils, stamps, or fabric markers to make unique patterns or images. You can also add appliques or patches for a more personalized look.
3. Tips for making chip bags with different materials: If you want to use different materials for your chip bag, such as leather or vinyl, there are a few things you should keep in mind. Make sure the material is strong enough to hold the weight of your chips, and be sure to use heavy-duty needles and thread when sewing.
The Art of Making Chip Bags: A Comprehensive Guide
Making chip bags isn’t just a practical task—it’s an art form. Here are some tips for mastering the art of making chip bags:
1. What makes a chip bag unique? The key to making a chip bag that stands out is to focus on the details. Think about the shape, size, and design of the bag, as well as the materials you use to construct it. You can also add labels or decorations to make your chip bag truly unique.
2. Creative ways to make chip bags: There are a variety of creative ways to make chip bags. Try experimenting with different fabrics and colors, or mix and match different materials to create a one-of-a-kind bag. You can also add pockets or zippers to make your chip bag more functional.
3. Benefits of making your own chip bags: Making your own chip bags is not only fun and rewarding, but it also has many practical benefits. Not only will your chip bags look great, but they’ll also be more durable and eco-friendly than store-bought bags.
Conclusion
Making chip bags is a fun and creative activity that anyone can do. From choosing the right fabric and gathering materials to adding labels or decorations, this comprehensive guide has all the information you need to make your own chip bags.