
Introduction
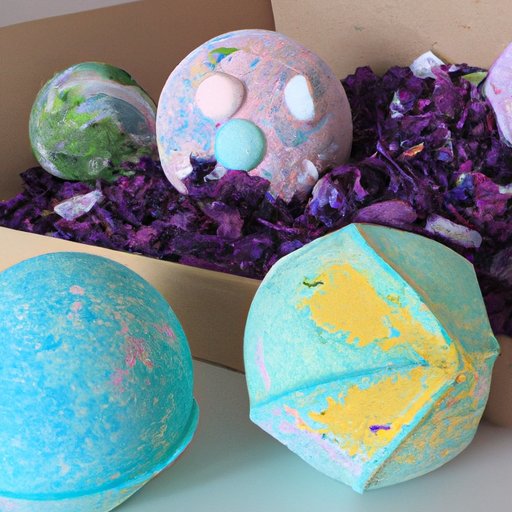
A bath bomb is a type of product that can be used to transform a regular bath into an indulgent spa experience. They are usually made from a combination of baking soda, citric acid, Epsom salts, and other natural ingredients such as essential oils, herbs, and colors. When added to warm water, bath bombs dissolve and release their wonderful aroma and color, creating a calming and therapeutic atmosphere.
Making bath bombs at home is not only easy but also cost-effective. With just a few simple ingredients, you can craft luxurious bath bombs in the comfort of your own home. Not only will you save money, but you can also customize your bath bombs according to your own preferences, choosing the perfect scent and color for your next relaxing soak.
Step-by-Step Guide to Making Bath Bombs at Home
Making bath bombs at home is a fun and rewarding activity. Here’s a step-by-step guide to help you get started:
Gather all necessary materials
Before you begin, make sure you have all the materials you need. You will need baking soda, citric acid, Epsom salts, oil (coconut or almond), and any additional ingredients you would like to add. You will also need measuring cups, mixing bowls, and molds if you want to make shaped bath bombs.
Measure and mix ingredients
Start by measuring out the dry ingredients and combining them in a bowl. Make sure to mix them well so there are no lumps. Next, measure out the wet ingredients and mix them together in a separate bowl.
Combine wet and dry ingredients
Slowly add the wet ingredients to the dry ingredients and mix everything together. Be careful not to overmix, as this can cause the mixture to become too wet and difficult to mold. The mixture should feel slightly damp but still hold its shape when pressed.
Mold into desired shape
Once the mixture has reached the right consistency, it’s time to start molding. If you are using molds, simply fill each one with the mixture and press firmly. If you are not using molds, you can roll the mixture into balls or use your hands to form it into the desired shape.
Allow bath bombs to dry
The last step is to let the bath bombs dry. This can take anywhere from 24 to 48 hours, depending on the humidity and temperature. Once the bath bombs have hardened, they are ready to be used or packaged for gifting.
A Beginner’s Guide to Crafting Luxurious Bath Bombs
While making your own bath bombs is fairly straightforward, there are some tips and tricks that can help you craft luxurious and unique bath bombs. Here are a few things to keep in mind:
Choose the right type of oil
When selecting an oil for your bath bombs, choose one that is light and won’t leave an oily residue in the tub. Coconut and almond oil are great options. You can also try experimenting with other types of oils such as jojoba or avocado.
Add fragrances and colors
Fragrance and color are important elements of any bath bomb. Essential oils are a great way to add scent and there are many different types available. For color, you can use food coloring, natural pigments, or even dried herbs and flowers.
Use molds for shaped bath bombs
If you want to create shaped bath bombs, you will need to use molds. There are many different types of molds available, from simple round shapes to more intricate designs. If you don’t have molds, you can also use cookie cutters or even your hands to form the desired shapes.
Creative Ideas for Customizing Your Own Bath Bombs
You can customize your bath bombs in many different ways. Here are some creative ideas to get you started:
Add essential oils for therapeutic effects
Essential oils are a great way to add therapeutic benefits to your bath bombs. Choose oils such as lavender, peppermint, or eucalyptus for a soothing and calming effect. You can also experiment with blends for a unique scent.
Mix in dried herbs, flowers or glitter
Adding dried herbs, flowers, or glitter to your bath bombs is a great way to give them a unique look and feel. Dried rose petals, lavender buds, and chamomile are all lovely additions. Glitter can also be added for a bit of sparkle.
Create unique shapes and textures
By using molds, cookie cutters, or your hands, you can create bath bombs in any shape or size you desire. You can also add texture to your bath bombs by pressing in small details such as lines or dots. Have fun experimenting with different shapes and textures!

How to Choose the Right Ingredients for DIY Bath Bombs
When choosing ingredients for your bath bombs, it’s important to select high-quality products. Here are a few tips to keep in mind:
Select natural ingredients
Choose natural ingredients whenever possible. Look for baking soda, citric acid, and Epsom salts that are free from additives and chemicals. Natural ingredients are better for your skin and will provide a more luxurious bath experience.
Choose quality essential oils
Essential oils are the key to adding fragrance and therapeutic benefits to your bath bombs. It’s important to select high-quality oils that are pure and free from additives. Look for oils that are certified organic and have been extracted through steam distillation.
Consider other additives such as baking soda and citric acid
Baking soda and citric acid are two of the most important ingredients in bath bombs. Baking soda helps to soften the water and adds bubbles, while citric acid helps to activate the other ingredients. Make sure to choose pure, high-quality versions of these ingredients for the best results.

Tips and Tricks for Perfectly Shaped Bath Bombs Every Time
Creating perfectly shaped bath bombs takes practice and patience. Here are a few tips and tricks that can help:
Use the right amount of ingredients
It’s important to use the right amount of ingredients when making bath bombs. Too much or too little of any ingredient can result in bath bombs that are either too wet or too dry. Make sure to measure out the ingredients carefully and follow the recipe closely.
Adjust the consistency of the mixture
If the mixture is too wet, add more dry ingredients. If it is too dry, add more wet ingredients. Keep adjusting until you reach the right consistency. The mixture should feel slightly damp but still hold its shape when pressed.
Use molds and cutters when needed
Using molds and cookie cutters can help you create perfectly shaped bath bombs. If you don’t have molds, you can still create unique shapes and textures by using your hands.

Decorative Ways to Package Homemade Bath Bombs
Packaging your bath bombs is the finishing touch. Here are some creative ideas for packaging your homemade bath bombs:
Select attractive containers
Choose containers that will show off your bath bombs in the best light. Mason jars, tins, and cellophane bags are all great options. You can also find specially designed containers specifically for bath bombs.
Use decorative labels and ribbons
Add a personal touch to your bath bombs with decorative labels and ribbons. You can print your own labels or purchase ready-made ones. Ribbons are also a nice addition and can be used to tie the containers shut.
Personalize with special touches
If you’re giving your bath bombs as gifts, you can add special touches such as handwritten notes or personalized tags. These small details will make your gift extra special.
Conclusion
Making bath bombs at home is a fun and rewarding activity. With just a few simple ingredients and a bit of creativity, you can craft luxurious and unique bath bombs that will transform your bath into a spa-like experience.