
Introduction
A wedding veil is an essential part of any bridal look. It adds the perfect finishing touch to the bride’s ensemble, making her feel both beautiful and special on her big day. Whether you choose a simple, traditional veil or a more elaborate, unique design, it’s important to find one that complements your dress and hairstyle. But what if you want something truly unique? Making your own wedding veil can be a great option for those looking for a one-of-a-kind look. Not only will it save you money, but it will also give you a chance to get creative and create something that is truly special.
Step-By-Step Guide: How to Make Your Own Wedding Veil
Making your own wedding veil doesn’t have to be complicated. With the right tools and supplies, you can easily craft a beautiful veil that you’ll love. Here’s a step-by-step guide to help you get started.
Choosing the Fabric
The first step in making your own veil is selecting the fabric. You’ll want to choose something that is lightweight and airy, like tulle or organza. These fabrics are available in different colors and patterns, so you can find one that will perfectly match your dress. When picking out your fabric, be sure to select a quality material that won’t fray or tear easily. This will ensure that your veil looks its best on your wedding day.
Taking Measurements
Once you’ve chosen your fabric, it’s time to take some measurements. Start by measuring the circumference of your head and adding an extra inch or two for the headpiece. Then, measure the length of the veil from the top of the headpiece to the desired length. For a traditional veil, you’ll want to leave at least 10 inches between the end of the veil and the floor.
Cutting the Fabric
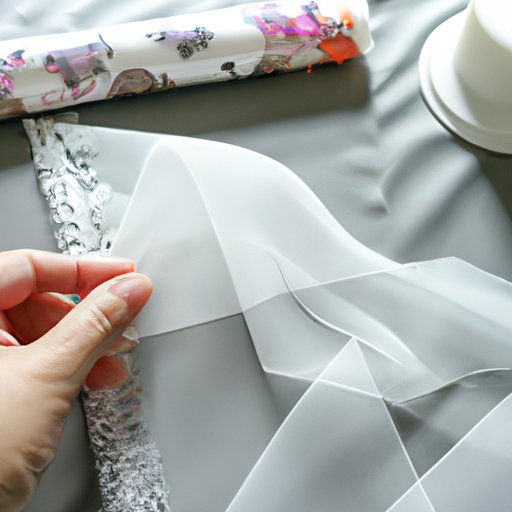
Now that you have the measurements, it’s time to cut the fabric. Use sharp scissors or a rotary cutter to get a clean, professional-looking edge. Be sure to leave enough room for hemming and trimming. Once you’ve finished cutting, you can add any embellishments such as lace, pearls, or beads.
Assembling the Veil
Now that you have all the pieces ready, it’s time to assemble the veil. Start by sewing the pieces together using a sewing machine or needle and thread. Be sure to use a strong stitch so the veil stays together. Once the veil is assembled, you can add any additional decorations such as ribbons, flowers, or feathers.

DIY Wedding Veil Tutorial: From Fabric Selection to Final Touches
Creating your own wedding veil doesn’t have to be difficult. With the right tools and supplies, anyone can make a beautiful veil for their special day. Here’s a tutorial to help you get started.
Finding Inspiration
Before you start crafting your veil, it’s important to do some research to find inspiration. Look through magazines, websites, and Pinterest boards to get an idea of the different styles of veils available. Think about what look you want to achieve – traditional, romantic, modern, etc. – and find examples that reflect that style.
Gathering Supplies
Once you have an idea of the look you’re going for, it’s time to gather the necessary materials and tools. You’ll need fabric, scissors, a sewing machine (or needle and thread), pins, and any other decorative elements you’d like to include. Make sure you have everything on hand before you begin.
Crafting the Veil
Now that you have all the supplies, it’s time to start crafting your veil. Follow the steps outlined above to measure, cut, and assemble the veil. When sewing, use a strong stitch to ensure that the veil stays together. If you’re having trouble, there are plenty of online tutorials that can help.
Crafting a Custom Veil for Your Big Day: Tips and Tricks
Making your own wedding veil can be a fun and rewarding experience. Here are some tips and tricks to help you create a custom veil that you’ll love.
Choosing a Style
When choosing a style for your veil, consider the shape and length. There are many different shapes, from the classic elbow-length veil to the dramatic cathedral-length veil. You can also combine different elements, such as lace, tulle, and satin, to create a unique look.
Adding Embellishments
Embellishments are a great way to add dimension and personality to your veil. Consider adding beads, lace, pearls, flowers, or feathers for a truly custom look. You can also layer different fabrics to create a unique texture and depth.
Designing the Perfect Wedding Veil: A Beginner’s Guide
Making your own wedding veil can seem intimidating, but it doesn’t have to be. With the right tools and supplies, even a beginner can create a beautiful veil for their big day. Here’s a beginner’s guide to help you get started.
Start with a Simple Design
If you’re new to veil-making, it’s best to start with a simple design. Stick to basic shapes and trims and avoid intricate details. This will help you get familiar with the process and give you a better understanding of how to create a veil.
Making Adjustments
Once you’ve mastered the basics, you can start making adjustments to your veil. Play around with the shape and length, and add more decorative elements if you’d like. Have fun with it and don’t be afraid to experiment!
Conclusion
Making your own wedding veil is a great way to save money and create a one-of-a-kind look for your big day. With the right supplies and a step-by-step guide, you can easily craft a beautiful veil that you’ll love. From finding inspiration and gathering supplies, to crafting the veil and adding embellishments, the process is surprisingly simple.