
Introduction
A wedding arch is a beautiful addition to any ceremony, transforming an ordinary space into something truly special. Whether you’re hosting a wedding in a traditional venue or an outdoor location, a well-designed arch can take your event to the next level. But if you’re working with a tight budget, buying a ready-made arch may not be an option. Fortunately, there are plenty of ways to craft a stunning arch yourself — all you need is a little creativity and some basic tools!
Step-by-Step Guide to Building a Wedding Arch
Creating your own wedding arch is actually easier than it sounds. Here’s a step-by-step guide to help you get started:
Gather the Necessary Materials
Before you start constructing your arch, it’s important to gather all the materials you’ll need. Depending on your design, this could include PVC pipes, metal pipes, wooden boards, fabric, string lights, and other decorative elements. If you’re going for a rustic look, you might also consider incorporating pieces of driftwood or branches. Make sure to have enough materials to complete your project.
Measure and Cut the Pieces
Once you have all your materials, you’ll need to measure and cut the pieces according to your design. For instance, if you’re using PVC pipes, you’ll need to cut them into the appropriate lengths and angles. If you’re using a wooden board as the base, you’ll need to cut it to size. Make sure to measure twice and cut once to avoid mistakes.
Assemble the Frame
Next, you’ll need to assemble the frame of the arch. Start by attaching the vertical pieces together with screws or bolts. If you’re using PVC pipes, you can use a special connector for this. Once the frame is assembled, attach the top piece and secure it into place. You can also add additional supports for extra stability.
Attach Decorative Elements
Now it’s time to add the decorative elements. This could include fabric drapes, string lights, flowers, ribbons, and other embellishments. Make sure to attach the elements securely so they don’t come loose during the event. You can also use glue or tape to keep everything in place.

DIY: Create Your Own Elegant Wedding Arch
Creating a beautiful wedding arch doesn’t have to be difficult or expensive. With the right materials and a bit of creativity, you can create a one-of-a-kind arch that will wow your guests. Here are a few tips to help you get started:
Choose an Appropriate Design
When it comes to designing your arch, think about the overall look you want to achieve. Do you want a classic arch or a more modern style? Are you going for a romantic or whimsical vibe? Consider the shape, size, and materials that will best suit your event. You can also look through pictures of existing arches for inspiration.
Select Color Scheme
The color scheme of your arch should complement the overall theme of the event. Look at the bridesmaids’ dresses and the decorations of the venue to determine the appropriate colors. If you’re having trouble deciding, opt for classic neutrals like white, cream, or blush. You can also add a pop of color with flowers or ribbons.
Add Special Touches
Finally, you can add special touches to make your arch truly unique. Personalized elements like monograms or initials are a great way to make the arch more meaningful. You can also incorporate meaningful symbols, such as a ribbon for the couple’s first dance or a bell for the start of their marriage. Have fun with it!

How to Assemble the Perfect Wedding Arch
Now that you’ve gathered the materials and chosen a design, it’s time to assemble your arch. Here are a few tips to help you get it just right:
Consider the Height
When assembling your arch, keep in mind that it should be tall enough to accommodate your guests. The average height of a wedding arch is 8-10 feet, but you may need to adjust this depending on the size of your venue. Make sure to double-check the measurements before you begin construction.
Secure the Base
It’s important to secure the base of the arch so it won’t move or shift during the event. If you’re using a wooden board, use screws to attach it to the ground or floor. You can also use sandbags for extra support. Make sure to test the stability of the arch before the event.
Fasten the Pieces Together
Once all the pieces are in place, you’ll need to fasten them together. Use screws or bolts to attach the vertical pieces to the base. If you’re using PVC pipes, use connectors to join the pieces. You can also use zip ties or rope to secure the pieces together.
Crafting a Beautiful Wedding Arch on a Budget
If you’re looking for ways to save money on your wedding arch, there are plenty of options. Here are a few ideas to get you started:
Reuse Existing Materials
Chances are, you already have some of the materials you need lying around the house. Before you go out and buy new supplies, take a look around and see what you can reuse. Old bedsheets, burlap sacks, and even cardboard boxes can be repurposed into beautiful arch decorations. Get creative and see what you can come up with!
Shop for Deals
When shopping for materials, keep an eye out for discounts and sales. Many stores offer seasonal deals on items like fabric and string lights, so it pays to shop around. You can also sign up for mailing lists or follow your favorite stores on social media to stay informed about upcoming promotions.
Substitute Materials When Necessary
If you’re on a tight budget, it may be necessary to substitute materials. For instance, instead of using wooden boards, you can use foam boards or PVC pipes. And instead of using expensive fabric, you can opt for burlap or muslin. With a bit of creativity, you can find inexpensive alternatives to almost any material.

Transform an Outdoor Space with a DIY Wedding Arch
If you’re planning an outdoor wedding, a DIY arch can be a great way to transform the space. Here are a few tips to help you get started:
Choose a Focal Point
When designing an outdoor arch, it’s important to choose a focal point. This could be a tree, fountain, or other natural feature. Place the arch near the focal point to draw attention to it. You can also use the focal point as part of the design, such as wrapping the arch around a tree or placing it in front of a fountain.
Match the Arch to Your Venue
When decorating your arch, make sure to match it to the overall theme of the event. If you’re getting married in a garden, you can incorporate lush greenery and brightly-colored flowers. If you’re having a beach wedding, you can opt for a nautical theme with rope and seashells. Choose materials and decorations that will blend in with the surrounding environment.
Incorporate Natural Elements
Finally, don’t forget to add natural elements to your arch. You can use branches, moss, or driftwood to give it an organic feel. Or, you can hang lanterns or string lights from the arch for a romantic touch. Incorporating natural elements is a great way to bring the outdoors indoors and make your arch truly unique.
Tips for Making a One-of-a-Kind Wedding Arch
If you’re looking to create a truly unique wedding arch, here are a few tips to help you get started:
Use Unique Materials
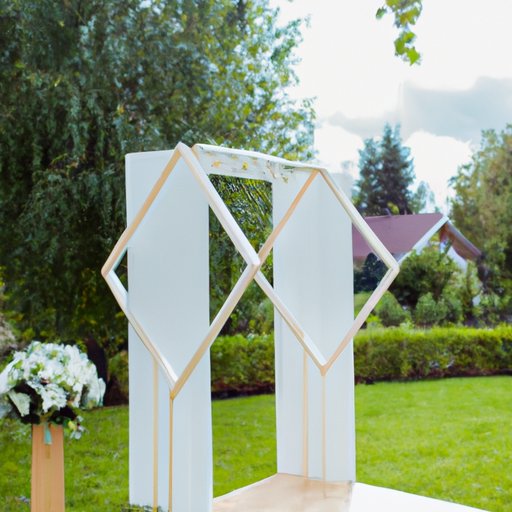
Instead of using standard materials like wood and fabric, why not think outside the box? Try incorporating unexpected materials, such as bamboo, paper, or even recycled objects. You can also use unusual shapes, such as hexagons or triangles, to give your arch a modern feel.
Incorporate Personalized Elements
Personalized elements are a great way to make your arch truly one-of-a-kind. You can use monograms, initials, or photos to add a personalized touch. You can also use the couple’s favorite colors or symbols to make the arch even more special.
Utilize Unexpected Colors and Textures
Don’t be afraid to play with colors and textures when designing your arch. Instead of sticking to muted shades, try mixing bright colors or bold patterns. You can also experiment with different fabrics, such as velvet or lace, to give the arch a luxurious feel. Have fun with it!
Designing and Constructing the Perfect Wedding Arch
Designing and constructing a wedding arch can seem intimidating, but it doesn’t have to be. With the right materials and a bit of creativity, you can create something truly special. Just remember to plan ahead and follow safety guidelines. Above all, have fun with it!
Conclusion
Creating a wedding arch can be a fun and rewarding experience. With the right materials and a bit of creativity, you can craft a stunning arch that will wow your guests. Whether you’re looking for a classic arch or a modern design, these tips will help you get started.