
Introduction
Teepee tents are a fun and unique way to camp outdoors. They offer plenty of space for a family or group of friends, and they can be easily set up and taken down in a matter of minutes. Whether you’re looking to build a traditional Native American style teepee or a more modern, contemporary version, this guide will walk you through the process from start to finish.
Overview of Teepee Tents
A teepee tent is a conical shaped shelter that is traditionally made of animal hide and wooden poles. The teepee was originally used by Native Americans for centuries as a mobile home and for ceremonial purposes. Today, modern teepee tents are made of canvas, nylon, or other synthetic materials and are used primarily for camping, festivals, and other outdoor events. They are popular for their spacious interior and easy setup.
Purpose of Article
This article provides step-by-step instructions on how to make your own teepee tent, whether it’s a traditional style or a modern version. We’ll go over the materials you need, the tools required, and the best methods for constructing a sturdy and long-lasting teepee. We’ll also discuss tips and tricks for making a teepee tent quickly and easily, as well as how to craft an authentic teepee tent from scratch using natural materials.
Step-by-Step Guide to Building a Teepee Tent
Building a teepee tent is not as difficult as it may seem, but there are several steps involved. Before you begin, you’ll need to decide what type of teepee tent you want to make – a traditional Native American style or a more modern version. Once you’ve decided, follow these steps to get started:
Choosing the Right Materials
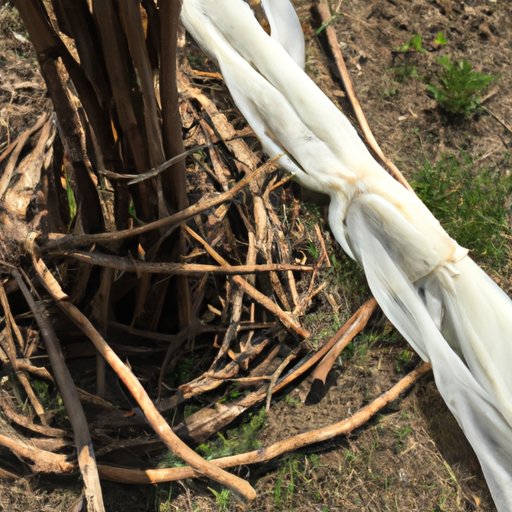
The first step in building a teepee tent is to choose the right materials. Traditional Native American teepees were made from animal hides, such as buffalo or deer hide, while modern versions are typically made from canvas or nylon. You’ll also need poles to construct the frame, which can be made of wood, metal, or plastic. For the cover, you’ll need enough fabric to wrap around the frame and secure it in place.
Assembling the Frame
Once you have all the materials you need, you can begin assembling the frame. Start by measuring and cutting the poles to the desired length. Then, attach the poles together at the top using rope or twine. Secure the poles in place with rope or stakes, and then add the groundsheet.
Covering the Frame
Next, you’ll need to cover the frame with the chosen material. Start by draping the fabric over the frame and securing it in place with rope or twine. Next, tie the cover to the poles to ensure a snug fit. Finally, create the door flap and add any decorative elements you desire.
Finishing Touches
Once you’ve finished assembling the frame and covering it with fabric, you can add the finishing touches. This includes adding a liner to the inside of the teepee, attaching ropes or straps to the outside of the teepee to help secure it in windy conditions, and adding any decorations or accessories.

How to Assemble a Teepee Tent in 10 Easy Steps
Here’s a step-by-step guide for assembling a modern teepee tent in 10 easy steps:
Step 1: Gather Supplies
Gather the necessary supplies, including poles, fabric, rope, groundsheet, liner, and any other materials or tools needed.
Step 2: Measure and Cut Poles
Measure and cut the poles to the desired length.
Step 3: Attach Poles Together
Attach the poles together at the top using rope or twine.
Step 4: Secure the Poles
Secure the poles in place with rope or stakes.
Step 5: Place the Groundsheet
Place the groundsheet inside the frame.
Step 6: Add the Cover
Drape the fabric over the frame and secure it in place with rope or twine.
Step 7: Tie the Cover to the Poles
Tie the cover to the poles to ensure a snug fit.
Step 8: Create the Door Flap
Create the door flap using fabric and rope.
Step 9: Add Decorative Elements
Add any decorative elements, such as ribbons, beads, or feathers.
Step 10: Test the Tent
Finally, test the tent to make sure it’s secure and stable.
Crafting an Authentic Teepee Tent from Scratch
If you’re looking to build a traditional Native American style teepee tent, you’ll need to gather natural materials and learn traditional techniques for constructing the frame and cover. Here’s what you’ll need:
Gathering Natural Materials
Start by gathering natural materials, such as animal hides, wood, and rope. You can use buffalo or deer hide for the cover, and wood for the poles.
Learning Native American Techniques
In order to construct a traditional teepee tent, you’ll need to learn the traditional techniques used by Native Americans. These include tying the poles together at the top, creating the door flap, and securing the cover to the frame.
Creating a Durable and Aesthetic Design
Once you’ve gathered the materials and learned the techniques, you can begin constructing the frame and cover. Take your time to make sure the design is both durable and aesthetically pleasing.

DIY: Make Your Own Teepee Tent Out of Natural Materials
If you’d like to make your own teepee tent out of natural materials, here’s a step-by-step guide:
Step 1: Gather Materials
Gather the necessary materials, such as animal hides, wood, and rope.
Step 2: Construct the Frame
Construct the frame using wood and rope.
Step 3: Sew the Canvas Cover
Sew the canvas cover using animal hides and rope.
Step 4: Install the Liner
Install the liner to the inside of the teepee.
Step 5: Secure the Cover
Secure the cover to the frame using rope or twine.
Step 6: Add Decorative Elements
Add any decorative elements, such as ribbons, beads, or feathers.

Tips and Tricks for Making a Teepee Tent Quickly and Easily
Here are some tips and tricks for making a teepee tent quickly and easily:
Utilize Pre-Made Kits
You can purchase pre-made kits that come with everything you need to assemble a teepee tent. This is a great option if you don’t have the time or resources to gather the materials yourself.
Follow Instructions Carefully
When assembling a teepee tent, make sure to follow the instructions carefully. This will ensure the tent is constructed properly and securely.
Choose the Right Location
Choose a level spot for your teepee tent and make sure it’s away from any hazards, such as trees or rocks.
Use Quality Materials
Make sure to use quality materials when constructing your teepee tent. This will ensure the tent is strong and durable.
Conclusion
Building a teepee tent is a fun and rewarding project that anyone can do. With the right materials and instructions, you can easily construct a traditional or modern style teepee tent in a matter of hours. Whether you’re looking to make a quick and easy setup or an authentic Native American style teepee, this guide has provided all the information you need to get started.
Summary of How to Make a Teepee Tent
To make a teepee tent, you’ll need to gather the necessary materials, such as poles, fabric, and rope. Then, assemble the frame, cover it with fabric, and add any decorative elements. Finally, test the tent to ensure it’s secure and stable.
Benefits of Building Your Own Teepee Tent
Building your own teepee tent offers many benefits, including saving money, learning new skills, and creating a unique and stylish camping experience.