
Introduction
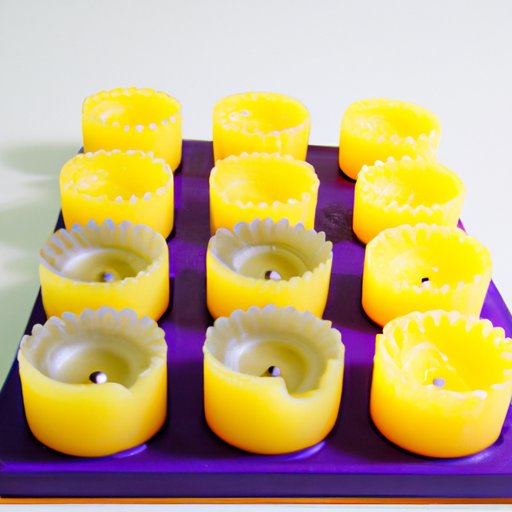
Making your own candle molds is a great way to customize your candles and create unique designs. Candle molds are used to shape and contain hot wax until it cools and hardens into a desired shape. They can be made from a variety of materials and come in all shapes and sizes. Making your own candle molds is an enjoyable and creative process that can be done in the comfort of your own home.
Step-by-Step Guide to Making a Candle Mold
Making a candle mold is a simple process that requires minimal materials and time. Here is a step-by-step guide to making your own candle mold:
Gather Materials
The first step is to gather the necessary materials. You will need wax, a mold, wick, and a heat source. If you don’t have a mold, you can use any type of heat-safe container or bowl as a substitute.
Create the Design
Once you have all of the materials, you can start creating the design of your candle. Use a pencil and paper to sketch out the shape of the candle and the design you want to create. This will help you visualize the final product before you start pouring the wax.
Prepare the Molds
Next, prepare the molds. If you are using a container or bowl, line the inside with aluminum foil or parchment paper to ensure the wax doesn’t stick to the sides. Then, secure the wick to the bottom of the container or bowl by tying it around a pencil or chopstick. This will ensure the wick stays in place when you pour the wax.
Pour the Wax
Now it’s time to pour the wax. Heat the wax in a double boiler or in a microwave until it is completely melted. Carefully pour the melted wax into the prepared molds, making sure to fill the entire container. Allow the wax to cool for at least one hour before attempting to remove it from the mold.
Cool and Remove the Mold
After the wax has cooled, carefully remove it from the mold. If you are using a container or bowl, you may need to cut away the foil or parchment paper to release the wax. Gently peel away the lining and then carefully pull the wax out of the mold. Allow the wax to cool completely before trimming the wick and adding any additional decorations.
The Basics of Creating a Candle Mold from Scratch
If you want to create a more intricate candle mold, you may need to make one from scratch. The basic steps for creating a homemade candle mold are as follows:
Choose the Right Materials
The first step is to choose the right materials for your candle mold. You will need some form of heat-safe material such as silicone, rubber, or clay. You will also need a container or box to hold the wax while it cools and hardens.
Measure and Cut the Materials
Once you have chosen the materials, measure and cut them to the desired size and shape. Make sure to leave enough room for the wax to expand as it cools and hardens.
Assemble the Mold
Finally, assemble the mold. Place the pieces together and make sure they fit snugly. Secure the pieces together with tape or glue if necessary. Once the mold is assembled, you are ready to pour the wax.

How to Choose the Right Materials for a Candle Mold
Choosing the right materials for your candle mold is essential for producing a high-quality product. Here are some things to consider when selecting materials for your candle mold:
Consider the Type of Wax
The type of wax you use will determine the type of materials you need for your mold. Some waxes require specific materials in order to hold their shape when cooled. Do some research on the type of wax you plan to use to determine the best materials for your mold.
Decide on the Shape and Size of the Mold
The shape and size of your mold will determine the type of materials you need. If you want a large or complex shape, you may need to use multiple pieces of material to create the desired shape. Consider the type of wax you are using and the size and shape of the finished product before selecting materials for your mold.
Pick the Right Container
Finally, pick the right container for your candle mold. Make sure the container is heat safe and able to withstand the temperatures of hot wax. Consider the size and shape of the container as well as its ability to contain the wax while it cools and hardens.

DIY Candle Molding: Tips and Tricks for a Perfect Mold
Creating your own candle mold can be a fun and rewarding experience. Here are some tips and tricks to help you get the perfect mold:
Use Heat Safe Containers
Make sure to use containers that are heat safe. This will prevent the wax from melting the container and leaking out during the cooling process.
Keep the Temperature Consistent
When heating the wax, make sure to keep the temperature consistent. If the temperature fluctuates too much, the wax may not cool evenly and the finished product may be distorted.
Make Sure the Mold is Sealed Tightly
Make sure the mold is sealed tightly before pouring the wax. This will prevent the wax from leaking out of the mold and ruining the finished product.
Crafting Your Own Candle Mold – A Beginner’s Guide
Making your own candle mold is a great way to express your creativity and customize your candles. Here are some tips for beginners who are just starting out:
Start with Simple Designs
When starting out, it’s best to begin with simple designs. This will help you get accustomed to the process and give you a better understanding of the materials and techniques involved.
Experiment with Different Materials
Experiment with different types of materials to find the ones that work best for you. Different materials will react differently when heated so it’s important to experiment and find the ones that work for you.
Have Fun and Enjoy the Process
Most importantly, have fun and enjoy the process. Don’t be afraid to make mistakes and don’t get discouraged if something doesn’t turn out the way you wanted it to. Remember that you are learning and experimenting so mistakes are part of the process.
Conclusion
Making your own candle molds is a fun and rewarding process that can be done at home with minimal materials and time. With the right materials and a little bit of patience, you can create beautiful and unique candles that can be enjoyed for years to come. From gathering the materials to crafting the perfect mold, this guide provides everything you need to know to get started on your next candle-making project.
Summary of How to Make a Candle Mold
Making a candle mold is a simple process that requires minimal materials and time. Gather the necessary materials, create the design, prepare the molds, pour the wax, and cool and remove the mold. To create a homemade candle mold, choose the right materials, measure and cut them to the desired size and shape, and assemble the mold. Finally, use heat safe containers, keep the temperature consistent, and make sure the mold is sealed tightly for a perfect mold.
Final Thoughts
Making your own candle molds is a great way to customize your candles and create unique designs. Whether you are creating a simple mold or a more intricate one from scratch, this guide provides everything you need to know to get started.