
Introduction
Jewelry is a precious and sentimental item that needs to be kept safe and secure. A jewelry box is the perfect way to store and organize all of your favorite pieces. Whether you’re looking for a simple wooden box or a more elaborate design, this article will provide step-by-step instructions on how to make a jewelry box of your own.
This article is written for craftspeople of any skill level who are interested in making their own jewelry box. It will cover how to make a jewelry box from scratch, assembling a jewelry box from a kit, crafting a custom jewelry box with scrap wood, upcycling an old cigar box into a jewelry box, creating a rustic jewelry box from reclaimed wood, and decorating a jewelry box with paint and embellishments.
Step-by-Step Guide to Making a Jewelry Box
Making a jewelry box from scratch requires some basic tools and materials. You’ll need a saw, drill, screws, glue, sandpaper, and whatever type of wood you’d like to use.
Gather Materials
First, gather all of the materials you’ll need to make your jewelry box. Depending on the type of box you want to make, you may need additional items such as hardware, foam inserts, or embellishments.
Cut Pieces
Once you have all of your materials together, it’s time to start cutting the pieces for your jewelry box. If you’re using a pre-made kit, the pieces should already be cut to size. Otherwise, you’ll need to measure and mark the wood before cutting it.
Assemble Pieces
Now it’s time to assemble the pieces of your jewelry box. Start by attaching the sides and bottom of the box. If you’re using a pre-made kit, the pieces should fit together easily. If you’re making the box from scratch, you may need to use screws or glue to hold the pieces in place.
Finish
Once the pieces of the box are assembled, it’s time to finish the project. Sand down any rough edges and apply a coat of paint or stain. If you’re using a pre-made kit, the pieces should already be finished.

DIY Jewelry Box: How to Make Your Own
Making a jewelry box from scratch is an easy and rewarding DIY project. All you need is some basic tools and materials, and you can create a beautiful and unique box for your jewelry. Here’s how to do it.
Choose Type of Wood
The first step is to choose the type of wood you’d like to use for your jewelry box. You can use anything from pine to cherry, depending on the look you’re going for. Pine is a good choice for a beginner, as it’s inexpensive and easy to work with.
Measure and Cut Pieces
Next, measure and mark the wood according to the dimensions of your jewelry box. Cut the pieces with a saw and sand down any rough edges.
Assemble Box
Once the pieces are cut, it’s time to assemble the box. Use screws or glue to attach the sides and bottom of the box. For a sturdier box, you may want to use corner braces or other hardware.
Finish
Finally, finish off the box with a coat of paint or stain. You can also add embellishments such as handles, hinges, or decorative trim to give the box a personalized touch.
How to Assemble a Jewelry Box from a Kit
If you don’t want to make a jewelry box from scratch, you can purchase a pre-made kit. These kits come with all of the pieces and hardware you need to assemble the box. Here’s how to put one together.
Gather Supplies
Gather all of the supplies you’ll need to assemble the jewelry box. The kit should include all of the pieces, hardware, and instructions you need.
Assemble Pieces as Instructed
Follow the instructions included with the kit to assemble the pieces of the box. Be sure to read through the instructions carefully before starting.
Attach Hardware
Once the pieces are assembled, attach the hardware such as hinges, handles, and locks. Again, follow the instructions included with the kit for best results.
Finish
Finally, finish off the box with a coat of paint or stain. You can also add embellishments such as decorative trim to give the box a personal touch.

Crafting a Custom Jewelry Box with Scrap Wood
If you have some scrap wood lying around, you can use it to make a custom jewelry box. This is a great way to repurpose wood that would otherwise go to waste. Here’s how to do it.
Gather Supplies
Gather all of the supplies you’ll need to make the jewelry box. You’ll need a saw, drill, screws, glue, sandpaper, and whatever type of wood you’d like to use.
Design the Box
Before you start cutting the wood, take some time to design the box. Sketch out the size and shape of the box on paper, and determine how many pieces you’ll need and how they’ll fit together.
Cut Pieces
Once you’ve designed the box, it’s time to start cutting the pieces. Measure and mark the wood before cutting it with a saw. Sand down any rough edges.
Assemble
Now it’s time to assemble the pieces of the box. Use screws or glue to attach the sides and bottom of the box. For a sturdier box, you may want to use corner braces or other hardware.
Finish
Finally, finish off the box with a coat of paint or stain. You can also add embellishments such as handles, hinges, or decorative trim to give the box a personalized touch.

Upcycling an Old Cigar Box into a Jewelry Box
Old cigar boxes make great jewelry boxes! They’re sturdy, attractive, and often made from high-quality wood. Here’s how to turn an old cigar box into a beautiful jewelry box.
Gather Supplies
Gather all of the supplies you’ll need to upcycle the cigar box. You’ll need foam inserts, glue, and any embellishments you want to add.
Clean and Prepare the Box
Before you start working on the box, it’s important to clean and prepare it. Use a damp cloth to remove any dust or debris, then let the box dry completely.
Add Foam Inserts
To make the box more functional, add foam inserts to the interior. Measure and cut the foam to fit the box, then glue it in place.
Finish
Finally, finish off the box with a coat of paint or stain. You can also add embellishments such as handles, hinges, or decorative trim to give the box a personalized touch.
Creating a Rustic Jewelry Box from Reclaimed Wood
Reclaimed wood is a great material to use for making a rustic jewelry box. It’s easy to find, environmentally friendly, and often very affordable. Here’s how to create a rustic jewelry box from reclaimed wood.
Find Reclaimed Wood
Start by finding some reclaimed wood. You can find it at salvage yards, construction sites, or online. Look for pieces that are sturdy and free of rot or damage.
Measure and Cut Pieces
Once you’ve found the wood you’d like to use, measure and mark it according to the dimensions of your jewelry box. Cut the pieces with a saw and sand down any rough edges.
Assemble Box
Now it’s time to assemble the box. Use screws or glue to attach the sides and bottom of the box. For a sturdier box, you may want to use corner braces or other hardware.
Finish
Finally, finish off the box with a coat of paint or stain. You can also add embellishments such as handles, hinges, or decorative trim to give the box a personalized touch.
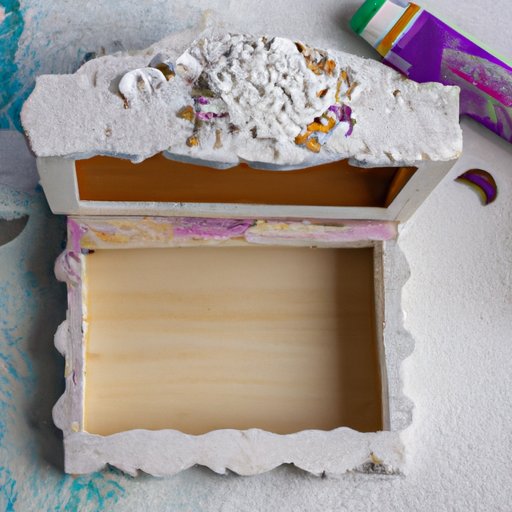
Decorating a Jewelry Box with Paint and Embellishments
Adding paint and embellishments to a jewelry box is a great way to customize it and make it unique. Here’s how to do it.
Gather Supplies
Gather all of the supplies you’ll need to decorate the jewelry box. You’ll need paint, brushes, embellishments, and any other items you’d like to use.
Paint or Stain Jewelry Box
Start by painting or staining the jewelry box. Choose a color that complements the wood or adds a pop of color. Allow the paint or stain to dry completely before moving on to the next step.
Add Embellishments
Once the paint or stain is dry, it’s time to add embellishments. You can use stickers, decals, or other decorative items to give the box a personalized touch.
Seal
Finally, seal the box with a coat of polyurethane to protect it from wear and tear. Allow the polyurethane to dry completely before using the box.
Conclusion
Making a jewelry box is a fun and rewarding project. Whether you’re making a jewelry box from scratch, assembling one from a kit, crafting a custom jewelry box with scrap wood, upcycling an old cigar box, creating a rustic jewelry box from reclaimed wood, or decorating a jewelry box with paint and embellishments, this article has provided step-by-step instructions to help you along the way.