
Introduction
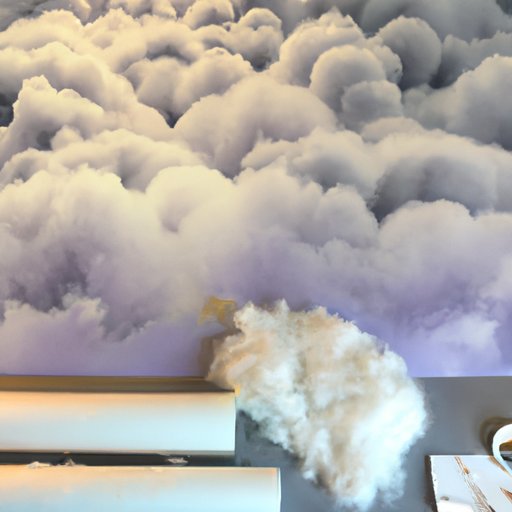
A cloud ceiling is an increasingly popular design element that can add style and visual interest to any space. It creates a soft, dreamy atmosphere and can be used to create a variety of looks and effects. Many people have encountered the challenge of making a cloud ceiling in their home and are looking for guidance. This article aims to help readers solve the problem by providing step-by-step instructions, a DIY tutorial, tips and tricks, supplies and tools needed, and ways to achieve different looks with a cloud ceiling.
Step-by-Step Guide to Making a Cloud Ceiling
Creating a cloud ceiling involves several steps, from gathering supplies and tools to preparing the room and ceiling and adding details and finishing touches. The following is a step-by-step guide to making a cloud ceiling.
Step 1: Gather Supplies and Tools Needed
Before beginning the project, it’s important to make sure you have all the necessary supplies and tools on hand. You’ll need items such as foam core, adhesive spray, fabric, scissors, tape measure, ruler, pencil, and a utility knife.
Step 2: Prepare the Room and Ceiling
The next step is to prepare the room and ceiling for the cloud installation. Start by removing any furniture or other objects from the room, as well as any existing ceiling fixtures. Clean the ceiling thoroughly to get rid of any dirt or dust. Once the room and ceiling are ready, you can begin creating the base layer of clouds.
Step 3: Create the Base Layer of Clouds
Using your foam core, cut out several cloud shapes in varying sizes. Then, using the adhesive spray, attach the foam core clouds to the ceiling. Make sure to leave some space between each cloud so that you have room to add detail later on.
Step 4: Add Details and Finishing Touches
Once the base layer of clouds is in place, you can start adding details and finishing touches. To do this, cut out pieces of fabric in various sizes and shapes to fit over the foam core clouds. Secure the fabric to the foam core with adhesive spray. You can also use other materials such as yarn or ribbon to create more texture and depth. Finally, use a ruler and pencil to draw outlines around the edges of the clouds, giving them a more finished look.
Easy DIY Tutorial
If you’re looking for a simple way to create a cloud ceiling without having to invest in expensive supplies and tools, then this easy DIY tutorial is for you. All you need is some fabric, scissors, tape measure, and thread. First, measure the dimensions of the room and calculate how many clouds you will need. Cut out the clouds from the fabric, making sure that they are evenly spaced apart. Sew the clouds together using thread. Finally, hang the clouds from the ceiling with nails or hooks.
To ensure success with this DIY tutorial, here are some tips and tricks to keep in mind: make sure to use the right type of fabric in order to achieve the desired effect; be sure to measure and cut the clouds accurately; and when sewing the clouds together, make sure to use a strong thread that won’t break easily.
Supplies and Tools Needed
In addition to the materials mentioned above, here is a list of additional supplies and tools needed to create a cloud ceiling:
- Foam core
- Adhesive spray
- Fabric
- Scissors
- Tape measure
- Ruler
- Pencil
- Utility knife
- Thread
- Nails or hooks
When selecting the materials for your cloud ceiling, it’s important to choose the right types. For example, use a lightweight fabric that won’t be too bulky or heavy, and make sure that the foam core is thick enough to support the fabric. Additionally, make sure to buy enough material to cover the entire ceiling.
Achieving Different Looks with a Cloud Ceiling
One of the great things about a cloud ceiling is that it can be used to create a variety of different looks. Here are some ideas for achieving different looks with a cloud ceiling:
Color Options
Choose colors that match the overall design of the space. For a bright, airy look, opt for light shades of blue, pink, or yellow. For a darker, moodier look, go for darker shades such as navy or black. You can also mix and match colors for a more eclectic look.
Layering Techniques
Create depth and texture by layering different fabrics and materials. For example, try layering felt over chiffon or tulle over cotton. Experiment with different textures and patterns to create a unique look.
Adding Special Effects
To add a little something extra to your cloud ceiling, try adding special effects such as twinkle lights, glitter, or even glow-in-the-dark paint. These small touches can really bring your cloud ceiling to life.

Benefits of Having a Cloud Ceiling
Having a cloud ceiling has numerous benefits. Not only does it provide a sense of visual appeal, but it also creates a feeling of comfort and can be used as a canvas for creative expression. Here are some of the key benefits of having a cloud ceiling:
Visual Appeal
A cloud ceiling adds a unique touch to any space. It can be used to create a whimsical, dreamy atmosphere, which is sure to wow any guests. With the right colors, materials, and techniques, you can create a one-of-a-kind look that will be the envy of all who see it.
Feeling of Comfort
The soft, fluffy texture of a cloud ceiling can create a feeling of comfort and relaxation, making it the perfect addition to a bedroom or living space. The gentle curves and lines of the clouds can also provide a calming effect, helping to reduce stress and anxiety.
Creative Expression
A cloud ceiling provides a blank canvas for creative expression. With the right materials and techniques, you can create a unique and personalized look that reflects your individual style. Whether you opt for a subtle, monochromatic look or a bright and vibrant one, the possibilities are endless.

Showcase of Beautiful Cloud Ceilings
For some inspiration, here are some examples of beautiful cloud ceilings:
- This blue and white cloud ceiling is made with soft fabrics and twinkle lights, creating a serene atmosphere.
- This modern cloud ceiling features bold colors and geometric shapes, creating a unique and eye-catching look.
- This rustic cloud ceiling is made with natural materials such as wood and burlap, evoking a cozy cabin-like feel.
These are just a few examples of the many beautiful cloud ceilings that can be created. With the right materials and techniques, you can create a one-of-a-kind look that will transform any space.
Conclusion
Creating a cloud ceiling is a fun and rewarding project that can take any room from drab to fab. From gathering supplies and tools to preparing the room and ceiling and adding details and finishing touches, there are many steps involved in creating a cloud ceiling. This article has provided a step-by-step guide, a DIY tutorial, supplies and tools needed, and ways to achieve different looks with a cloud ceiling. Additionally, the benefits of having a cloud ceiling and a showcase of beautiful cloud ceilings were discussed. With these tips and tricks, you’ll be able to create a stunning cloud ceiling in no time.
For further information and resources, please visit the following links: