
Introduction
A bean bag is an incredibly versatile piece of furniture that can add a splash of color, texture, and comfort to any room. Its malleable shape makes it perfect for lounging, while its lightweight design and compact size make it easy to move around or store away when not in use. Whether you’re looking to make a statement with a vibrant patterned fabric or create a cozy spot to relax, making your own bean bag is a great way to create something unique.

Overview of the Bean Bag
Bean bags are filled with polystyrene beads, which provide cushioning and support. The outer fabric is usually made of cotton, vinyl, or another durable material. While most bean bags are round, some come in other shapes such as squares, rectangles, or even hearts. They can be used as standalone pieces or as part of a larger seating arrangement. Bean bags come in a variety of sizes, so you can choose one that fits your space.

Benefits of Making Your Own Bean Bag
Making your own bean bag has several advantages. You can choose the fabric and color that best reflects your style. You can also customize the size and shape of the bean bag to fit the dimensions of your living space. And, of course, there’s the satisfaction of creating something yourself.
Step-by-Step Tutorial on Sewing a Bean Bag
Creating a bean bag from scratch requires basic sewing skills. Here’s a step-by-step tutorial on how to sew a bean bag.
Gather Materials
You will need: fabric (1 yard), polystyrene beads (enough to fill the bean bag), thread, scissors, pins, measuring tape, needle, and sewing machine.
Cut and Pin Fabric
Measure and cut two pieces of fabric for the top and bottom of the bean bag. Pin the two pieces together, right side facing out. Cut a third piece of fabric for the sides of the bean bag. Pin the side fabric to the top and bottom pieces, right side facing out.
Sew the Pieces Together
Using a sewing machine, sew a 1/2 inch seam allowance around the entire perimeter of the fabric. Leave a 6-inch opening at the center of the bottom of the bean bag so you can fill it with polystyrene beads.
Stuff and Close the Bean Bag
Fill the bean bag with polystyrene beads. Once filled, hand stitch the opening closed. Turn the bean bag right side out, and you’re done!
How to Make a No-Sew Bean Bag
If you don’t want to sew a bean bag, you can assemble one without using a needle and thread. Here’s how.
Gather Materials
You will need: fabric (2 yards), polystyrene beads (enough to fill the bean bag), scissors, pins, measuring tape, and glue gun.
Assemble the Bean Bag
Measure and cut four rectangular pieces of fabric for the top and bottom of the bean bag, and two rectangular pieces for the sides. Place the top and bottom pieces together and pin them. Place the side pieces on top of the top and bottom pieces and pin them. Glue the pieces together using a glue gun.
Stuff and Close the Bean Bag
Fill the bean bag with polystyrene beads. Once filled, glue the opening closed. Turn the bean bag right side out, and you’re done!
DIY Bean Bag Chair: A Beginner’s Guide
Making a bean bag chair is a great way to create a comfortable seating option for your home. Here’s a beginner’s guide to creating a DIY bean bag chair.
Gather Materials
You will need: fabric (2 yards), polystyrene beads (enough to fill the bean bag), scissors, pins, measuring tape, foam board, batting, and upholstery staples.
Assemble the Chair Frame
Measure and cut two pieces of foam board for the seat and back of the chair. Cover the foam boards with batting and staple it in place. Cover the batting with fabric and staple it in place.
Attach the Seat and Back
Attach the seat and back pieces to each other with upholstery staples. Measure and cut two pieces of fabric for the sides of the chair. Pin the side pieces to the seat and back pieces and sew them together.
Stuff and Close the Bean Bag
Fill the bean bag with polystyrene beads. Once filled, hand stitch the opening closed. Turn the bean bag right side out, and you’re done!
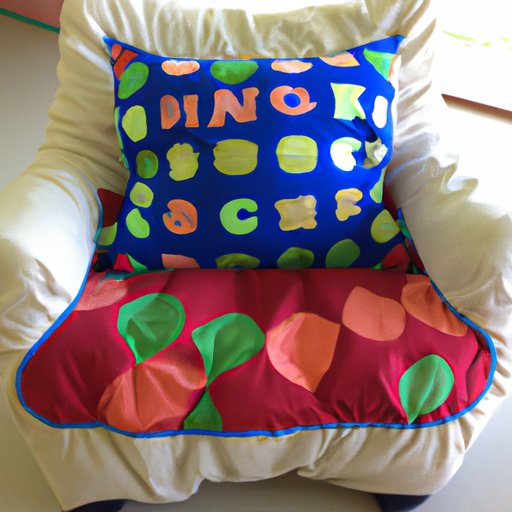
Crafting a Personalized Bean Bag for Kids
Personalizing a bean bag for kids is a great way to make something special and unique. Here’s how to craft a personalized bean bag for kids.
Gather Materials
You will need: fabric (1 yard), polystyrene beads (enough to fill the bean bag), thread, scissors, pins, measuring tape, needle, buttons, and decorative trim.
Measure and Cut Fabric
Measure and cut two pieces of fabric for the top and bottom of the bean bag. Pin the two pieces together, right side facing out. Cut a third piece of fabric for the sides of the bean bag. Pin the side fabric to the top and bottom pieces, right side facing out.
Decorate the Bean Bag
Add buttons, decorative trim, or other embellishments to the outside of the bean bag. This can be done before or after sewing the pieces together.
Sew or Assemble the Bean Bag
Using a sewing machine, sew a 1/2 inch seam allowance around the entire perimeter of the fabric. Leave a 6-inch opening at the center of the bottom of the bean bag so you can fill it with polystyrene beads. Alternatively, you can use a glue gun to assemble the bean bag.
Stuff and Close the Bean Bag
Fill the bean bag with polystyrene beads. Once filled, hand stitch the opening closed. Turn the bean bag right side out, and you’re done!

Creating a Customized Bean Bag with Repurposed Materials
If you’re looking for an eco-friendly option, you can make a bean bag using repurposed materials. Here’s how.
Gather Materials
You will need: fabric scraps (1 yard), polystyrene beads (enough to fill the bean bag), thread, scissors, pins, measuring tape, needle, old clothes, and old blankets.
Cut and Assemble Pieces
Measure and cut two pieces of fabric for the top and bottom of the bean bag. Pin the two pieces together, right side facing out. Cut a third piece of fabric for the sides of the bean bag. Pin the side fabric to the top and bottom pieces, right side facing out. Use pieces of old clothes or blankets to decorate the outside of the bean bag.
Stuff and Close the Bean Bag
Fill the bean bag with polystyrene beads. Once filled, hand stitch the opening closed. Turn the bean bag right side out, and you’re done!
Crafting an Eco-Friendly Bean Bag from Recycled Materials
You can also make an eco-friendly bean bag from recycled materials. Here’s how.
Gather Materials
You will need: fabric scraps (1 yard), polystyrene beads (enough to fill the bean bag), thread, scissors, pins, measuring tape, needle, and plastic bottles.
Cut and Assemble Pieces
Measure and cut two pieces of fabric for the top and bottom of the bean bag. Pin the two pieces together, right side facing out. Cut a third piece of fabric for the sides of the bean bag. Pin the side fabric to the top and bottom pieces, right side facing out. Use pieces of plastic bottles to decorate the outside of the bean bag.
Stuff and Close the Bean Bag
Fill the bean bag with polystyrene beads. Once filled, hand stitch the opening closed. Turn the bean bag right side out, and you’re done!
Conclusion
Making a bean bag is a fun and creative way to add a unique piece of furniture to your home. With a few simple tools and materials, you can create a bean bag that’s perfect for your space. Whether you choose to sew, assemble, or customize your bean bag, the possibilities are endless.