
Introduction
Lowering a bike seat is an important part of ensuring that you have the right fit for your riding style. The correct seat height can help prevent injury and make cycling much more comfortable. This article will provide an overview of the process of lowering a bike seat and offer step-by-step instructions on how to do it.
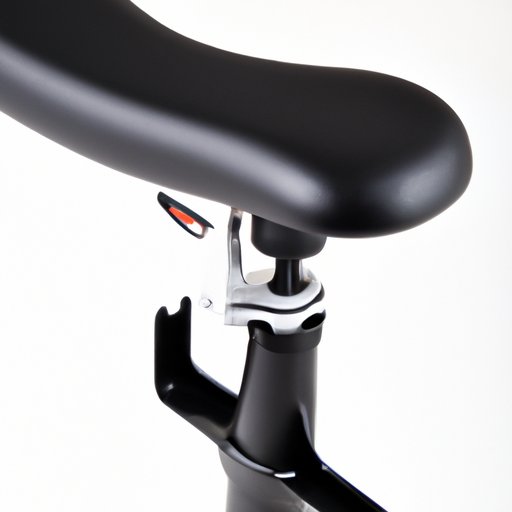
Adjust the Height of Your Bike Seat with an Allen Key
One of the simplest ways to lower a bike seat is by using an Allen key. You will need an Allen key that is compatible with the size of bolt at the top of your seat post. Here’s what you will need to get started:
- Allen key
- Socket wrench
- Measuring tape
Here’s the step-by-step process for adjusting the height of your bike seat with an Allen key:
- Measure the distance from the middle of the seat post to the ground. This is the starting point for your adjustment.
- Loosen the bolt at the top of the seat post with the Allen key. Do not remove it completely.
- Using a socket wrench, slowly rotate the seat post until it reaches the desired height.
- Tighten the bolt back into place.

Loosen the Seat Post Clamp and Slide the Seat Down
If you don’t have an Allen key or a socket wrench, you can still adjust the height of your bike seat by loosening the seat post clamp and sliding the seat down. Here’s what you will need to get started:
- Screwdriver
- Measuring tape
Here’s the step-by-step process for loosening the seat post clamp and sliding the seat down:
- Measure the distance from the middle of the seat post to the ground. This is the starting point for your adjustment.
- Loosen the screws on the seat post clamp with a screwdriver.
- Carefully slide the seat down until it reaches the desired height.
- Tighten the screws back into place.
Replace the Longer Seat Post with a Shorter One
If you want to lower your bike seat significantly, you may need to replace the longer seat post with a shorter one. Here’s what you will need to get started:
- New seat post
- Allen key
- Seat post clamp
- Socket wrench
- Measuring tape
Here’s the step-by-step process for replacing the longer seat post with a shorter one:
- Measure the distance from the middle of the seat post to the ground. This is the starting point for your adjustment.
- Remove the existing seat post with an Allen key.
- Install the new seat post into the frame and secure it with the seat post clamp.
- Using a socket wrench, slowly rotate the seat post until it reaches the desired height.
- Tighten the bolt back into place.
Use a Bicycle Seatpost Clamp with a Quick-Release Lever
If your bike has a seatpost clamp with a quick-release lever, you can easily adjust the height of your bike seat without any tools. Here’s what you will need to get started:
- Quick-release lever
- Measuring tape
Here’s the step-by-step process for using a bicycle seatpost clamp with a quick-release lever:
- Measure the distance from the middle of the seat post to the ground. This is the starting point for your adjustment.
- Unscrew the quick-release lever until it is loose enough to allow the seat post to move freely.
- Carefully slide the seat down until it reaches the desired height.
- Tighten the quick-release lever back into place.

Take Apart the Bicycle Seat and Reinstall it at a Lower Height
If you want to lower your bike seat even further, you may need to take apart the bicycle seat and reinstall it at a lower height. Here’s what you will need to get started:
- Flathead screwdriver
- Phillips screwdriver
- Measuring tape
Here’s the step-by-step process for taking apart the bicycle seat and reinstalling it at a lower height:
- Measure the distance from the middle of the seat post to the ground. This is the starting point for your adjustment.
- Remove the screws from the underside of the seat with a flathead or Phillips screwdriver.
- Carefully take apart the seat and remove the padding.
- Reinstall the seat at the desired height and reassemble it.
- Tighten the screws back into place.

Get a Different Saddle That Can Be Adjusted to a Lower Height
If you find that none of the above methods are working for you, then you may want to consider getting a different saddle that can be adjusted to a lower height. Here’s what you will need to get started:
- New saddle
- Allen key
- Seat post clamp
- Socket wrench
- Measuring tape
Here’s the step-by-step process for getting a different saddle that can be adjusted to a lower height:
- Measure the distance from the middle of the seat post to the ground. This is the starting point for your adjustment.
- Remove the existing seat with an Allen key.
- Install the new saddle into the frame and secure it with the seat post clamp.
- Using a socket wrench, slowly rotate the seat post until it reaches the desired height.
- Tighten the bolt back into place.
Conclusion
Lowering a bike seat is an important part of ensuring that you have the right fit for your riding style. With the right tools and a bit of patience, you can easily adjust the height of your bike seat to get the perfect fit. Remember to always measure the distance from the middle of the seat post to the ground before making any adjustments.
Finally, here are some tips for getting the perfect height for your bike seat:
- Make sure your legs are almost fully extended when pedaling.
- Your hips should stay level when pedaling.
- Your heels should not hit the pedals when pedaling.
- There should be a slight bend in your knee when the pedal is at its lowest point.