
Introduction
Are you looking to upgrade your bathroom? Installing bathroom wall tile is a great way to add style and character to your space. With the right materials and tools, you can easily transform your bathroom with beautiful tile. In this article, we’ll explore the benefits of installing bathroom wall tile and provide a comprehensive guide to help you get started.

Overview of Installing Bathroom Wall Tile
Installing bathroom wall tile is a relatively simple process, but it does require some preparation and planning. You’ll need to measure the area, buy the right materials, and make sure you have the right tools. Once you’ve done all of that, you’ll be ready to start laying your tile. Here’s a quick overview of the steps involved in installing bathroom wall tile:
- Preparing the area
- Measuring and cutting the tile
- Applying adhesive and laying the tile
- Grouting the tile
Benefits of Installing Bathroom Wall Tile
Installing bathroom wall tile has many benefits. It’s a great way to add a touch of style and elegance to your bathroom. Tile is also easy to clean and maintain, making it an ideal choice for bathrooms. Additionally, tile is waterproof and resistant to mold and mildew, so it’s perfect for high-moisture environments like bathrooms. Finally, tile is durable and can last for years with proper care and maintenance.
Step-by-Step Guide to Installing Bathroom Wall Tile
Ready to get started? Here’s a step-by-step guide to installing bathroom wall tile. Follow these steps to ensure a successful installation.
1. Preparing the Area
Before you can start installing bathroom wall tile, you’ll need to prepare the area. Make sure the wall is clean and free of any dirt or debris. If necessary, use a damp cloth to wipe down the wall. Then, measure the area to determine how much tile you’ll need. Once you have the measurements, you can purchase the appropriate amount of tile.
2. Measuring and Cutting the Tile
Once you have the tile, you’ll need to measure and cut it to fit the area. Make sure to leave enough room for grout and expansion joints. Use a measuring tape and a pencil to mark the tile before you begin cutting. You can use a wet saw to make the cuts, or you can use a tile nipper for smaller cuts.
3. Applying Adhesive and Laying the Tile
Now that you’ve measured and cut the tile, it’s time to apply the adhesive and lay the tile. Apply a thin layer of adhesive to the wall using a notched trowel. Then, starting from the bottom, press the tiles into the adhesive. Make sure to leave enough space between the tiles for grout. Once you’ve laid all the tiles, let the adhesive set according to the manufacturer’s instructions.
4. Grouting the Tile
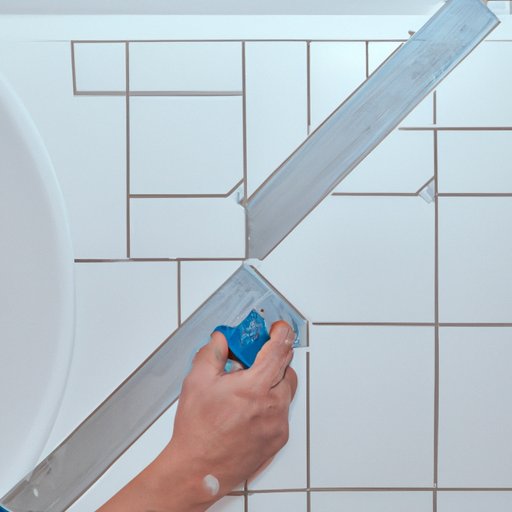
Once the adhesive has set, you can begin grouting the tile. Start by mixing the grout according to the manufacturer’s instructions. Then, use a rubber float to apply the grout to the spaces between the tiles. Make sure to work the grout into the gaps and remove any excess. Finally, let the grout dry according to the manufacturer’s instructions.
DIY Tutorial: A Beginner’s Guide to Installing Bathroom Wall Tile
If you’re a beginner, here’s a helpful tutorial to get you started. This tutorial will walk you through the basics of installing bathroom wall tile.
1. Gather Materials and Tools
The first step is to gather the materials and tools you’ll need for the job. You’ll need tile, adhesive, grout, a wet saw, a tile nipper, a measuring tape, a pencil, a notched trowel, and a rubber float. Once you have all of your materials and tools, you’re ready to begin.
2. Measure and Cut the Tile
Next, you’ll need to measure and cut the tile. Use a measuring tape and a pencil to mark the tile before you begin cutting. You can use a wet saw to make the cuts, or you can use a tile nipper for smaller cuts.
3. Apply Adhesive and Lay the Tile
Now that you’ve measured and cut the tile, it’s time to apply the adhesive and lay the tile. Apply a thin layer of adhesive to the wall using a notched trowel. Then, starting from the bottom, press the tiles into the adhesive. Make sure to leave enough space between the tiles for grout.
4. Grout the Tile
Once you’ve laid all the tiles, it’s time to grout the tile. Start by mixing the grout according to the manufacturer’s instructions. Then, use a rubber float to apply the grout to the spaces between the tiles. Make sure to work the grout into the gaps and remove any excess. Finally, let the grout dry according to the manufacturer’s instructions.

How To: Installing Bathroom Wall Tile in 7 Easy Steps
Here’s an easy-to-follow guide to installing bathroom wall tile in seven easy steps.
1. Prepare the Area
Before you can start installing bathroom wall tile, you’ll need to prepare the area. Make sure the wall is clean and free of any dirt or debris. If necessary, use a damp cloth to wipe down the wall. Then, measure the area to determine how much tile you’ll need. Once you have the measurements, you can purchase the appropriate amount of tile.
2. Measure and Cut the Tile
Once you have the tile, you’ll need to measure and cut it to fit the area. Make sure to leave enough room for grout and expansion joints. Use a measuring tape and a pencil to mark the tile before you begin cutting. You can use a wet saw to make the cuts, or you can use a tile nipper for smaller cuts.
3. Apply Adhesive and Lay the Tile
Now that you’ve measured and cut the tile, it’s time to apply the adhesive and lay the tile. Apply a thin layer of adhesive to the wall using a notched trowel. Then, starting from the bottom, press the tiles into the adhesive. Make sure to leave enough space between the tiles for grout.
4. Let the Adhesive Set
Once you’ve laid all the tiles, let the adhesive set according to the manufacturer’s instructions.
5. Grout the Tile
Once the adhesive has set, you can begin grouting the tile. Start by mixing the grout according to the manufacturer’s instructions. Then, use a rubber float to apply the grout to the spaces between the tiles. Make sure to work the grout into the gaps and remove any excess. Finally, let the grout dry according to the manufacturer’s instructions.
6. Let the Grout Dry
Once the grout has dried, you can begin to clean up any excess grout or adhesive. Use a damp cloth to wipe down the tiles and remove any residue.
7. Clean Up
Finally, you’re ready to finish up. Clean up any remaining debris and make sure all the tiles are secure. Your bathroom wall tile is now installed!

Essential Tools and Tips for Installing Bathroom Wall Tile
Here are some essential tools and tips to keep in mind when installing bathroom wall tile.
Tools
You’ll need a few essential tools to get the job done. These include a wet saw, a tile nipper, a measuring tape, a pencil, a notched trowel, and a rubber float. Make sure you have all of these tools on hand before you begin.
Tips
- Make sure to measure the area carefully before purchasing tile.
- Use a wet saw to make clean, straight cuts.
- Apply a thin layer of adhesive to the wall using a notched trowel.
- Work the grout into the gaps and remove any excess.
- Clean up any remaining debris and make sure all the tiles are secure.
Installing Bathroom Wall Tile Like a Pro: A Comprehensive Guide
If you’re looking for a more comprehensive guide to installing bathroom wall tile, here it is. This guide will walk you through the entire process, from beginning to end.
1. Preparing the Area
Before you can start installing bathroom wall tile, you’ll need to prepare the area. Make sure the wall is clean and free of any dirt or debris. If necessary, use a damp cloth to wipe down the wall. Then, measure the area to determine how much tile you’ll need. Once you have the measurements, you can purchase the appropriate amount of tile.
2. Measuring and Cutting the Tile
Once you have the tile, you’ll need to measure and cut it to fit the area. Make sure to leave enough room for grout and expansion joints. Use a measuring tape and a pencil to mark the tile before you begin cutting. You can use a wet saw to make the cuts, or you can use a tile nipper for smaller cuts.
3. Applying Adhesive and Laying the Tile
Now that you’ve measured and cut the tile, it’s time to apply the adhesive and lay the tile. Apply a thin layer of adhesive to the wall using a notched trowel. Then, starting from the bottom, press the tiles into the adhesive. Make sure to leave enough space between the tiles for grout. Once you’ve laid all the tiles, let the adhesive set according to the manufacturer’s instructions.
4. Grouting the Tile
Once the adhesive has set, you can begin grouting the tile. Start by mixing the grout according to the manufacturer’s instructions. Then, use a rubber float to apply the grout to the spaces between the tiles. Make sure to work the grout into the gaps and remove any excess. Finally, let the grout dry according to the manufacturer’s instructions.
5. Finishing Touches
Once the grout has dried, you can begin to clean up any excess grout or adhesive. Use a damp cloth to wipe down the tiles and remove any residue. Finally, check to make sure all the tiles are secure and there are no gaps or cracks. Your bathroom wall tile is now installed!
Conclusion
Installing bathroom wall tile is a great way to upgrade your bathroom. With the right materials and tools, you can easily transform your bathroom with beautiful tile. This article provided a comprehensive guide to installing bathroom wall tile, from preparing the area to finishing touches. We also discussed the benefits of installing bathroom wall tile, essential tools and tips, and DIY tutorials. Now you’re ready to get started on your own bathroom wall tile project!