
Introduction
A bathroom vent is an essential component to any bathroom. Not only does it help keep the air in the room fresh, but it also prevents mold and mildew from forming due to moisture buildup. Installing a bathroom vent can be a daunting task, but with the right steps and materials, anyone can do it. This article will provide a step-by-step guide to help you with installing a bathroom vent, as well as some DIY tips and troubleshooting advice to ensure a successful installation.
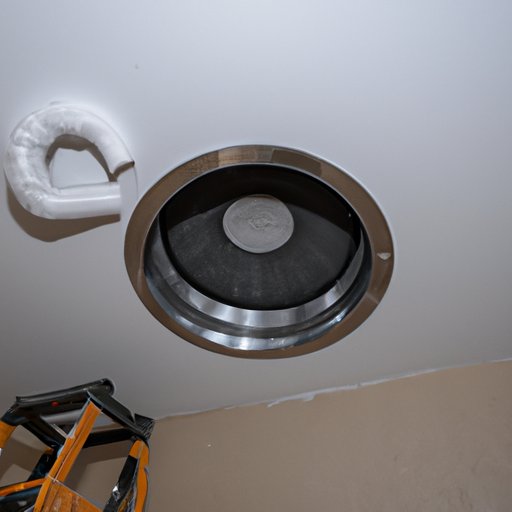
Step-by-Step Guide to Installing a Bathroom Vent
The first step to installing a bathroom vent is to prepare the area for installation. This includes removing any existing vents, cleaning the area, and ensuring that the area is dry. Once the area is ready, you can begin the installation process.
The next step is to install the vent fan. Put the fan in place and secure it with screws. Make sure that the fan is level so that it runs correctly. Connect the fan to the power source and turn it on to make sure it works properly.
Once the fan is installed and running, the next step is to connect it to the ductwork. Measure the space between the fan and the ductwork, then cut the ductwork to fit. Use foil tape to seal the joints and make sure there are no gaps or leaks. Connect the fan to the ductwork and secure the connection with clamps.
The final step is to test the fan and adjust it as necessary. Turn the fan on and check for proper air circulation. If the fan is too loud or if the air flow is inadequate, make adjustments to the fan speed and airflow settings to fix the problem.
DIY Tips for Installing a Bathroom Vent
When installing a bathroom vent, it’s important to choose the right size fan for your space. A fan that is too small won’t be able to move enough air, while a fan that is too large can cause excessive noise. Make sure you know the measurements of the space before purchasing a fan.
It’s also important to use the proper tools and materials when installing a bathroom vent. Make sure you have all the necessary tools and materials before starting the installation process. This includes a drill, screwdriver, foil tape, clamps, and a vent fan.
Finally, make sure you wear the proper protective gear when installing a bathroom vent. This includes safety glasses, gloves, and a dust mask. These items will protect you from any debris or dust that may be generated during the installation process.
A Beginner’s Guide to Installing a Bathroom Vent
If you’re new to installing bathroom vents, it’s important to understand the basics of the process. The first step is to measure and mark the area where the fan will be installed. Then, purchase the necessary materials and follow the manufacturer’s instructions for the installation process.
Next, you need to determine the type of fan you need. There are several types of fans available, such as inline, axial, and centrifugal. Choose the type of fan that best fits your needs and budget.
Finally, make sure you read and understand the manufacturer’s instructions before beginning the installation process. This will help ensure that you install the fan correctly and safely.

How to Easily Install a Bathroom Vent
Installing a bathroom vent doesn’t have to be difficult. With the right tools and materials, anyone can easily install a bathroom vent. Here are the steps to follow:
First, gather the necessary tools and materials before beginning the installation process. This includes a drill, screwdriver, foil tape, clamps, and a vent fan. Next, take measurements of the space where the fan will be installed. This will help you determine the size of the fan you need.
Once the measurements have been taken, you’re ready to begin the installation process. Install the fan according to the manufacturer’s instructions, then connect the fan to the ductwork. Make sure to use foil tape to seal the joints and clamps to secure the connection.
Finally, test the fan to make sure it is working properly. Adjust the fan speed and airflow settings as needed until the fan is running smoothly.
A Checklist for Installing a Bathroom Vent
Installing a bathroom vent can be a daunting task, so it’s important to have a checklist of the steps you need to follow. Here is a checklist of the steps you need to take to successfully install a bathroom vent:
- Measure and mark the area for the vent fan
- Purchase the necessary materials
- Install the vent fan according to the manufacturer’s instructions
- Connect the fan to the ductwork
- Test the fan and adjust as necessary
Troubleshooting Common Problems When Installing a Bathroom Vent
Even after following the steps outlined above, you may still encounter some problems when installing a bathroom vent. Here are some common problems and solutions:
If you experience poor air circulation, make sure the fan is the correct size for the space and that it is connected to the ductwork properly. If the fan is leaking, make sure the joints are sealed properly with foil tape. Finally, if the fan is too noisy, adjust the fan speed and airflow settings to reduce the noise.
Conclusion
Installing a bathroom vent can seem like a daunting task, but with the right steps and materials, anyone can do it. This article provided a step-by-step guide to help you with installing a bathroom vent, as well as some DIY tips and troubleshooting advice to ensure a successful installation.
To recap, the steps for installing a bathroom vent include preparing the area for installation, installing the vent fan, connecting the fan to the ductwork, testing the fan, and adjusting as necessary. Additionally, it’s important to choose the right size fan, use the proper tools and materials, and wear protective gear when installing a bathroom vent.