
Introduction
Installing bathroom tile is an excellent way to add a touch of style and sophistication to your space. Whether you’re looking for a unique statement piece or just want to spruce up your existing decor, tiling your bathroom is a great DIY project that can be completed in just a few days. In this article, we’ll discuss the basics of installing bathroom tile, from preparation to grouting and finishing touches.
Step-by-Step Guide to Installing Bathroom Tile
Installing bathroom tile is relatively straightforward, but it does require a bit of planning. Here’s a step-by-step guide to help you get started:
Preparation
The first step in installing bathroom tile is to prepare the surface. Start by removing any existing fixtures and tiles, then use a putty knife to remove any remaining adhesive or grout. Once the surface is cleared, you’ll need to sand it down and fill in any cracks or holes. Finally, clean the area with a damp cloth to ensure it’s free of dust and debris.
Measuring and Cutting
Once the surface is prepared, you can begin measuring and cutting the tile. Measure the area where the tile will go and mark it off with a pencil. Use a tile cutter or wet saw to cut the tiles to size. Make sure to wear safety goggles and gloves when cutting the tile.
Laying the Tiles
Next, you’ll need to lay out the tiles. Begin by applying a thin layer of adhesive to the back of each tile. Then, using a notched trowel, spread a thin layer of mortar over the area where the tile will be placed. Press the tile firmly into the mortar and repeat until the entire area is covered.
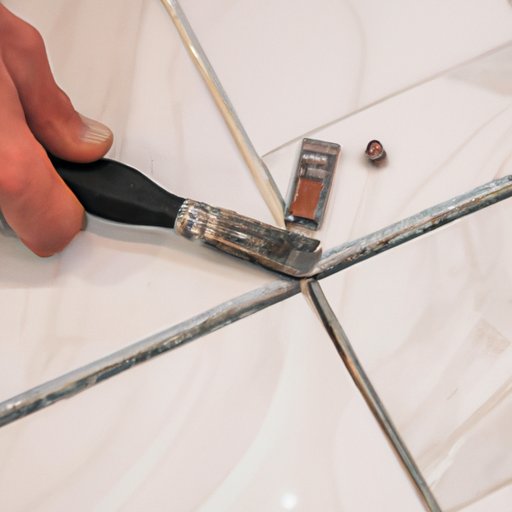
Grouting
Once all of the tiles are in place, it’s time to grout. Begin by mixing the grout according to the instructions on the package. Using a rubber float, spread the grout over the tiles, making sure to fill in the gaps between them. Allow the grout to dry completely before moving on to the next step.
Finishing Touches
Finally, you’ll need to apply a sealant to the grout to protect it from water damage. Once the sealant has dried, you can replace any fixtures and enjoy your newly tiled bathroom!

DIY: How to Install Bathroom Tile in 3 Easy Steps
For those who are looking for a quick and easy way to install bathroom tile, here’s a simple three-step guide:
Step 1: Preparing the Floor
Start by removing any existing fixtures and tiles, then use a putty knife to remove any remaining adhesive or grout. Once the surface is cleared, you’ll need to sand it down and fill in any cracks or holes. Finally, clean the area with a damp cloth to ensure it’s free of dust and debris.
Step 2: Laying the Tiles
Begin by applying a thin layer of adhesive to the back of each tile. Then, using a notched trowel, spread a thin layer of mortar over the area where the tile will be placed. Press the tile firmly into the mortar and repeat until the entire area is covered.
Step 3: Applying the Grout
Begin by mixing the grout according to the instructions on the package. Using a rubber float, spread the grout over the tiles, making sure to fill in the gaps between them. Allow the grout to dry completely before applying a sealant to protect it from water damage.
A Beginner’s Guide to Installing Bathroom Tile
If you’re a beginner looking to install bathroom tile, here’s a comprehensive guide to get you started:
What You’ll Need
Before you begin, make sure you have all the necessary supplies. You’ll need tile, adhesive, grout, a tile cutter/wet saw, a notched trowel, a rubber float, and a sealant. You may also need some sandpaper, a putty knife, and a damp cloth.
Planning and Preparation
Once you have the supplies, it’s time to start planning. Take measurements of the area where the tile will go and mark it off with a pencil. Use a tile cutter or wet saw to cut the tiles to size. Next, prepare the surface by removing any existing fixtures and tiles, then use a putty knife to remove any remaining adhesive or grout. Once the surface is cleared, you’ll need to sand it down and fill in any cracks or holes. Finally, clean the area with a damp cloth to ensure it’s free of dust and debris.
Installing the Tiles
Now that the surface is prepared, you can begin installing the tiles. Start by applying a thin layer of adhesive to the back of each tile. Then, using a notched trowel, spread a thin layer of mortar over the area where the tile will be placed. Press the tile firmly into the mortar and repeat until the entire area is covered.

Get the Look: How to Install Bathroom Tile
If you’re looking for a specific look, here’s how to achieve it:
Choosing the Right Tile
First, you’ll need to choose the right tile for your space. Consider the size, shape, and color of the tile, as well as the overall theme of the room. Make sure to measure the area where the tile will go and plan accordingly.
Creating a Design
Once you’ve chosen the tile, it’s time to create a design. Sketch out a rough layout on paper, then transfer it to the floor. Make sure to leave enough space between the tiles for grout.
Setting the Tiles
Once the design is set, you can begin laying the tiles. Start by applying a thin layer of adhesive to the back of each tile. Then, using a notched trowel, spread a thin layer of mortar over the area where the tile will be placed. Press the tile firmly into the mortar and repeat until the entire area is covered.

How to Install Bathroom Tile with Professional Results
For those who are looking for professional results, here’s what you need to know:
Tools You’ll Need
You’ll need tile, adhesive, grout, a tile cutter/wet saw, a notched trowel, a rubber float, and a sealant. You may also need some sandpaper, a putty knife, and a damp cloth.
Prepping the Room
Start by removing any existing fixtures and tiles, then use a putty knife to remove any remaining adhesive or grout. Once the surface is cleared, you’ll need to sand it down and fill in any cracks or holes. Finally, clean the area with a damp cloth to ensure it’s free of dust and debris.
Laying the Tiles
Begin by applying a thin layer of adhesive to the back of each tile. Then, using a notched trowel, spread a thin layer of mortar over the area where the tile will be placed. Press the tile firmly into the mortar and repeat until the entire area is covered.
Grouting and Sealing
Once all of the tiles are in place, it’s time to grout. Begin by mixing the grout according to the instructions on the package. Using a rubber float, spread the grout over the tiles, making sure to fill in the gaps between them. Allow the grout to dry completely before applying a sealant to protect it from water damage.
The Basics of Installing Bathroom Tile
Here’s the basic process of installing bathroom tile:
Choosing the Right Tile
First, you’ll need to choose the right tile for your space. Consider the size, shape, and color of the tile, as well as the overall theme of the room. Make sure to measure the area where the tile will go and plan accordingly.
Measuring and Marking
Once you’ve chosen the tile, measure the area where the tile will go and mark it off with a pencil. Use a tile cutter or wet saw to cut the tiles to size. Make sure to wear safety goggles and gloves when cutting the tile.
Adhering the Tile
Next, you’ll need to lay out the tiles. Begin by applying a thin layer of adhesive to the back of each tile. Then, using a notched trowel, spread a thin layer of mortar over the area where the tile will be placed. Press the tile firmly into the mortar and repeat until the entire area is covered.
Grouting
Once all of the tiles are in place, it’s time to grout. Begin by mixing the grout according to the instructions on the package. Using a rubber float, spread the grout over the tiles, making sure to fill in the gaps between them. Allow the grout to dry completely before moving on to the next step.
Tips and Tricks for Installing Bathroom Tile Successfully
Here are some tips and tricks to help you install bathroom tile successfully:
Thoroughly Clean the Surface
Make sure to thoroughly clean the surface before you begin. Remove any existing fixtures and tiles, then use a putty knife to remove any remaining adhesive or grout. Once the surface is cleared, you’ll need to sand it down and fill in any cracks or holes. Finally, clean the area with a damp cloth to ensure it’s free of dust and debris.
Measure Twice, Cut Once
Take your time when measuring and cutting the tile. Make sure to measure the area where the tile will go and mark it off with a pencil. Use a tile cutter or wet saw to cut the tiles to size. When cutting the tile, make sure to wear safety goggles and gloves.
Use Quality Materials
When installing bathroom tile, it’s important to use quality materials. Invest in good-quality tile, adhesive, grout, and sealant to ensure the best results.
Grout Carefully
When grouting, make sure to fill in the gaps between the tiles. Use a rubber float to spread the grout evenly and allow the grout to dry completely before applying a sealant.
Conclusion
Installing bathroom tile is a great way to add a touch of style and sophistication to your space. With a little bit of planning and the right materials, you can easily transform your bathroom into a beautiful and functional space. From preparation and measuring to grouting and finishing touches, this step-by-step guide will walk you through the process of installing bathroom tile.
In addition to the aesthetic benefits, installing bathroom tile can also increase the value of your home. With a few simple steps, you can create a stunning space that will last for years to come.