
Introduction
Backup cameras are becoming increasingly popular in vehicles. They provide improved visibility when reversing, making it easier and safer to navigate tight spots. In this article, we’ll explore the purpose of a backup camera, the benefits of installing one, and provide a comprehensive guide to installing a backup camera.

Overview of the Purpose of a Backup Camera
A backup camera is a small camera that is mounted at the rear of a vehicle. It provides an image of what is behind the car, allowing the driver to see obstacles that may be out of view in their rearview mirror or side mirrors. This makes it easier to reverse safely, as well as maneuver in tight spaces.
Benefits of Installing a Backup Camera
The primary benefit of installing a backup camera is improved visibility when reversing. The camera allows you to see what is directly behind you, as well as objects that may be off to the side or out of your line of sight. This can help prevent accidents due to unseen obstacles, such as small children, pets, or other vehicles.
In addition, backup cameras can make parking easier. You can use the camera to ensure that your car is properly aligned in a parking space, reducing the risk of hitting another vehicle or object. This can save time and frustration when trying to park in tight spots.
Step-By-Step Guide to Installing a Backup Camera
Installing a backup camera can seem daunting, but it doesn’t have to be. With the right tools and some patience, anyone can install a backup camera in their vehicle. Here is a step-by-step guide to installing a backup camera.
Gather Necessary Materials
Before you get started, make sure you have all the necessary materials. You will need a backup camera, a monitor, wiring, and mounting hardware. Most backup cameras come with all the necessary mounting hardware, but you may need to purchase additional components depending on your vehicle.
Choose a Location for the Camera
Next, you’ll need to decide where to install the camera. Generally, you want to mount the camera as close to the center of the rear bumper as possible. This will give you the best visibility when reversing. Make sure that the camera is not blocked by any other components and is visible from the rearview mirror.
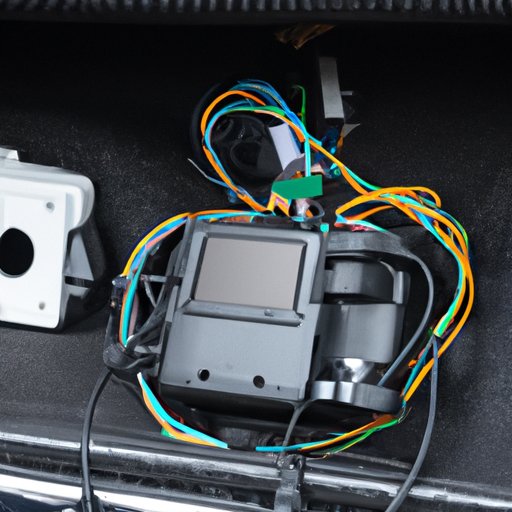
Connect the Wiring
Once you have chosen a location for the camera, you can begin connecting the wiring. Start by connecting the power cable to the battery. Then, connect the video cables to the camera and the monitor. Make sure that the connections are secure and that there are no exposed wires.
Mount the Camera
Now that the wiring is connected, you can mount the camera. Use the mounting hardware that came with the camera to securely attach it to the chosen location. Make sure that the camera is level and that the lens is pointing in the desired direction.
Test the System
Before you complete the installation, it’s important to test the system. Turn on the vehicle and the monitor, and make sure that the image is clear. If the image is distorted or blurry, adjust the camera until it is properly aligned.
How to Install a Backup Camera in 10 Easy Steps
Installing a backup camera doesn’t have to be complicated. Follow these 10 steps to make the process easier:
Step 1: Gather Necessary Materials
Gather all the necessary materials for the installation. This includes a backup camera, wiring, mounting hardware, and a monitor.
Step 2: Choose a Location for the Camera
Choose a location for the camera that is close to the center of the rear bumper and is visible from the rearview mirror.
Step 3: Connect the Wiring
Connect the power cable to the battery and the video cables to the camera and the monitor.
Step 4: Mount the Camera
Use the mounting hardware that came with the camera to securely attach it to the chosen location.
Step 5: Test the System
Turn on the vehicle and the monitor and make sure that the image is clear.
Step 6: Make Adjustments and Troubleshoot
If the image is distorted or blurry, adjust the camera until it is properly aligned.
Step 7: Connect the Monitor
Securely attach the monitor to the dashboard or console of the vehicle.
Step 8: Test the System Again
Turn on the vehicle and the monitor and make sure that the image is still clear.
Step 9: Secure the Wiring
Make sure that all the wiring is properly secured and that there are no exposed wires.
Step 10: Test the System Again
Turn on the vehicle and the monitor and make sure that the image is still clear.
A Beginner’s Guide to Installing a Backup Camera
Installing a backup camera doesn’t have to be intimidating. Here are a few tips to keep in mind when installing a backup camera:
What Tools Do You Need?
You will need a backup camera, wiring, mounting hardware, and a monitor. Make sure that you have all the necessary tools before you start the installation.
How to Connect the Wiring
Start by connecting the power cable to the battery. Then, connect the video cables to the camera and the monitor. Make sure that the connections are secure and that there are no exposed wires.
Where to Mount the Camera
You want to mount the camera as close to the center of the rear bumper as possible. This will give you the best visibility when reversing. Make sure that the camera is not blocked by any other components and is visible from the rearview mirror.
How to Test the System
Turn on the vehicle and the monitor and make sure that the image is clear. If the image is distorted or blurry, adjust the camera until it is properly aligned.

Installing a Backup Camera: What You Need to Know
When installing a backup camera, there are a few things to keep in mind. Here is what you need to know about installing a backup camera:
Understanding Different Types of Backup Cameras
There are several different types of backup cameras available. Each type has its own advantages and disadvantages, so make sure you understand the differences before making a purchase.
Choosing the Right Camera for Your Vehicle
Different types of cameras are designed for different vehicles. Be sure to choose a camera that is compatible with your vehicle.
Tips for Installing a Backup Camera
Follow the manufacturer’s instructions and keep the wiring away from moving parts. Make sure that the camera is securely mounted and that the image is clear before completing the installation.

Installation Tips for Your New Backup Camera
Installing a backup camera is not difficult, but there are a few tips to keep in mind. Here are a few installation tips for your new backup camera:
Follow Manufacturer Instructions
Make sure to follow the manufacturer’s instructions when installing the camera. This will ensure that the camera is installed correctly and safely.
Keep Wires Away from Moving Parts
Make sure to keep the wiring away from any moving parts, such as the engine or exhaust. This will help prevent any damage to the wiring or the camera.
Choose the Right Location for the Camera
Choose a location for the camera that is close to the center of the rear bumper and is visible from the rearview mirror.
Make Sure the Camera is Properly Mounted
Use the mounting hardware that came with the camera to securely attach it to the chosen location. Make sure that the camera is level and that the lens is pointing in the desired direction.
Comprehensive Guide to Installing a Backup Camera
Installing a backup camera can seem overwhelming, but it doesn’t have to be. With the right tools and some patience, anyone can install a backup camera in their vehicle. Here is a comprehensive guide to installing a backup camera:
Choosing the Right Backup Camera
Make sure to choose a camera that is compatible with your vehicle. Different types of cameras are designed for different vehicles, so make sure to understand the differences before making a purchase.
Connecting the Wiring
Start by connecting the power cable to the battery. Then, connect the video cables to the camera and the monitor. Make sure that the connections are secure and that there are no exposed wires.
Mounting the Camera
Use the mounting hardware that came with the camera to securely attach it to the chosen location. Make sure that the camera is level and that the lens is pointing in the desired direction.
Testing the System
Turn on the vehicle and the monitor and make sure that the image is clear. If the image is distorted or blurry, adjust the camera until it is properly aligned.
Troubleshooting and Adjustments
If the image is still distorted or blurry after adjusting the camera, check the wiring and make sure that all the connections are secure.
Securing the Wiring
Make sure that all the wiring is properly secured and that there are no exposed wires.
Final Testing of the System
Turn on the vehicle and the monitor and make sure that the image is still clear.
Conclusion
Installing a backup camera is not difficult, but it does require some patience and attention to detail. By following the steps outlined in this guide, you can easily install a backup camera in your vehicle and enjoy improved visibility when reversing.