
Introduction
Installing a kitchen backsplash is a relatively simple project that can make a big impact on the look of your kitchen. It can also be an inexpensive way to update your space without investing in a full remodel. Whether you’re looking to do a DIY backsplash installation or hire a professional, this guide will help you get started.
Overview of the Problem
One of the biggest challenges of installing a kitchen backsplash is choosing the right material. There are so many options out there, from tile and glass to natural stone and even metal. Once you’ve decided on a material, you’ll need to measure and mark the area, cut the pieces, apply adhesive, and install the backsplash.
Benefits of Installing a Backsplash
A kitchen backsplash can add style and color to your space without breaking the bank. It’s also a great way to protect walls from cooking splatters and spills. With the right materials and a little bit of know-how, you can easily install a backsplash yourself and save money in the process.
Step-by-Step Guide to Installing Kitchen Backsplash
Installing a kitchen backsplash isn’t as difficult as it may seem. Here’s a step-by-step guide to help you get started:
1. Preparing the Area
Before you begin, make sure the wall is clean and free of dust, dirt, and grease. If necessary, use a degreaser or mild detergent to remove any residue. You should also repair any cracks or holes in the wall before you start.
2. Measuring and Marking
Once the surface is clean, use a tape measure to measure the area for the backsplash. Make sure to measure twice and mark the area with a pencil or marker. This will help you determine where to cut the pieces for the backsplash.
3. Cutting the Pieces
Using a wet saw or tile cutter, carefully cut the pieces to fit the marked area. Be sure to wear eye protection when cutting the tiles.
4. Applying Adhesive
Apply adhesive to the back of each piece of tile according to the manufacturer’s instructions. Spread the adhesive evenly, and make sure to cover the entire back of the tile.
5. Applying the Backsplash
Carefully place the tiles onto the wall, making sure they are level and even. Use spacers between the tiles to ensure a consistent pattern.
6. Finishing Touches
Once the tiles are in place, use grout to fill in the gaps between the tiles. Allow the grout to dry completely before wiping away any excess. Finally, seal the grout to protect it from moisture and stains.
DIY Kitchen Backsplash Installation: What You Need to Know
When it comes to DIY kitchen backsplash installation, there are a few things you need to consider. Here’s what you should know before getting started:
1. Selecting Materials
Choose a material that is durable and easy to maintain. Natural stone, porcelain, and ceramic tiles are all good choices. Consider the overall look of your kitchen when selecting a material.
2. Choosing a Design
Once you’ve chosen a material, you’ll need to decide on a design. There are endless possibilities, from subway tile to herringbone patterns. Choose a design that complements the rest of your kitchen.
3. Tools and Supplies
Gather the necessary tools and supplies before you start. You’ll need a tape measure, safety glasses, a wet saw or tile cutter, grout, caulk, and adhesive. Make sure you have enough of each item before you begin.
A Beginner’s Guide to Installing Kitchen Backsplash
If you’re new to DIY backsplash installation, here’s a basic guide to get you started:
1. Gather Necessary Tools
Gather the necessary tools and supplies before you start. You’ll need a tape measure, safety glasses, a wet saw or tile cutter, grout, caulk, and adhesive. Make sure you have enough of each item before you begin.
2. Choose a Design
Once you’ve chosen a material, you’ll need to decide on a design. There are endless possibilities, from subway tile to herringbone patterns. Choose a design that complements the rest of your kitchen.
3. Measure and Cut
Use a tape measure to measure the area for the backsplash. Make sure to measure twice and mark the area with a pencil or marker. Then, using a wet saw or tile cutter, carefully cut the pieces to fit the marked area.
4. Apply Adhesive
Apply adhesive to the back of each piece of tile according to the manufacturer’s instructions. Spread the adhesive evenly, and make sure to cover the entire back of the tile.
5. Install the Backsplash
Carefully place the tiles onto the wall, making sure they are level and even. Use spacers between the tiles to ensure a consistent pattern.

How to Install a Kitchen Backsplash on a Budget
Installing a kitchen backsplash doesn’t have to be expensive. Here are some tips for installing a backsplash on a budget:
1. Cost-Effective Materials
When selecting materials, look for cost-effective options such as vinyl or peel-and-stick tiles. These materials are often cheaper than traditional tile, but they still offer the same benefits.
2. Creative Alternatives
Instead of buying new materials, consider using creative alternatives such as recycled wood, fabric, or wallpaper. These materials can be just as effective as traditional tile and will cost much less.
3. Reusing Existing Materials
If you already have tile in your kitchen, you may be able to reuse it for your backsplash. Simply measure the area and mark the tiles, then cut the pieces to fit your space.

Easy Tips for Installing Kitchen Backsplash
Here are some easy tips to help make your backsplash installation a breeze:
1. Start with a Clean Surface
Before you begin, make sure the wall is clean and free of dust, dirt, and grease. If necessary, use a degreaser or mild detergent to remove any residue.
2. Use Caulk
After the tiles are installed, use caulk to fill in any gaps or cracks between the tiles. This will help prevent water damage and keep the tiles looking their best.
3. Sand the Edges
Once the caulk has dried, sand the edges of the tiles to create a smooth finish. This will give your backsplash a professional look.
Creative Ideas for Installing Kitchen Backsplash
There are countless ways to get creative with your kitchen backsplash. Here are a few ideas to get you started:
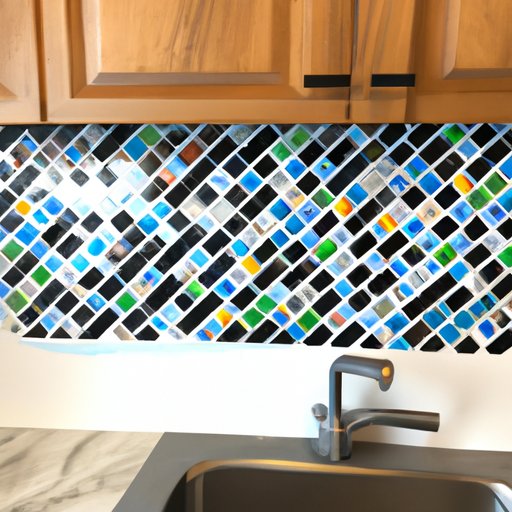
1. Mosaic Tiles
Mosaic tiles are a fun and unique way to add color and texture to your kitchen. They come in a variety of colors, shapes, and sizes, so you can create a one-of-a-kind design.
2. Decorative Borders
Create a custom look by adding a decorative border around the edges of your backsplash. You can use tile or paint to create a unique design.
3. Painted Patterns
Add a pop of color to your kitchen with a painted pattern. Use stencils or masking tape to create a geometric pattern or design.

The Ultimate Guide to Installing Kitchen Backsplash
Installing a kitchen backsplash can be a daunting task, but with the right preparation and knowledge, it doesn’t have to be. Here’s a comprehensive guide to help you get started:
1. Planning Ahead
Before you begin, make sure you have all the necessary tools and supplies. Measure the area and mark the tiles, then gather the materials you’ll need for the project.
2. Laying Out the Pattern
Lay out the tiles in the pattern of your choice. Use spacers between the tiles to ensure a consistent pattern. Once you’re happy with the layout, you can begin to cut the pieces.
3. Sealing the Deal
Once the tiles are in place, use grout to fill in the gaps between the tiles. Allow the grout to dry completely before wiping away any excess. Finally, seal the grout to protect it from moisture and stains.
Conclusion
Installing a kitchen backsplash is a great way to update your space without breaking the bank. With the right materials and a little bit of know-how, you can easily install a backsplash yourself. Use this guide to help you get started and add a unique touch to your kitchen.