
Introduction
The kitchen is one of the most important rooms in your home. It’s where you prepare meals for your family, entertain guests, and relax after a long day. That’s why it’s important to make sure your kitchen looks its best. One way to update the look of your kitchen is to install a new kitchen faucet. Installing a new kitchen faucet is not as difficult as it may seem. With the right tools and materials, you can do it yourself in just a few steps.
This article will provide a comprehensive guide on how to install a new kitchen faucet. It will include a step-by-step guide, a DIY tutorial, a beginner’s guide, and quick and easy instructions. By the end of this article, you should have all the information you need to install a new kitchen faucet with confidence.
Step-by-Step Guide: How to Install a New Kitchen Faucet
Installing a new kitchen faucet is a relatively straightforward process that can be done in a few simple steps. Here’s what you’ll need to do:
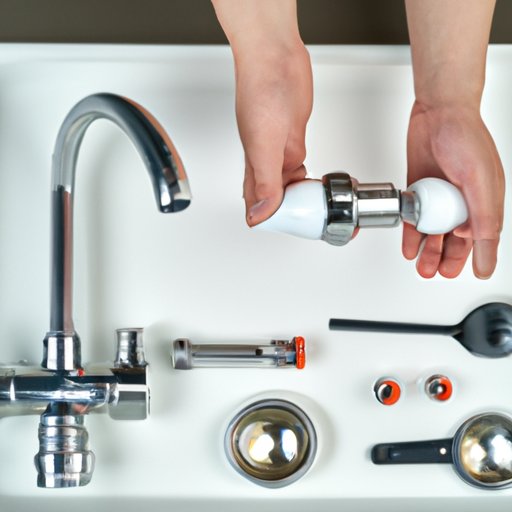
- Gather the Necessary Tools and Materials: Before you begin, you’ll need to gather the necessary tools and materials. This includes a basin wrench, adjustable pliers, Teflon tape, plumber’s putty, and a replacement faucet.
- Prepare the Faucet for Installation: Once you have all the necessary tools and materials, you’ll need to prepare the faucet for installation. This includes removing the old faucet, cleaning the sink, and applying the Teflon tape and plumber’s putty to the connections.
- Install the Faucet: Now it’s time to install the new faucet. You’ll need to attach the faucet to the sink and secure it with nuts or screws. Make sure the faucet is securely attached to the sink before moving on to the next step.
- Connect the Water Supply Lines: After the faucet is installed, you’ll need to connect the water supply lines. You’ll need to use the basin wrench to attach the supply lines to the faucet. Make sure the connections are tight and secure before turning on the water supply.
DIY Tutorial: Installing a Kitchen Faucet in 5 Easy Steps
If you’re looking for a quick and easy DIY tutorial on how to install a new kitchen faucet, look no further. Here’s a step-by-step guide on how to install a kitchen faucet in five easy steps:
- Step 1: Gather the Necessary Tools and Materials: As mentioned above, you’ll need to gather the necessary tools and materials before you start. This includes a basin wrench, adjustable pliers, Teflon tape, plumber’s putty, and a replacement faucet.
- Step 2: Prepare the Faucet for Installation: Next, you’ll need to remove the old faucet, clean the sink, and apply the Teflon tape and plumber’s putty to the connections.
- Step 3: Install the Faucet: Now it’s time to install the new faucet. Attach the faucet to the sink and secure it with nuts or screws. Make sure the faucet is securely attached to the sink before moving on to the next step.
- Step 4: Connect the Water Supply Lines: After the faucet is installed, you’ll need to connect the water supply lines. Use the basin wrench to attach the supply lines to the faucet. Make sure the connections are tight and secure before turning on the water supply.
- Step 5: Test and Finishing Touches: Finally, turn on the water supply and test the faucet to make sure it’s working properly. If everything is working correctly, you can now make any necessary adjustments and enjoy your new kitchen faucet.
A Beginner’s Guide to Installing a New Kitchen Faucet
If you’re a beginner when it comes to installing a new kitchen faucet, there are a few things you should keep in mind. Here’s a quick guide on what you need to know before you start:
- Identify the Type of Faucet You Need: Before you start, you’ll need to identify the type of faucet that you need. There are several different types of kitchen faucets available, so it’s important to make sure you choose the right one for your needs.
- Measure the Space Where the Faucet Will Be Installed: You’ll also need to measure the space where the faucet will be installed. This will help you determine the size and style of the faucet that you need.
- Understand the Plumbing Requirements: Finally, you’ll need to understand the plumbing requirements for the faucet. Make sure you know exactly what you need to do before you start the installation process.
Installing a Kitchen Faucet – What You Need to Know
There are a few key things to keep in mind when installing a kitchen faucet. Here’s what you need to know:
- Shut Off the Water Supply: Before you start, you’ll need to shut off the water supply. This will prevent any accidents or damage during the installation process.
- Consider the Height and Reach of the Faucet: You’ll also need to consider the height and reach of the faucet. Make sure the faucet is at an appropriate height and reach so you can easily access the sink.
- Secure the Faucet to the Countertop: Finally, you’ll need to make sure the faucet is securely attached to the countertop. This will ensure the faucet is stable and won’t move when it’s in use.

Quick and Easy Instructions for Installing a Kitchen Faucet
If you’re looking for quick and easy instructions on how to install a kitchen faucet, here’s what you need to do:
- Shut Off the Water Supply: First, you’ll need to shut off the water supply. This will prevent any accidents or damage during the installation process.
- Prepare the Faucet for Installation: Next, you’ll need to remove the old faucet, clean the sink, and apply the Teflon tape and plumber’s putty to the connections.
- Install the Faucet: Now it’s time to install the new faucet. Attach the faucet to the sink and secure it with nuts or screws. Make sure the faucet is securely attached to the sink before moving on to the next step.
- Connect the Water Supply Lines: After the faucet is installed, you’ll need to connect the water supply lines. Use the basin wrench to attach the supply lines to the faucet. Make sure the connections are tight and secure before turning on the water supply.
The Basics of Installing a Kitchen Faucet – A Comprehensive Guide
Installing a kitchen faucet doesn’t have to be complicated or intimidating. Here’s a comprehensive guide on the basics of installing a kitchen faucet:
- Choose the Right Faucet: Before you start, you’ll need to identify the type of faucet that you need. There are several different types of kitchen faucets available, so it’s important to make sure you choose the right one for your needs.
- Prepare the Faucet for Installation: Next, you’ll need to remove the old faucet, clean the sink, and apply the Teflon tape and plumber’s putty to the connections.
- Install the Faucet: Now it’s time to install the new faucet. Attach the faucet to the sink and secure it with nuts or screws. Make sure the faucet is securely attached to the sink before moving on to the next step.
- Connect the Water Supply Lines: After the faucet is installed, you’ll need to connect the water supply lines. Use the basin wrench to attach the supply lines to the faucet. Make sure the connections are tight and secure before turning on the water supply.
- Test the Faucet and Make Any Necessary Adjustments: Finally, turn on the water supply and test the faucet to make sure it’s working properly. If everything is working correctly, you can now make any necessary adjustments and enjoy your new kitchen faucet.
Conclusion
Installing a new kitchen faucet doesn’t have to be complicated or intimidating. With the right tools and materials, you can do it yourself in just a few steps. This article has provided a comprehensive guide on how to install a new kitchen faucet. It includes a step-by-step guide, a DIY tutorial, a beginner’s guide, and quick and easy instructions. With this information, you should have all the information you need to install a new kitchen faucet with confidence.