
Introduction
Installing a kitchen sink faucet may seem daunting to some, especially for those who have little to no experience with plumbing. There are various factors to consider, such as the type of faucet and its compatibility with your sink. However, with the right knowledge and tools, installing a kitchen sink faucet can be accomplished easily and quickly. In this article, we will provide a step-by-step guide, video tutorial, an infographic, tips and tricks, frequently asked questions, and expert insights on how to install a kitchen sink faucet.
Step-by-Step Guide
Materials Needed
Before starting the installation process, gather all necessary materials first. These materials may vary according to the type of faucet and the complexity of the installation. Here are some of the essential materials needed in installing a kitchen sink faucet:
- Faucet and all its components
- Faucet wrench or basin wrench
- Adjustable wrench
- Screwdrivers
- Plumber’s putty
- Teflon tape
- Bucket or container for waste disposal
Tools List
In addition to the materials listed above, having the right tools is crucial to ensure a smooth installation process. Here is a list of recommended tools that may be needed in installing a kitchen sink faucet:
- Drill
- Hacksaw
- Pipe cutter
- Plumbers’ tape measure
- Plunger
- Soldering gun and solder
- Tubing cutter
Preparation
Before installing the new faucet, it is essential to prepare the work area and turn off the water supply. Here are the steps to prepare your kitchen sink for the installation process:
- Place the bucket or container beneath the sink to catch any water that may drip.
- Turn off the water supply under the sink – hot and cold – by turning the valves clockwise.
- Turn on the faucet to release any remaining water from the pipes. Then, allow the faucet to drain out and wait for any excess waste to drip into the container or bucket.
Removing the Old Faucet
The next step is to remove the old faucet. Here’s how:
- Disconnect the supply lines by turning the nuts counterclockwise. Be careful not to damage or bend the lines.
- Using the basin wrench or faucet wrench, loosen and remove the nuts, bolts, and screws that hold the faucet in place. Be mindful of any plastic pieces or seals that may also need to be removed.
- Detach the old faucet from the sink by lifting it up and off gently.
Mounting the New Faucet Base
Once the old faucet is removed, the next step is to mount the new faucet base. Here’s how:
- Put the gasket and mounting plate in place on the sink. Check the fit and placement of the gasket and plate to ensure they fit snugly together.
- Thread the mounting bolts through the plate’s holes, then the sink. Make sure that the bolts are tightened until they are snugly in place.
- Inspect the base deck of the faucet to ensure there is a rubber or plastic gasket that is placed over it.
- Position the base deck on the mounting plate and ensure that the mounting bolts extend through the matching holes on the base deck. Use the faucet wrench to tighten the mounting nuts under the sink until they are snug. Do not overtighten or damage the nuts.
Attaching the Supply Lines
The next step is to attach the supply lines to the new faucet. Here’s how:
- Apply plumber’s putty around the base of the faucet then insert the supply lines through the mounting hole on the sink. The putty helps create a watertight seal.
- Ensure the faucet is leveled before attaching the supply lines. Connect the mounting hardware and tighten the nuts around the mounting plate and the faucet.
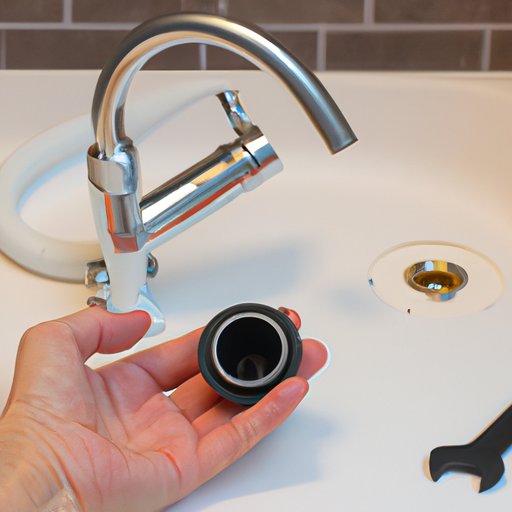
Installing the Smooth-Surface Washer
To prevent leaks, it is essential to install a smooth-surface washer. Here’s how:
- Locate the smooth-surface washer from the kit that comes with the new faucet.
- Insert the washer into the top of the tailpiece that leads to the sink drain. Ensure that the green side of the washer is facing away from the nut you are securing it with to create a watertight seal.
- Further tighten the nut using slip-lock pliers. Be careful not to overtighten and damage the washer.
Securing the Faucet
The next step is to secure the faucet to the sink. Here is how:
- Ensure that the faucet is leveled and secure in place.
- Put a bead of plumber’s putty on the underside of the deck plate to help keep the faucet secure.
- Press the deck plate onto the sink, then tighten the mounting nuts from below until snugly in place.
- Use a clean, damp cloth to wipe away any excess putty that may be visible once the faucet is secured.
Attaching the Hot and Cold Water Supply
The next step is to reconnect the hot and cold water supply. Here’s how:
- Reconnect the supply lines to the hot and cold water valves. Tighten the nuts using the adjustable wrench until snug.
- Open the hot and cold valves, then turn on the water supply under the sink by turning on the shut-off valves.
- Turn on the faucet to test the water temperature and allow the water to run for a few minutes to flush any debris.
Testing the Faucet
The last step is to test the faucet to ensure that everything is working correctly. Here’s how:
- Run both hot and cold water to ensure they are functioning correctly.
- Check for any leaks or drips around the new faucet and clean the area after testing.
- Test the sprayer function, if applicable.
Video Tutorial
Sometimes, even with detailed written instructions, some individuals may feel more comfortable following along with a visual guide. We recommend watching a step-by-step video tutorial to complement the written guide. Here’s one we recommend:
Infographic
Infographics are excellent visual aids that show all the steps and parts of the installation process neatly and aesthetically. This infographic helps you walk through the faucet installation process and reinforces what you learned from the step-by-step guide.

Listicle
Installing a kitchen sink faucet involves various steps, but grouping them into logical categories with helpful tips and tricks can make the process more manageable. Here are some tips and tricks to help you install your new kitchen sink faucet:
Preparation:
- Remove all clutter and objects under the sink to allow for ample space to work.
- Clean the sink and area where you will install the new faucet before installation.
Tools:
- Refer to the materials and tools list mentioned earlier for guidance.
Removing the Old Faucet:
- Take photos before removing the old faucet to help guide in the installation of the new one.
- Use penetrating oil if a nut/bolt seems to be stuck and won’t move; let it sit for about ten minutes before trying again.
Installing the New Faucet:
- Ask someone to assist in holding the new faucet in place while you tighten it with the faucet wrench.
- Periodically check the level of the faucet as you tighten the nuts to ensure it is straight.
Attaching the Water Supply:
- Use Teflon tape on the threaded ends of the connectors to help create a watertight seal.
- Tighten the supply lines using adjustable wrenches.
Testing the Faucet:
- Check for leaks and drips by wiping the area and letting water run for a few minutes.
- If applicable, test the sprayer function of your new faucet both before and after turning the water supply back on.
FAQ
What is plumber’s putty?
Plumber’s putty is a pliable substance used to create a watertight seal between two surfaces. In kitchen sink faucet installations, it is used beneath the deck plate to help keep the faucet in place and prevent leakages.
Do I need a basin wrench to install a kitchen sink faucet?
While it is possible to remove and install a kitchen sink faucet with an adjustable wrench, a basin wrench is more appropriate for creating ample space around the nut for easy maneuvering and extra torque.
Can I install a kitchen sink faucet without a plumber’s help?
Installing a kitchen sink faucet can be accomplished quickly and easily, even if you have little to no plumbing experience. With the right knowledge and tools, you can install it by yourself.
How long does it take to install a kitchen sink faucet?
The installation process length depends on the complexity of the faucet and how much experience you have. Usually, it can take anywhere from 30 minutes to three hours for installation.
When is it time to replace my kitchen sink faucet?
You should replace your kitchen sink faucet when it starts to show wear and tear that makes it difficult to turn on, leaks around the base, or produces a weak water stream.
Expert Tips and Tricks
We interviewed a professional plumber on some tips and tricks to make the installation process smoother. Here are some of his insights:
- Always turn off the water supply before installation.
- Ensure that the gasket and mounting plate fit snugly together to avoid any leaks.
- Periodically check for leaks as you go through the installation process.
- Before tightening the faucet onto the sink, place a rag on the sink to avoid scratching it.
- Make sure the faucet is facing the correct direction before attaching the supply line.
DIY vs. Professional Services
Deciding between DIY installation versus hiring a professional can be difficult. Consider the following pros and cons:
DIY Installation
Pros:
- Cost-effective
- Educational
- Accomplish it at your convenience
Cons:
- May take longer than professional installation
- May not have all the tools needed for the job
- May make mistakes and cause leaks or damage to the faucet or sink
Professional Installation
Pros:
- Swift installation time
- Possesses the necessary tools and expertise to guarantee a perfect installation process
- Comprehensive warranty
Cons:
- Expensive
- Might have to schedule at an inconvenient time.
Ultimately, the decision lies in the customer’s preferences and experience. Choose the option that makes the most sense for you.
Conclusion
Now that you’ve read the step-by-step guide, watched the video tutorial and viewed the infographic, read the expert tips and tricks, and answered frequently asked questions, you are ready to install your new kitchen sink faucet. Installing a kitchen sink faucet can be a straightforward and manageable task, even for those with little plumbing experience. Follow the guide provided, and you’ll have your new faucet installed in no time. Remember, If you have any more concerns or questions, don’t hesitate to contact a plumber or seek further guidance.