
Introduction
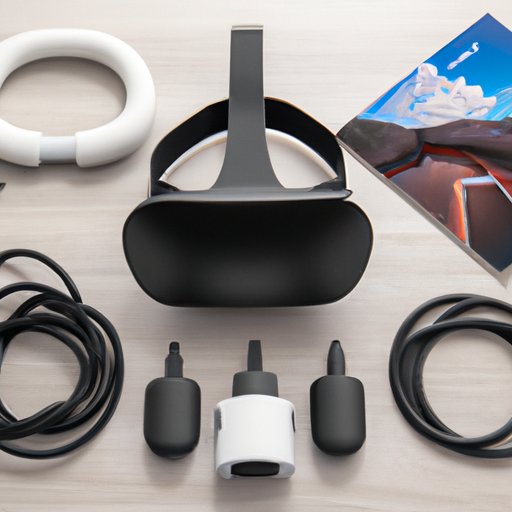
The Oculus Quest 2 is one of the most advanced virtual reality headsets available. It offers an immersive experience with its high-resolution display, powerful processor, advanced audio and visuals, and intuitive touch controllers. However, some people may want to hook up their Oculus Quest 2 to a television in order to share the experience with friends or family.
In this article, we will explore the different ways that you can hook up your Oculus Quest 2 to a TV, as well as the benefits and drawbacks of each method. We will also provide step-by-step instructions on how to connect the Oculus Quest 2 to a TV using each method.

Use the Oculus Link Cable
The Oculus Link Cable is an official cable from Oculus that allows you to connect your Oculus Quest 2 to a computer and use it as if it were an Oculus Rift headset. This cable can also be used to connect your Oculus Quest 2 to a television, allowing you to share the VR experience with others.
What is an Oculus Link Cable?
The Oculus Link Cable is a USB 3.0 Type-C cable that connects your Oculus Quest 2 to a compatible PC or laptop. The cable is designed to provide a stable connection for high-quality video and audio streaming. It also has an integrated headphone jack that allows you to plug in headphones or other audio devices directly into the cable.
Benefits of Using an Oculus Link Cable
Using an Oculus Link Cable has several advantages. First, it is an officially supported connection method, so you can be sure that it will work properly and provide the best possible experience. Second, the cable is designed to provide a stable connection with minimal latency, so you won’t have to worry about any lag or stuttering while playing. Finally, the integrated headphone jack allows you to plug in headphones or other audio devices directly into the cable, eliminating the need for additional cables.
Step-by-Step Instructions on How to Connect the Oculus Quest 2 to a TV Using an Oculus Link Cable
1. Plug one end of the Oculus Link Cable into the USB-C port on your Oculus Quest 2.
2. Plug the other end of the Oculus Link Cable into one of the USB ports on your TV.
3. Turn on your TV and make sure that it is connected to the same Wi-Fi network as your Oculus Quest 2.
4. On your Oculus Quest 2, open the Settings menu and select “Connect to TV.”
5. Select the name of your TV from the list of available devices.
6. Your Oculus Quest 2 should now be connected to your TV.
Connect Using an HDMI to USB-C Adapter
If your TV does not have a USB port, you can still connect your Oculus Quest 2 to it by using an HDMI to USB-C adapter. This type of adapter allows you to connect an HDMI cable directly to your Oculus Quest 2, which then plugs into your TV.
What is an HDMI to USB-C Adapter?
An HDMI to USB-C adapter is a small device that allows you to connect an HDMI cable directly to your Oculus Quest 2. The adapter is plugged into the USB-C port on the headset, and then an HDMI cable is plugged into the adapter. This allows you to connect your Oculus Quest 2 to a TV without needing to use an Oculus Link Cable.
Benefits of Using an HDMI to USB-C Adapter
Using an HDMI to USB-C adapter has several advantages. First, it is an inexpensive solution compared to buying an Oculus Link Cable. Second, it is easy to set up and requires no additional software. Finally, it provides a stable connection with minimal latency, so you won’t have to worry about any lag or stuttering while playing.
Step-by-Step Instructions on How to Connect the Oculus Quest 2 to a TV Using an HDMI to USB-C Adapter
1. Plug one end of the HDMI cable into the HDMI to USB-C adapter.
2. Plug the other end of the HDMI cable into one of the HDMI ports on your TV.
3. Plug the HDMI to USB-C adapter into the USB-C port on your Oculus Quest 2.
4. Turn on your TV and make sure that it is connected to the same Wi-Fi network as your Oculus Quest 2.
5. On your Oculus Quest 2, open the Settings menu and select “Connect to TV.”
6. Select the name of your TV from the list of available devices.
7. Your Oculus Quest 2 should now be connected to your TV.
Connect via Wi-Fi Streaming
Another way to connect your Oculus Quest 2 to a TV is by using Wi-Fi streaming. This method allows you to stream the video and audio from your Oculus Quest 2 directly to your TV without having to connect any cables.
How Does Wi-Fi Streaming Work?
Wi-Fi streaming works by using your home Wi-Fi network to transmit the video and audio from your Oculus Quest 2 directly to your TV. To use this method, your TV must be connected to the same Wi-Fi network as your Oculus Quest 2. Once the two devices are connected, you can start streaming the content from your Oculus Quest 2 directly to your TV.
Benefits of Using Wi-Fi Streaming
Using Wi-Fi streaming has several advantages. First, it is a wireless connection, so you don’t have to worry about tangling up cables. Second, it is easy to set up, as all you need to do is make sure that both devices are connected to the same Wi-Fi network. Finally, it provides a stable connection with minimal latency, so you won’t have to worry about any lag or stuttering while playing.
Step-by-Step Instructions on How to Connect the Oculus Quest 2 to a TV Using Wi-Fi Streaming
1. Make sure that both your TV and your Oculus Quest 2 are connected to the same Wi-Fi network.
2. On your Oculus Quest 2, open the Settings menu and select “Connect to TV.”
3. Select the name of your TV from the list of available devices.
4. Your Oculus Quest 2 should now be connected to your TV.
Mirror the Display Using Chromecast
You can also connect your Oculus Quest 2 to a TV by mirroring the display using Chromecast. This method allows you to cast the video and audio from your Oculus Quest 2 directly to your TV without having to connect any cables.
What is Chromecast?
Chromecast is a streaming device developed by Google that allows you to cast the video and audio from your Oculus Quest 2 directly to your TV. To use this method, your TV must be connected to the same Wi-Fi network as your Oculus Quest 2. Once the two devices are connected, you can start casting the content from your Oculus Quest 2 directly to your TV.
Benefits of Using Chromecast
Using Chromecast has several advantages. First, it is a wireless connection, so you don’t have to worry about tangling up cables. Second, it is easy to set up, as all you need to do is make sure that both devices are connected to the same Wi-Fi network. Finally, it provides a stable connection with minimal latency, so you won’t have to worry about any lag or stuttering while playing.
Step-by-Step Instructions on How to Connect the Oculus Quest 2 to a TV Using Chromecast
1. Make sure that both your TV and your Oculus Quest 2 are connected to the same Wi-Fi network.
2. On your Oculus Quest 2, open the Settings menu and select “Cast Screen.”
3. Select the name of your Chromecast device from the list of available devices.
4. Your Oculus Quest 2 should now be connected to your TV.
Use a Third-Party Wireless Video Transmitter
Finally, you can connect your Oculus Quest 2 to a TV by using a third-party wireless video transmitter. This method allows you to transmit the video and audio from your Oculus Quest 2 directly to your TV without having to connect any cables.
What is a Third-Party Wireless Video Transmitter?
A third-party wireless video transmitter is a device that allows you to transmit the video and audio from your Oculus Quest 2 directly to your TV. To use this method, your TV must be connected to the same Wi-Fi network as your Oculus Quest 2. Once the two devices are connected, you can start transmitting the content from your Oculus Quest 2 directly to your TV.
Benefits of Using a Third-Party Wireless Video Transmitter
Using a third-party wireless video transmitter has several advantages. First, it is a wireless connection, so you don’t have to worry about tangling up cables. Second, it is easy to set up, as all you need to do is make sure that both devices are connected to the same Wi-Fi network. Finally, it provides a stable connection with minimal latency, so you won’t have to worry about any lag or stuttering while playing.
Step-by-Step Instructions on How to Connect the Oculus Quest 2 to a TV Using a Third-Party Wireless Video Transmitter
1. Make sure that both your TV and your Oculus Quest 2 are connected to the same Wi-Fi network.
2. On your Oculus Quest 2, open the Settings menu and select “Connect to TV.”
3. Select the name of your wireless video transmitter from the list of available devices.
4. Your Oculus Quest 2 should now be connected to your TV.

Connect with a PC and Oculus Desktop App
Finally, you can connect your Oculus Quest 2 to a TV by using a PC and the Oculus Desktop App. This method allows you to stream the video and audio from your Oculus Quest 2 directly to your TV without having to connect any cables.
What is the Oculus Desktop App?
The Oculus Desktop App is a software program developed by Oculus that allows you to stream the video and audio from your Oculus Quest 2 directly to your TV. To use this method, your TV must be connected to the same Wi-Fi network as your Oculus Quest 2. Once the two devices are connected, you can start streaming the content from your Oculus Quest 2 directly to your TV.
Benefits of Using the Oculus Desktop App
Using the Oculus Desktop App has several advantages. First, it is a wireless connection, so you don’t have to worry about tangling up cables. Second, it is easy to set up, as all you need to do is make sure that both devices are connected to the same Wi-Fi network. Finally, it provides a stable connection with minimal latency, so you won’t have to worry about any lag or stuttering while playing.
Step-by-Step Instructions on How to Connect the Oculus Quest 2 to a TV Using the Oculus Desktop App
1. Make sure that both your TV and your Oculus Quest 2 are connected to the same Wi-Fi network.
2. Download and install the Oculus Desktop App on your PC.
3. Connect your Oculus Quest 2 to your PC using the Oculus Link Cable.
4. Open the Oculus Desktop App and select the “Stream” option.
5. Select the name of your TV from the list of available devices.
6. Your Oculus Quest 2 should now be connected to your TV.
Conclusion
Hooking up your Oculus Quest 2 to a TV is a great way to share the VR experience with friends and family. In this article, we explored the different ways that you can hook up your Oculus Quest 2 to a TV, as well as the benefits and drawbacks of each method. We also provided step-by-step instructions on how to connect the Oculus Quest 2 to a TV using each method.
Using the Oculus Link Cable is the easiest and most reliable method for connecting your Oculus Quest 2 to a TV. If your TV does not have a USB port, you can connect your Oculus Quest 2 to it using an HDMI to USB-C adapter. You can also connect your Oculus Quest 2 to a TV by using Wi-Fi streaming, Chromecast, a third-party wireless video transmitter, or a PC and the Oculus Desktop App.
No matter which method you choose, connecting your Oculus Quest 2 to a TV is a great way to share the VR experience with others. With the right setup, you can enjoy the same immersive experience on a larger screen.