
Introduction
Popcorn ceilings were popular during the 1970s, but they’ve since lost their luster. The texture is outdated and may even contain asbestos fibers. If you have popcorn ceilings in your home and want to update them, you’ll need to know how to get rid of them. This guide will provide you with a step-by-step process on removing popcorn ceilings from your home.
A popcorn ceiling is a textured ceiling that has a bumpy, stucco-like appearance. It’s made from a mix of joint compound, water, and styrofoam beads. The mixture is sprayed onto the ceiling and allowed to dry, leaving behind a bumpy texture.
There are several reasons why you might want to remove a popcorn ceiling. It can be difficult to clean and may contain asbestos fibers, which can be hazardous to your health. Removing it can also help make your home look more modern and updated.
Preparing for the Job
Before you start removing your popcorn ceiling, you’ll need to prepare for the job. First, you’ll need to cover the walls and floor with plastic sheeting. This will protect them from any dust or debris that may occur during the removal process. You’ll also need to gather all the necessary tools, such as a putty knife, pole sander, and drywall mud.

Scraping off the Popcorn Ceiling
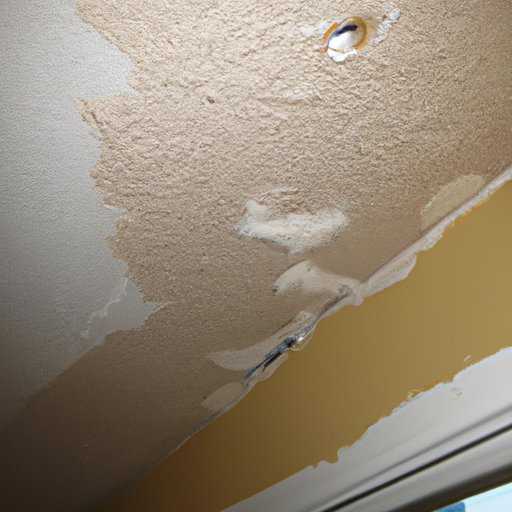
Once you’ve prepared for the job, you can begin scraping off the popcorn ceiling. Start by using a putty knife to carefully scrape off the texture. You can wet down the popcorn ceiling before scraping to make the job easier. Be sure to wear a dust mask and eye protection while doing this to protect yourself from any flying particles.
Sanding the Popcorn Ceiling
After you’ve scraped off the popcorn ceiling, you’ll need to sand it. Use a pole sander to sand the surface until it’s smooth. Make sure you’re wearing a dust mask and safety glasses while doing this. Once you’ve finished sanding, you should vacuum up any dust that’s left behind.

Applying a Skim Coat of Drywall Mud
Once the popcorn ceiling is sanded, you can apply a skim coat of drywall mud. This will help fill in any cracks or imperfections in the surface. Use a trowel to spread the mud evenly across the ceiling. Allow it to dry overnight and then sand it down until it’s smooth.

Covering the Popcorn Ceiling with a New Layer
Once the skim coat of drywall mud is dry, you can begin covering the popcorn ceiling with a new layer. You can use drywall or plaster to do this. Cut the drywall or plaster to fit the size of the room and then attach it to the ceiling with screws. Make sure to use a level to ensure the new layer is even.
Priming and Painting the Ceiling
Once the new layer is attached to the ceiling, you can begin priming and painting it. Start by applying a coat of primer to the ceiling. Once the primer is dry, you can begin painting. Choose a color that complements the rest of the room. Allow the paint to dry completely before using the room again.
Conclusion
Removing a popcorn ceiling is no easy task, but it can be done with the right preparation and tools. Start by covering the walls and floors with plastic sheeting and gathering the necessary tools. Then, scrape off the popcorn ceiling, sand it, apply a skim coat of drywall mud, cover it with a new layer, and finish the job with primer and paint. With some patience and hard work, you can get rid of your popcorn ceiling and give your home a much-needed update.