
Introduction
Cracks in drywall ceilings can be a nuisance and a danger in your home. Not only do they detract from the appearance of the room, but they can also indicate larger problems such as water damage or structural issues. Fortunately, repairing these cracks is relatively simple and can be done with just a few tools and materials.
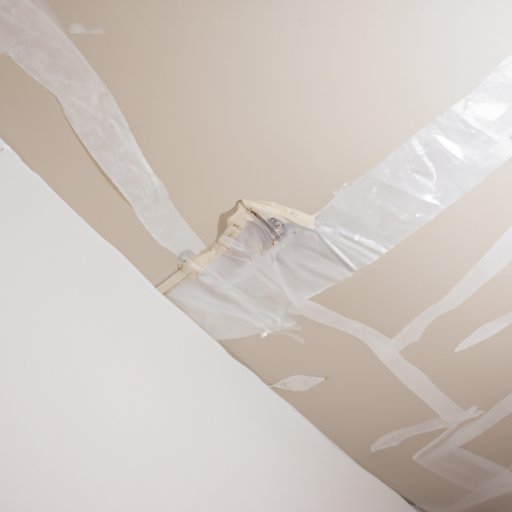
Definition of Drywall Ceiling Cracks
Drywall ceiling cracks are typically long, thin lines that run along the ceiling. These cracks may appear as a result of settling, water damage, or a variety of other causes. In some cases, they can even be the result of an earthquake or other natural disaster.
Overview of the Problem
The first step to repairing drywall ceiling cracks is to properly assess the damage. Depending on the size and type of crack, you may need to use different techniques and materials to repair it. Minor cracks can often be filled with spackle and covered with paint, while larger cracks may require more extensive repair work.
Patching with Spackle
Spackle is a lightweight, easy-to-use patching material that is great for minor repairs. It’s perfect for filling small holes and cracks in drywall and is available at most hardware stores.
Preparing the Area
Before using spackle, you should make sure the area is clean and free of debris. If necessary, use a vacuum to remove any dust or dirt from the crack.
Applying the Spackle
Once the area is clean, you can apply the spackle. Use a putty knife or other tool to spread the spackle over the crack. Make sure it is evenly applied and covers the entire area. Allow the spackle to dry completely before moving on to the next step.
Letting the Spackle Dry
After applying the spackle, let it dry completely. This can take anywhere from several hours to a few days depending on the size of the crack and the humidity levels in the room. Once the spackle is completely dry, it can be sanded down to create a smooth finish.
Applying Fiberglass Mesh Tape
For larger cracks, you may need to use fiberglass mesh tape in addition to spackle. This tape helps reinforce the repair and ensures a strong bond between the drywall and the spackle.
Cutting the Tape to Size
Before applying the tape, you will need to cut it to size. Measure the length and width of the crack and then cut the tape accordingly. Make sure to leave a few inches of extra tape on each side so that it covers the entire area.
Applying the Tape
Once you have cut the tape to size, you can apply it to the crack. Use a putty knife or other tool to press the tape firmly into place. Make sure it is evenly applied and covers the entire area.
Sealing the Tape
Once the tape is in place, seal it with a layer of spackle. Apply a thin layer of spackle over the tape and let it dry completely. Then, sand the spackle until it is smooth.
Using a Drywall Knife
If the crack is particularly large, you may need to use a drywall knife to scrape away any loose debris. This will help ensure a strong bond between the spackle and the drywall.
Selecting the Appropriate Knife
When selecting a drywall knife, make sure to choose one that is the right size and shape for the job. A knife with a wide blade will work best for larger cracks, while a narrow blade is better suited for smaller cracks.
Scraping Around the Crack
Once you have selected the appropriate knife, use it to scrape away any loose debris from around the crack. Be careful not to dig too deep into the drywall, as this can cause further damage.
Removing Debris from the Crack
Once you have scraped away any loose debris, use a vacuum to remove any dust or dirt from the crack. This will help ensure a strong bond between the spackle and the drywall.
Filling with Joint Compound
Once the area is prepped, you can begin to fill the crack with joint compound. This will help give the repair a stronger, longer-lasting bond.
Preparing the Joint Compound
Before applying the joint compound, you will need to mix it according to the manufacturer’s instructions. Make sure to mix it thoroughly to ensure a strong bond.
Applying the Joint Compound
Once the joint compound is mixed, use a putty knife or other tool to spread it over the crack. Make sure it is evenly applied and covers the entire area. Let the joint compound dry completely before proceeding to the next step.
Letting the Compound Dry
Allow the joint compound to dry completely before moving on to the next step. This can take anywhere from several hours to a few days depending on the size of the crack and the humidity levels in the room.
Applying Durabond
Durabond is a special type of joint compound designed specifically for drywall repairs. It is stronger than regular joint compound and helps to ensure a durable, long-lasting repair.
Preparing the Surface
Before applying the Durabond, make sure the surface is clean and free of debris. If necessary, use a vacuum to remove any dust or dirt from the crack.
Applying the Durabond
Once the surface is prepped, you can apply the Durabond. Use a putty knife or other tool to spread the Durabond over the crack. Make sure it is evenly applied and covers the entire area.
Letting the Durabond Dry
Allow the Durabond to dry completely before moving on to the next step. This can take anywhere from several hours to a few days depending on the size of the crack and the humidity levels in the room.
Painting over the Repair
Once the repair is complete, you can begin to paint over it. This will help to conceal the crack and give the wall a finished look.
Priming the Wall
Before painting, you should prime the wall. This will help ensure that the paint adheres to the wall properly and gives the final coat a professional finish.
Adding Finishing Paint
Once the primer is dry, you can add a finishing coat of paint. Use a roller or brush to apply the paint evenly over the wall. Allow the paint to dry completely before adding a second coat if necessary.
Cleaning Up After Painting
Once the paint is dry, you can clean up the area. Vacuum away any dust or debris and make sure the wall is free of any lumps or bumps. This will help ensure a smooth, professional finish.
Conclusion
Repairing drywall ceiling cracks is a fairly straightforward process. With the right tools and materials, you can easily patch up any cracks in your ceiling and get back to enjoying your home. Remember to take your time and follow the steps outlined above for best results.