
Introduction
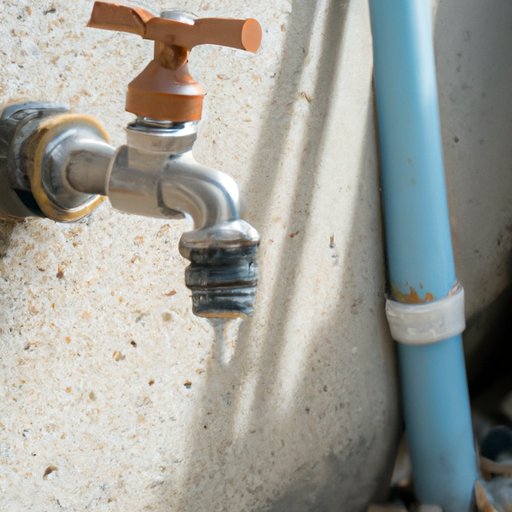
A leaky outdoor faucet can be more than just an annoyance. Left unchecked, it can lead to water damage, wasted water, and higher water bills. Fortunately, fixing a leaky outdoor faucet doesn’t have to be a complicated process. With the right tools and know-how, you can get your faucet back in working order in no time.
This article will provide an overview of common outdoor faucet leaks and step-by-step instructions for repairing them. We’ll also look at identifying the source of an outdoor faucet leak, DIY tips, and quick fixes for common issues. Finally, we’ll cover troubleshooting and repairing a leaky outdoor faucet.
Step-by-Step Guide to Repairing a Leaky Outdoor Faucet
The first step when addressing any leaky outdoor faucet is to shut off the water supply. Most outdoor faucets have a dedicated shut off valve located near the spigot. If you can’t locate a shut off valve, you may need to shut off the main water supply to your home or building.
Once the water supply is shut off, you can remove the handle and inspect the parts. You may need to use a wrench or pliers to loosen the handle. Once the handle is removed, you should be able to see the interior components of the faucet. Look for any worn or damaged parts that may be causing the leak.
If you find any worn or damaged parts, replace them with new ones. You can purchase replacement parts from most hardware stores. Before replacing the parts, make sure they are compatible with your faucet. Once you’ve replaced any necessary parts, reassemble the faucet and turn on the water supply.

Identifying the Source of an Outdoor Faucet Leak and How to Fix It
Sometimes the source of an outdoor faucet leak isn’t immediately apparent. In these cases, it’s important to identify the source of the leak before attempting to fix it. Common sources of leaks include loose connections, worn washers, and corrosion.
To identify and repair the source of the leak, first check all of the connections for tightness. Use a wrench to tighten any loose connections. Next, inspect the washer for wear or damage. If the washer is worn or damaged, replace it with a new one. Finally, check for corrosion. If you find any corrosion, clean it off with a steel brush and apply a rust-inhibiting primer.

DIY Tips for Fixing a Leaky Outdoor Faucet
When attempting to fix a leaky outdoor faucet, it’s important to take certain safety precautions. First, gather all of the necessary tools and supplies. Make sure you have a wrench, screwdriver, pliers, and any other tools you may need. Second, wear appropriate safety gear such as goggles and gloves. Finally, make sure to follow the manufacturer’s instructions when replacing any parts.

Quick Fixes for Common Outdoor Faucet Leaks
Some outdoor faucet leaks don’t require a major repair job. For minor leaks, there are a few quick fixes you can try. First, check all of the connections for tightness. Loose connections can cause water to seep out of the faucet. Second, check the washer for wear or damage. If the washer is worn or damaged, replace it with a new one. Finally, check for corrosion. If you find any corrosion, clean it off with a steel brush and apply a rust-inhibiting primer.
Troubleshooting and Repairing a Leaky Outdoor Faucet
If you’ve tried the steps above and your outdoor faucet is still leaking, it may be a sign of a more serious issue. In these cases, you may need to troubleshoot and repair the faucet yourself. First, use a pressure gauge to check for low water pressure. Low water pressure can cause leaks. Second, check for blockages in the pipes or valves. Blockages can cause water to back up and create leaks. Finally, if you find any broken or corroded pipes or valves, replace them.
Conclusion
Fixing a leaky outdoor faucet doesn’t have to be a daunting task. With the right tools and know-how, you can easily identify and repair the source of the leak yourself. From checking connections to replacing worn parts, this article has provided a step-by-step guide to fixing a leaky outdoor faucet.