
Introduction
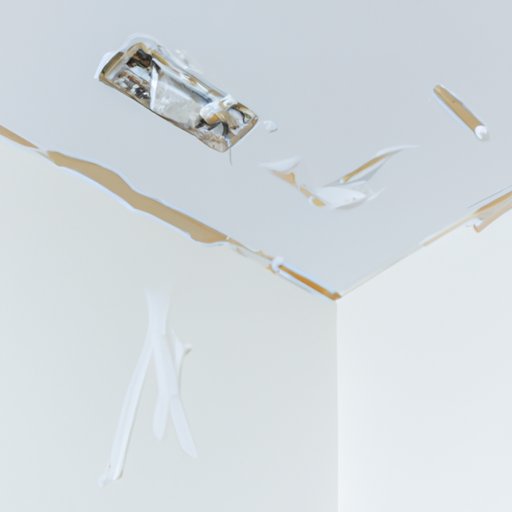
A cracked ceiling can be both an eyesore and a safety hazard. When left unchecked, the crack can spread, leading to further damage and potentially compromising the structural integrity of your home. Fortunately, repairing a cracked ceiling is a relatively simple process that you can do yourself with the right materials and a bit of patience.
In this article, we’ll explore eight different methods for fixing a cracked ceiling, from using a patch kit to replacing a section of damaged ceiling. With the help of these step-by-step instructions, you’ll have a safe and attractive ceiling in no time.
Use a Patch Kit to Repair the Crack
The first method is to use a patch kit to repair the crack. A patch kit is a pre-made adhesive patch that is designed to cover small cracks or holes in ceilings or walls. The patch consists of a thin layer of plastic that is applied directly to the surface of the ceiling. The patch is then painted over to match the existing color of the ceiling.
To apply the patch kit, start by cleaning the area around the crack with a damp cloth. Next, peel off the backing from the patch and press it firmly onto the ceiling. Finally, allow the patch to dry for 24 hours before painting over it.

Apply Joint Compound to Fill and Smooth the Crack
Another option for fixing a cracked ceiling is to apply joint compound to fill and smooth the crack. Joint compound, also known as drywall mud, is a plaster-like material that is used to fill in gaps and cracks in drywall or plaster surfaces. It can also be used to create a smooth, seamless finish on walls and ceilings.
To apply joint compound, start by cleaning the area around the crack with a damp cloth. Next, using a putty knife, apply a thin layer of joint compound to the crack. Allow the joint compound to dry for at least 24 hours. Finally, use a sanding block to smooth out any rough edges.
Use Drywall Tape to Reinforce the Repair
Once the joint compound has dried, you can use drywall tape to reinforce the repair. Drywall tape is a thin, paper-like material that is used to cover seams between pieces of drywall. It helps to protect the seams from moisture and provides additional strength to the repair.
To apply the drywall tape, start by cutting a piece of tape that is slightly larger than the area of the repair. Next, using a putty knife, press the tape firmly onto the joint compound. Finally, use a damp cloth to smooth out any bumps or wrinkles in the tape.

Use Textured Paint to Camouflage the Crack
Once the drywall tape is in place, you can use textured paint to camouflage the crack. Textured paint is a type of paint that contains small particles that create a raised, bumpy texture when applied to a surface. This texture helps to hide imperfections such as cracks and chips.
To apply the textured paint, start by stirring the paint thoroughly. Next, use a paint roller to apply the paint to the wall or ceiling. Be sure to roll the paint in one direction only. Finally, allow the paint to dry for at least 24 hours before adding a second coat if necessary.

Replace a Section of Damaged Ceiling
If the crack is too large to be repaired with a patch kit or joint compound, you may need to replace a section of damaged ceiling. To do this, you will need a few basic tools and materials, such as a utility knife, a drywall saw, drywall screws, and a piece of replacement drywall.
To replace the section of damaged ceiling, start by using a utility knife to cut away the damaged area. Next, use a drywall saw to cut the replacement drywall to size. Finally, use drywall screws to secure the new piece of drywall in place.
Use a Peel-and-Stick Patch to Cover the Crack
Another option for fixing a cracked ceiling is to use a peel-and-stick patch. This type of patch consists of a thin layer of material that is adhered directly to the ceiling. The patch is then painted over to match the existing color of the ceiling.
To apply the peel-and-stick patch, start by cleaning the area around the crack with a damp cloth. Next, peel off the backing from the patch and press it firmly onto the ceiling. Finally, allow the patch to dry for 24 hours before painting over it.
Install an Acoustic Ceiling Panel to Hide the Damage
If the crack is still visible after applying a patch kit or a peel-and-stick patch, you may want to consider installing an acoustic ceiling panel. An acoustic ceiling panel is a decorative panel that is designed to cover up imperfections in ceilings. It is made of lightweight material that is easy to install and comes in a variety of colors and textures.
To install an acoustic ceiling panel, start by measuring the area of the ceiling where you want to install the panel. Next, cut the panel to size and attach it to the ceiling using adhesive strips. Finally, use a putty knife to smooth out any bumps or wrinkles in the panel.
Conclusion
Repairing a cracked ceiling doesn’t have to be a difficult task. By following the steps outlined above, you can easily fix the problem yourself with minimal effort. Whether you choose to use a patch kit, joint compound, drywall tape, textured paint, a peel-and-stick patch, or an acoustic ceiling panel, your ceiling will be looking like new in no time.
With these eight simple steps, you can have a safe and attractive ceiling in no time.