
Introduction
Monkeys are one of the most popular animals around the world. With their playful attitude and mischievous behavior, it’s no wonder why they are so beloved. If you want to capture the essence of a monkey in pencil, learning how to draw them is essential.
In this article, we will explore how to draw a monkey from scratch. We will go over the steps involved and provide helpful tips along the way. We will also look at a beginner’s guide to drawing a monkey and provide a video tutorial to help you get started. So let’s dive right in!
What is a Monkey?
Monkeys are primates that belong to the family Cercopithecidae. They are found in tropical and subtropical climates across Africa, Asia, Central and South America. Monkeys vary in size and come in various shades of brown, gray, red and black.
They have long tails that can be used for balance while they move through the trees. Monkeys are highly social animals, living in groups called troops. All species of monkeys are omnivores and eat fruits, nuts, insects and small animals.
Why Learning How to Draw Monkeys is Beneficial
Drawing monkeys can be both fun and challenging. It requires patience, practice and an understanding of anatomy. By learning how to draw a monkey, you can gain a better appreciation for the animal and develop your artistic skills. Drawing helps you pay attention to detail and hone your observation skills.
It can also be a great way to relax and express yourself. You can use your drawings to tell stories or simply to practice techniques. Whether you are a beginner or advanced artist, learning how to draw a monkey can be a rewarding experience.
Step-by-Step Guide on How to Draw a Monkey
Here is a step-by-step guide on how to draw a monkey. Remember to take your time and enjoy the process.
Start with the Head
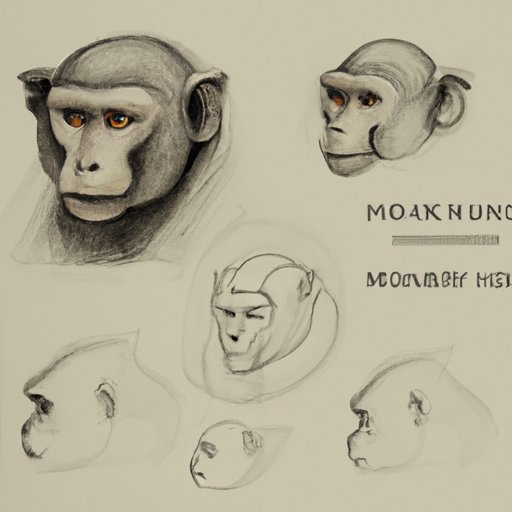
Begin by sketching the head. Start by drawing a circle for the skull and then add two smaller circles for the eyes. Add a curved line for the mouth and two curved lines for the ears.
Add the Ears, Nose and Mouth
Next, draw the ears. Start by drawing two curved lines and then fill in the shape. For the nose, draw a rounded triangle and then add two curved lines for the nostrils. For the mouth, draw two curved lines and then add two shorter lines for the lips.
Draw the Torso and Arms
Now it’s time to draw the torso and arms. Start by drawing two curved lines for the shoulders and then add two more lines for the arms. Add four curved lines for the fingers and a curved line for the tail.
Create the Legs and Feet
To create the legs, start by drawing two curved lines for the thighs and then add two more lines for the calves. Finally, draw the feet by adding four curved lines for the toes.
Finish with Details
Now you can finish up your drawing by adding details. Start by drawing fur on the face and body. You can also add shading to give your drawing more depth and texture. Finally, draw a few branches and leaves in the background to complete the scene.
Tutorial: Drawing a Monkey from Scratch
If you want to learn how to draw a monkey from scratch, here is a detailed tutorial to help you get started.
Begin with Outlining the Head
Start by outlining the head. Draw a large circle for the skull and then add two smaller circles for the eyes. Next, draw a curved line for the mouth and two curved lines for the ears.
Add the Eyes, Nose and Mouth
For the eyes, draw two curved lines and then fill in the shape. For the nose, draw a rounded triangle and then add two curved lines for the nostrils. For the mouth, draw two curved lines and then add two shorter lines for the lips.
Draw the Arms and Hands
Draw two curved lines for the shoulders and then add two more lines for the arms. Add four curved lines for the fingers and a curved line for the tail.
Create the Torso and Legs
Draw two curved lines for the thighs and then add two more lines for the calves. Finally, draw the feet by adding four curved lines for the toes.
Finish with Details
Now you can finish up your drawing by adding details. Start by drawing fur on the face and body. You can also add shading to give your drawing more depth and texture. Finally, draw a few branches and leaves in the background to complete the scene.

Tips for Capturing the Essence of a Monkey in Pencil
Here are some tips to help you capture the essence of a monkey in pencil.
Use Reference Photos
Reference photos can be a great way to practice drawing a monkey. Look for photos of different types of monkeys and study the shapes, proportions and details. This will help you understand the anatomy of a monkey and make it easier to draw.
Work with Proportions
When drawing a monkey, it’s important to pay attention to proportions. Make sure the head, body and limbs are in proportion to each other. This will help you create a more accurate drawing.
Pay Attention to Shading
Shading can help you bring your drawing to life. Pay attention to the direction of the light and use light and dark values to create a sense of depth. This will help you create a more realistic drawing.
Don’t Forget the Fur Texture
Monkeys have thick fur that can be difficult to capture in pencil. To add texture, use short, quick strokes to create the illusion of fur. This will help your drawing look more realistic.

Learn How to Draw a Monkey with This Video Guide
If you want to learn how to draw a monkey, this video guide can help. It provides an overview of the steps involved and a step-by-step demonstration. The video also offers tips for adding realism to your drawing.
Create Your Own Monkey Masterpiece with These Drawing Steps
If you want to create your own monkey masterpiece, follow these steps.
Sketching the Basic Shapes
Start by sketching the basic shapes. Draw a circle for the head and then add two smaller circles for the eyes. Draw two curved lines for the ears and a curved line for the mouth.
Developing the Features
Next, develop the features. Draw two curved lines for the shoulders and then add two more lines for the arms. Draw four curved lines for the fingers and a curved line for the tail.
Refining the Details
Finally, refine the details. Start by drawing fur on the face and body. You can also add shading to give your drawing more depth and texture. Finally, draw a few branches and leaves in the background to complete the scene.
A Beginner’s Guide to Drawing a Monkey
If you are a beginner, here is a guide to help you get started.
Gather Reference Materials
Gather reference materials such as photos, books and videos. This will help you understand the anatomy of a monkey and make it easier to draw.
Break Down the Elements
Break down the elements into simple shapes. Start by drawing a circle for the head and then add two smaller circles for the eyes. Draw two curved lines for the ears and a curved line for the mouth.
Start with Simple Shapes
Start with simple shapes and gradually add more details. Draw two curved lines for the shoulders and then add two more lines for the arms. Draw four curved lines for the fingers and a curved line for the tail.
Practice, Practice, Practice!
The best way to improve your drawing skills is to practice. Take your time and don’t be afraid to make mistakes. With enough practice, you will be able to create your own monkey masterpiece.

Using Shapes to Develop an Accurate Monkey Drawing
Using shapes is a great way to develop an accurate monkey drawing. Here are some tips to help you get started.
Identify the Major Shapes
Start by identifying the major shapes. Draw a circle for the head and then add two smaller circles for the eyes. Draw two curved lines for the ears and a curved line for the mouth.
Establish Proportions
Make sure the head, body and limbs are in proportion to each other. This will help you create a more accurate drawing.
Connect the Shapes
Connect the shapes to create the figure. Draw two curved lines for the shoulders and then add two more lines for the arms. Draw four curved lines for the fingers and a curved line for the tail.
Add Details
Finish up your drawing by adding details. Start by drawing fur on the face and body. You can also add shading to give your drawing more depth and texture. Finally, draw a few branches and leaves in the background to complete the scene.
Conclusion
Capturing the essence of a monkey in pencil can be a rewarding experience. With patience, practice and an understanding of anatomy, you can learn how to draw a monkey from scratch. Use the steps and tips provided in this article to create your own monkey masterpiece.