
Introduction
Drawing shoes can be a fun and creative way to express your style. Whether you are creating a cartoon character or designing a shoe line, learning how to draw shoes is an essential skill. This article will provide a step-by-step guide on how to draw simple shoes, as well as beginner’s tips and tricks to help you get started.
Step-by-Step Guide to Drawing Simple Shoes
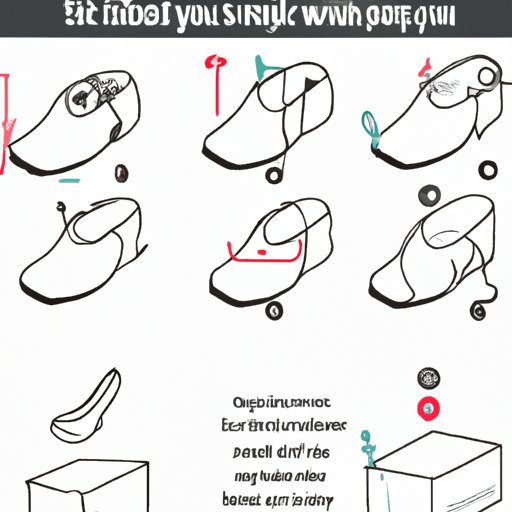
When drawing shoes, it is important to start with the basics. This step-by-step guide will walk you through the process of drawing simple shoes from start to finish.
Begin with the Sole
The sole of the shoe is the foundation for the rest of the design. Start by drawing an oval shape for the base of the shoe. Then, draw two curved lines for the sides of the sole. You can also add details such as laces and stitching to give the shoe more texture and depth.
Draw the Heel
Next, draw the heel of the shoe. This can be done by drawing a triangle shape at the back of the sole. Make sure to draw the heel slightly higher than the sole to give the shoe a more realistic look.
Add the Upper and Laces
Once the sole and heel are in place, it’s time to add the upper and laces. To do this, draw two curved lines from the top of the sole to the heel. Then, draw two crossed lines for the laces. Finally, add any additional details such as straps or buckles.
Finalize the Details
The last step is to finalize the details of the shoe. This includes adding shadows and highlights to create a 3D effect, as well as adding texture and color. Once all the details are complete, you should have a realistic looking shoe.
Beginner’s Guide to Drawing Shoes with Tips and Tricks
These tips and tricks will help make the process of learning how to draw shoes easier and more enjoyable. With these helpful hints, you’ll be able to start drawing shoes like a pro in no time.
Use Reference Photos for Inspiration
When learning how to draw shoes, it can be helpful to use reference photos as inspiration. Look at different types of shoes and observe the different shapes and details. This will give you an idea of what the finished product should look like.
Start with a Rough Sketch Before Adding Detail
Before you begin adding detail, it’s important to start with a rough sketch. This will help you figure out the proportions and overall shape of the shoe. Once you’re happy with the sketch, you can begin adding more detail.
Don’t Stress over Perfection
Remember that it takes practice to perfect your skills. Don’t stress if your first few attempts don’t turn out the way you want them to. Keep at it and soon you’ll be drawing shoes like a pro.

Learn How to Draw Shoes Quickly and Easily
Drawing shoes doesn’t have to be complicated or time consuming. With the right tools and techniques, you can learn how to draw shoes quickly and easily.
Break Down the Shoe into Smaller Parts
One way to make the process of drawing shoes easier is to break down the shoe into smaller parts. Start by drawing the sole and heel, then move on to the upper and laces. This will help keep your drawing organized and less overwhelming.
Practice Often to Improve Your Skills
The only way to get better at drawing shoes is to practice often. Set aside some time each day to work on your drawings and you’ll soon see improvement in your skills.
Utilize Online Resources to Enhance Your Drawing Ability
There are many online resources available to help you learn how to draw shoes. From tutorials to free templates, there are plenty of ways to enhance your drawing ability.

Easy Tutorial on How to Draw Shoes
This easy tutorial will walk you through the steps of how to draw shoes. With just a few simple steps, you’ll be able to draw realistic looking shoes in no time.
Start with a Circle for the Base
The first step is to draw a circle for the base of the shoe. This will form the sole of the shoe. Make sure the circle is not too big or too small, but just the right size for the shoe.
Draw the Toe and Heel Sections
Next, draw the toe and heel sections. The toe section should be slightly rounded and the heel section should be slightly pointed. Make sure to draw the toe and heel sections slightly higher than the sole for a more realistic look.
Add the Uppers and Laces
Once the toe and heel sections are in place, it’s time to add the uppers and laces. To do this, draw two curved lines from the top of the sole to the heel. Then, draw two crossed lines for the laces. You can add additional details such as straps or buckles for a more realistic look.
Finalize the Details
The last step is to finalize the details of the shoe. This includes adding shadows and highlights to create a 3D effect, as well as adding texture and color. Once all the details are complete, you should have a realistic looking shoe.
A Visual Guide to Drawing Shoes for Beginners
This visual guide will help beginners learn how to draw shoes more easily. By observing the different parts of the shoe, proportions, textures and materials used, you can create a realistic looking shoe.
Identify the Different Parts of the Shoe
The first step is to identify the different parts of the shoe. These include the sole, heel, upper, laces and other details such as straps or buckles. By understanding the anatomy of a shoe, you can create a more accurate drawing.
Observe the Proportions of the Shoe
It is important to pay attention to the proportions of the shoe. This means making sure the toe and heel sections are slightly higher than the sole and the laces are in the correct position. Observing the proportions of the shoe will help make your drawing look more realistic.
Consider the Different Textures and Materials Used
Finally, consider the different textures and materials used when drawing shoes. Different materials such as leather, canvas, suede and rubber can all be used to create a variety of looks. Pay attention to the textures and materials used in real life shoes to make your drawing more accurate.

Master the Art of Drawing Shoes in Just a Few Steps
Drawing shoes doesn’t have to be difficult or complicated. With the right tools and techniques, you can master the art of drawing shoes in just a few steps.
Find Inspiration from Existing Designs
When starting out, it can be helpful to find inspiration from existing designs. Look at different types of shoes and observe the different shapes and details. This will give you an idea of what the finished product should look like.
Utilize Different Drawing Techniques
Once you have an idea of what you want to draw, it’s time to start utilizing different drawing techniques. Experiment with different pencil strokes and shading techniques to create more realistic looking shoes.
Experiment with Color and Texture
Finally, experiment with color and texture to bring your shoes to life. Different colors and textures can be used to create a variety of looks. Have fun with it and don’t be afraid to try something new.
Conclusion
Drawing shoes doesn’t have to be difficult or time consuming. With this comprehensive guide, you now have all the steps and tips you need to draw simple shoes quickly and easily. Start with the basics, such as the sole and heel, then move on to the upper and laces. Utilize reference photos and online resources to help you along the way. Lastly, practice often and don’t be afraid to experiment with color and texture. By following these steps, you’ll be able to master the art of drawing shoes in no time.