
Introduction
Bicycles are a popular form of transportation and recreation, and drawing them can be a great way to express creativity and practice art skills. Drawing bicycles is also a great way to learn about the different parts of a bike, as well as their function. In this article, we’ll discuss the benefits of learning to draw a bicycle, provide a step-by-step tutorial, and offer easy tips for sketching a bicycle.
Definition of Bicycle
A bicycle is a two-wheeled vehicle typically powered by the rider’s legs. The two wheels are connected by a frame, which holds the seat and handlebars. Bicycles come in a variety of styles, including road bikes, mountain bikes, and BMX bikes. Each type of bike has its own unique features, such as different sizes and shapes of wheels, different types of brakes, and various components for comfort and performance.

Benefits of Learning to Draw a Bicycle
Learning to draw a bicycle has many benefits. First, it helps to develop fine motor skills and hand-eye coordination. Drawing requires focus and attention to detail, which can help to improve concentration and focus. Additionally, drawing can be a great way to express creativity and explore different mediums of art. Finally, it’s an enjoyable activity that can be done alone or with friends, making it a great way to spend time and bond.
Step-by-Step Tutorial on How to Draw a Bicycle
This step-by-step tutorial will guide you through the process of drawing a basic bicycle. Here’s what you’ll need: paper, pencil, eraser, colored pencils (optional).
Step 1: Sketch the Frame
Start by lightly sketching the frame of the bicycle. This includes the main part of the frame, the handlebars, and the seat. Make sure to draw the frame in proportion to the wheels. When you’re finished sketching the frame, go over it with a darker pencil line.
Step 2: Add the Wheels
Next, draw the two wheels. Start by drawing two circles, one slightly larger than the other. Then, draw spokes radiating from the center of each circle. If you’re having trouble drawing the spokes, try tracing around a coin or a lid from a jar.
Step 3: Outline the Handlebars and Pedals
Now it’s time to add the handlebars and pedals. Draw the handlebars by connecting the frame to the wheels. Then, draw the pedals by connecting the frame to the wheels. You can make the handlebars and pedals as detailed or as simple as you like.
Step 4: Detail the Bike
To give your bicycle more realism, you can add details such as a kickstand, reflectors, and a chain. These details are optional, so feel free to omit them if you’d like.
Step 5: Color in Your Bicycle
Finally, color in your bicycle. You can use colored pencils, markers, or paint. Feel free to experiment with different colors and shades to create an interesting design. Once you’ve finished coloring in your bicycle, erase any remaining pencil lines.
Drawing a Bicycle: A Visual Guide
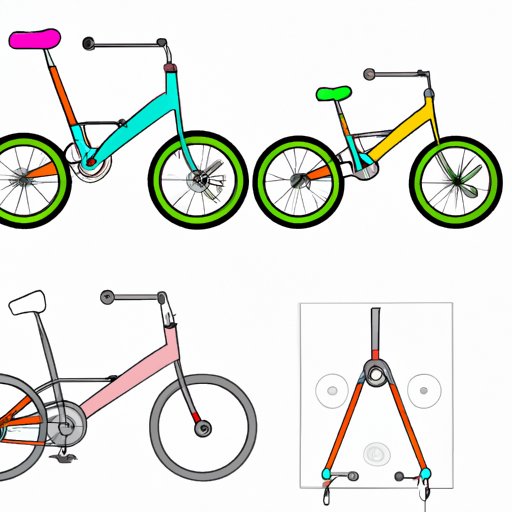
Sometimes it’s easier to learn by seeing. To help you get started, here is a visual guide on how to draw a bicycle.

In this image, you can see the basic steps for drawing a bicycle. Start with the frame, then add the wheels, handlebars, and pedals. Finally, add details and color in your bicycle.

Easy Tips for Sketching a Bicycle
Here are some easy tips for sketching a bicycle.
Start with the Frame
The frame of the bicycle is the foundation for the rest of the bike. Start by sketching the frame first, then move on to the wheels, handlebars, and pedals.
Use Reference Images
Reference images can be helpful when sketching a bicycle. Look at photos of bicycles online or in magazines and use them as a guide. This will help you get the proportions and details just right.
Keep It Simple
When sketching a bicycle, it’s important to keep it simple. Don’t worry about getting every detail perfect; instead, focus on capturing the overall shape and form of the bicycle.

Learn to Draw a Bicycle in 5 Simple Steps
Now that you know the basics of how to draw a bicycle, let’s look at the five steps in detail.
Step 1: Sketch the Frame
Start by lightly sketching the frame of the bicycle. This includes the main part of the frame, the handlebars, and the seat. Make sure to draw the frame in proportion to the wheels. When you’re finished sketching the frame, go over it with a darker pencil line.
Step 2: Add the Wheels
Next, draw the two wheels. Start by drawing two circles, one slightly larger than the other. Then, draw spokes radiating from the center of each circle. If you’re having trouble drawing the spokes, try tracing around a coin or a lid from a jar.
Step 3: Outline the Handlebars and Pedals
Now it’s time to add the handlebars and pedals. Draw the handlebars by connecting the frame to the wheels. Then, draw the pedals by connecting the frame to the wheels. You can make the handlebars and pedals as detailed or as simple as you like.
Step 4: Detail the Bike
To give your bicycle more realism, you can add details such as a kickstand, reflectors, and a chain. These details are optional, so feel free to omit them if you’d like.
Step 5: Color in Your Bicycle
Finally, color in your bicycle. You can use colored pencils, markers, or paint. Feel free to experiment with different colors and shades to create an interesting design. Once you’ve finished coloring in your bicycle, erase any remaining pencil lines.
A Beginner’s Guide to Drawing a Bicycle
If you’re just getting started with drawing a bicycle, here are some tips to keep in mind.
Start With the Frame
The frame of the bicycle is the foundation for the rest of the bike. Start by sketching the frame first, then move on to the wheels, handlebars, and pedals.
Use Reference Images
Reference images can be helpful when sketching a bicycle. Look at photos of bicycles online or in magazines and use them as a guide. This will help you get the proportions and details just right.
Practice Makes Perfect
Don’t expect your first attempt at drawing a bicycle to be perfect. It takes practice and patience to master the skill. So keep sketching and eventually you’ll be able to draw bicycles with ease.
Conclusion
In conclusion, drawing a bicycle can be a fun and rewarding experience. By following this step-by-step tutorial and using the easy tips provided, you can learn to draw a bicycle in no time. Remember to start with the frame, use reference images for guidance, and practice to perfect your sketch. With enough practice and dedication, you’ll be able to draw bicycles with ease.
Summary of Key Points
• Bicycles are two-wheeled vehicles typically powered by the rider’s legs.
• Learning to draw a bicycle has many benefits, including developing fine motor skills and expressing creativity.
• Follow this step-by-step tutorial and use the easy tips provided to learn to draw a bicycle in no time.
• Start with the frame, use reference images for guidance, and practice to perfect your sketch.
Final Thoughts
Drawing a bicycle can be an enjoyable and rewarding experience. With enough practice and dedication, you’ll be able to draw bicycles with ease.