
Introduction
Drawing a fishing pole is a great way to learn about perspective, texture, and shading. Whether you’re a beginner looking to improve your skills or an experienced artist wanting to add realism to your work, this article will provide you with all the information you need.
A fishing pole is a rod used for fishing. It typically consists of a long shaft made from wood, metal or fiberglass, a reel attached at one end, a line connecting the reel to the hook, and a handle for gripping. Drawing a fishing pole can be a challenging but rewarding experience.
The benefits of learning how to draw a fishing pole include improved hand-eye coordination, increased understanding of perspective and shading, and better artistic skills in general.
Step-by-Step Guide to Drawing a Fishing Pole
The following steps will show you how to draw a basic fishing pole. You can then use these steps as a basis for creating more detailed and realistic drawings.
Basic Shapes and Lines
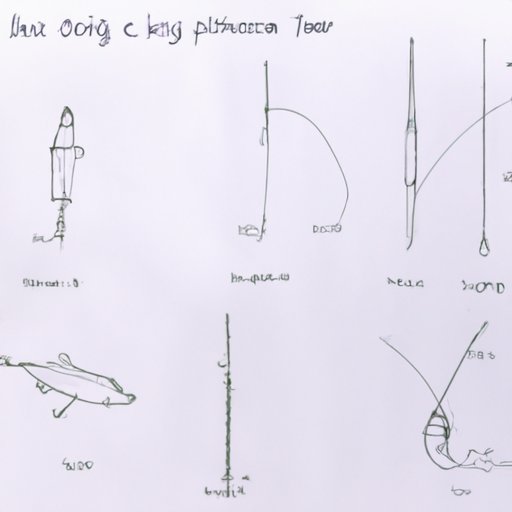
Start by sketching out the basic shape of the pole. Use simple lines and shapes to form the shaft, reel and handle. Don’t worry too much about details at this stage, just focus on getting the general outline right.
Detailing the Pole
Once you have the basic shape, start adding details such as line, texture and shading. This will give your drawing more depth and realism. Pay attention to the proportions of the pole and make sure everything looks accurate.
Finishing Touches
Finally, finish off your drawing with highlights and shadows. These will help bring the whole image together and give it a more polished look. Once you’re happy with your drawing, you can move on to creating a more realistic and detailed version.
A Beginner’s Guide to Drawing a Fishing Pole
If you’re just starting out, drawing a fishing pole can seem like a daunting task. But with some practice and patience, you can create beautiful and realistic drawings.
Starting with the Basic Shapes
The first step is to sketch out the basic shape of the pole. Use simple lines and shapes to form the shaft, reel and handle. Don’t worry too much about details at this stage, just focus on getting the general outline right.
Adding Details
Once you have the basic shape, start adding details such as line, texture and shading. This will give your drawing more depth and realism. Pay attention to the proportions of the pole and make sure everything looks accurate.
Practice Makes Perfect
Drawing a fishing pole is not something that you can master overnight. The best way to improve your skills is to keep practicing. Start with basic shapes and lines, and gradually add more details until you get the desired effect.

Draw a Fishing Pole in 8 Easy Steps
Follow these eight simple steps to draw a realistic fishing pole.
Step 1: Sketch Out the Basic Shape of the Pole
Start by sketching out the basic shape of the pole. Use simple lines and shapes to form the shaft, reel and handle. Don’t worry too much about details at this stage, just focus on getting the general outline right.
Step 2: Add Details Such as Line, Texture and Shading
Once you have the basic shape, start adding details such as line, texture and shading. This will give your drawing more depth and realism. Pay attention to the proportions of the pole and make sure everything looks accurate.
Step 3: Draw the Reel and Handle
Now it’s time to draw the reel and handle. These should be drawn in separate shapes, so make sure they are clearly distinct from each other. Also, pay attention to the size and shape of the reel and handle, as these will affect the overall look of the fishing pole.
Step 4: Shade in the Reel and Handle
Next, shade in the reel and handle. This will help give them a more realistic look and will also help to define the shapes of the parts. Use light and dark shades to create contrast and depth.
Step 5: Add Details to the Reel and Handle
Now it’s time to add details to the reel and handle. This could include things such as screws or buttons, or any other details that you think would make the reel and handle look more realistic.
Step 6: Draw the Fishing Line
The next step is to draw the fishing line. This should be drawn in a curved line, to indicate the line’s movement through the water. Make sure to draw the line in a realistic manner, paying attention to its thickness and texture.
Step 7: Finalize the Pole With Highlights and Shadows
Now it’s time to finalize your drawing with highlights and shadows. This will help to bring the whole image together and will give it a more polished look. Be sure to pay attention to the light and shadow of the fishing pole, and make sure that the highlights and shadows are placed in the correct areas.
Step 8: Add the Background
The final step is to add the background. This could be anything from a lake or river to a beach or forest. You can also add other elements to the background such as trees or rocks. Just make sure that the background fits the overall tone of your drawing.

Tips and Tricks for Drawing a Fishing Pole
Here are some useful tips and tricks to help you create a realistic fishing pole drawing.
Use Reference Images
Using reference images can be a great way to get an idea of what a real fishing pole looks like. Look at pictures of different types of poles and try to replicate the same shapes and textures in your drawing.
Keep Proportions in Mind
It’s important to keep the proportions of the fishing pole in mind when drawing. If the pole is too big or too small, it won’t look realistic. Try to keep the proportions as close to a real fishing pole as possible.
Observe Light and Shadow
Light and shadow can make a huge difference in a drawing. Pay attention to how the light hits the pole and how the shadows fall. This will help to create a more realistic and believable drawing.

How to Create a Realistic Fishing Pole Drawing
Creating a realistic fishing pole drawing requires a certain level of skill and knowledge. Here are some tips to help you achieve a more realistic look.
Understand Perspective
Perspective is an important part of creating a realistic drawing. Understand how the perspective of the fishing pole changes depending on where you’re looking from. This will help you create a more accurate and believable drawing.
Pay Attention to Details
Details are essential in creating a realistic fishing pole drawing. Pay attention to the details of the pole and make sure they are as accurate as possible. This will help to make your drawing look more believable.
Learn How to Blend Colors
Blending colors is another important aspect of creating a realistic fishing pole drawing. Learn how to mix and blend colors to create the perfect shade for your drawing. This will help to create a more lifelike image.
A Sketch Artist’s Guide to Drawing a Fishing Pole
Sketching a fishing pole can be a great way to practice your drawing skills. Here are some tips to help you create a realistic sketch.
Start With a Light Pencil Sketch
When sketching a fishing pole, it’s important to start with a light pencil sketch. This will help you get the basic shape and proportions right before you start adding details. Make sure to use light strokes and don’t press too hard on the paper.
Add Layers of Details
Once you’ve sketched out the basic shape of the pole, start adding layers of details. This could include lines, textures, and shading. Keep the details subtle and make sure they look realistic.
Use Different Techniques to Create Texture
Texture is key to creating a realistic sketch. Experiment with different techniques such as hatching, crosshatching and stippling to create different textures. Practice these techniques and find the ones that work best for you.
Learn to Draw a Fishing Pole With This Tutorial
This tutorial will teach you how to draw a realistic fishing pole. Follow the steps below to create a beautiful and lifelike drawing.
Gather Your Supplies
Gather the necessary supplies for drawing a fishing pole. You will need a pencil, eraser, ruler, paper, and a reference image of a fishing pole. You may also want to use colored pencils or markers for shading and highlighting.
Begin by Sketching the Basic Shape of the Pole
Start by sketching out the basic shape of the pole. Use simple lines and shapes to form the shaft, reel and handle. Don’t worry too much about details at this stage, just focus on getting the general outline right.
Add Details and Shading
Once you have the basic shape, start adding details such as line, texture and shading. This will give your drawing more depth and realism. Pay attention to the proportions of the pole and make sure everything looks accurate.
Finish the Drawing With Highlights and Shadows
Finally, finish off your drawing with highlights and shadows. This will help bring the whole image together and give it a more polished look. Be sure to pay attention to the light and shadow of the fishing pole, and make sure that the highlights and shadows are placed in the correct areas.
Conclusion
Drawing a fishing pole can be a fun and rewarding experience. By following the steps outlined in this article, you can learn how to draw a realistic fishing pole. Remember to practice and pay attention to the details and proportions of the pole, and you’ll be able to create beautiful and lifelike drawings.