
Introduction
In times of social distancing, it can be hard to get a trim or a new hairstyle. But with the right tools and some practice, you can learn how to cut your own hair. This article will provide a step-by-step guide on how to cut your own hair as a female, from start to finish.

Invest in the Right Tools
Before you start cutting your own hair, you’ll need to invest in the right tools. Here are some of the essential items you’ll need:
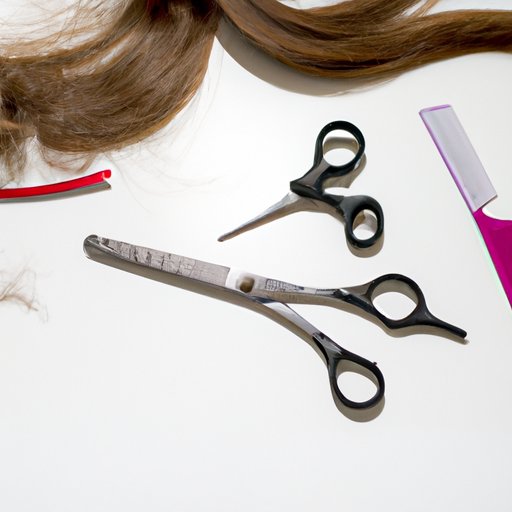
Clippers/Scissors
The most important tool for cutting your own hair is a pair of sharp, professional-grade scissors or clippers. Clippers can help you achieve a more even cut, while scissors give you more control over the length of the cut. Invest in a good pair of scissors or clippers if you plan to cut your own hair regularly.
Hair Cutting Cape
A hair cutting cape can help keep the area around you clean while you cut your hair. It also helps to protect your clothing from any stray hairs.
Comb and Hair Clips
You’ll also need a comb and a few hair clips. The comb will help you part and section your hair and the clips will help you secure each section in place while you cut.
Start with a Trim
If you’re a beginner, start with a simple trim. This will help you get used to the process and gain confidence before attempting a more dramatic cut.
Determine Length Desired
Before you start cutting, determine the length you want your hair to be. Measure the desired length against the ends of your hair and mark it with a clip or a pen.
Comb Hair and Secure with Clip
Next, comb your hair and secure the top half of your hair with a clip. Make sure the clip is tight and secure so that the bottom half of your hair is free.
Cut Along the Bottom of the Hair
Now you’re ready to start cutting. Take your scissors or clippers and start cutting along the bottom of your hair, following the line you marked earlier. If you’re using scissors, use a slow and steady motion. If you’re using clippers, move them in an upward motion as you cut.

Follow the Natural Curve of Your Hair
Once you’ve trimmed the bottom of your hair, you’re ready to move onto the sides and back. The key is to follow the natural curve of your hair.
Use Comb to Create Sections
Start by using your comb to create sections. Part your hair into four sections: two at the front, one at the back and one at the nape of your neck.
Cut Along the Natural Curve of Your Hair
Take one section at a time and cut along the natural curve of your hair. Start at the bottom and work your way up. Be sure to take your time and go slowly. If you make a mistake, you can always go back and fix it.
Cut in Sections
To ensure an even cut, it’s best to divide your hair into smaller sections. This will help you to avoid mistakes and get a more precise cut.
Divide Hair Into Sections
Start by dividing your hair into two sections: one at the top of your head and one at the back. Then, divide each of those sections into smaller sections.
Secure Each Section With a Clip
Once you’ve divided your hair into sections, secure each section with a clip. This will help keep the sections in place while you cut.
Cut Along the Natural Curve of Your Hair
Once your hair is secured, you can start cutting. Take one section at a time and cut along the natural curve of your hair. Start at the bottom and work your way up. Be sure to take your time and go slowly.
Create Layers and Textured Edges
If you want to add layers or textured edges to your hair, here are some tips:
Cut Short Pieces at the Front
For layers, start with the front of your hair. Take small sections of hair and cut them shorter than the rest of your hair. This will create a layered effect.
Gradually Increase Length Toward the Back
For textured edges, start at the front of your hair and gradually increase the length of your cut as you move towards the back. This will give you a softer, more natural look.
Create Textured Edges Around the Face
To create textured edges around your face, take small sections of hair and cut them shorter than the rest of your hair. This will give you a softer, more natural frame around your face.
Finish with Styling Products
Once you’ve finished cutting your hair, you can use styling products to hold your style in place. Here are some common products to try:
Hair Spray
Hair spray can help hold your style in place and add shine to your hair. Use a light-hold spray for a natural look.
Wax/Gel
Wax or gel can help add texture and definition to your hair. Use a small amount and work it through your hair with your fingers.
Curling Iron/Flat Iron
If you want to add curls or waves to your hair, a curling iron or flat iron can help. Be sure to use a heat protectant spray before styling your hair with heat.
Conclusion
Cutting your own hair can be daunting but with the right tools and some practice, it can be done. Start with a simple trim and then move onto more complicated styles. Remember to take your time and go slowly. With patience and practice, you can achieve salon-quality results right at home.
To recap, here are the steps for cutting your own hair as a female: invest in the right tools, start with a trim, follow the natural curve of your hair, cut in sections, create layers and textured edges, and finish with styling products. By taking the time to learn how to cut your own hair, you’ll be able to save money and have fun experimenting with different styles.