
Introduction
Crown molding is an ornamental trim used to add a decorative touch to walls, ceilings, and cabinets. It is typically made from wood, MDF (medium-density fiberboard), PVC (polyvinyl chloride), or other materials, and comes in a variety of shapes and sizes. Installing crown molding on cabinets can instantly elevate the look of any kitchen, bathroom, or living space.
Step-by-Step Guide to Cutting Crown Molding for Cabinets
Cutting crown molding for cabinets may seem like a daunting task, but with the right tools and technique, it can be done with relative ease. Here is a step-by-step guide to help you get started:
Selecting the Right Tools
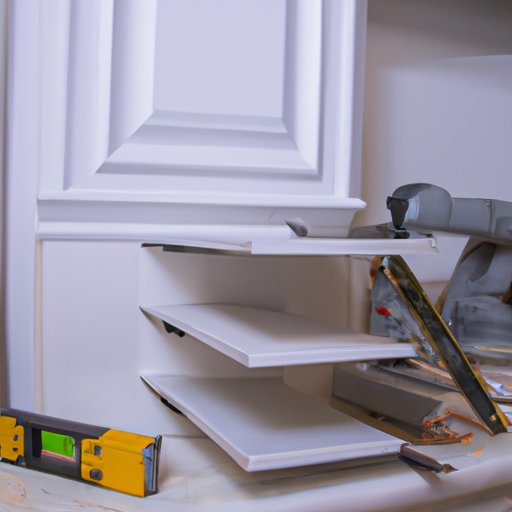
The first step is to select the right tools for the job. You will need a miter saw, coping saw, tape measure, level, pencil, and adhesive. For safety reasons, it is also important to wear protective eyewear and gloves when making the cuts.
Marking the Cut Lines
Once you have the right tools, the next step is to mark the cut lines. Make sure to measure twice and mark once to ensure accuracy. Using a level, make sure that each line is straight before making the cut.
Making the Cuts
Now it’s time to make the cuts. With a miter saw, you can make straight, angled, and compound cuts. If you are working with curved pieces, use a coping saw instead. When making the cuts, make sure to take your time and follow the marks precisely.

How to Achieve Perfect Cuts for DIY Cabinet Crown Molding
For DIY cabinet crown molding projects, it is essential to make accurate, precise cuts. There are two main ways to achieve perfect cuts: using a miter saw and using a coping saw.
Using a Miter Saw
A miter saw is the most common tool used for making crown molding cuts. It is ideal for making straight, angled, and compound cuts. To use a miter saw, simply adjust the blade angle and depth to match the desired cut. Be sure to double check the measurements before making the cut.
Using a Coping Saw
A coping saw is best suited for making curved cuts. This type of saw is handheld and has a thin, flexible blade that makes it easier to maneuver around curves. To use a coping saw, simply adjust the blade tension and start cutting along the marked lines.
A Beginner’s Guide to Installing Crown Molding on Cabinets
Installing crown molding on cabinets is a relatively easy process. Here is a step-by-step guide to help you get started:
Measuring and Marking the Pieces
Before beginning the installation process, measure and mark the pieces of crown molding. Measure twice and mark once to ensure accuracy. Using a level, make sure that each line is straight before making the cut.
Cutting the Pieces
Once the pieces are marked, it’s time to make the cuts. With a miter saw, you can make straight, angled, and compound cuts. If you are working with curved pieces, use a coping saw instead. When making the cuts, make sure to take your time and follow the marks precisely.
Applying the Adhesive
Next, apply the adhesive to the back of the crown molding pieces. Use a brush or roller to evenly spread the adhesive on each piece. Allow the adhesive to dry completely before continuing.
Securing the Molding
Once the adhesive has dried, it’s time to secure the crown molding to the cabinets. Use a hammer and nails to attach the pieces to the cabinets. For added stability, use wood glue as well.
Tips and Tricks for Installing Crown Molding on Kitchen Cabinets
Installing crown molding on kitchen cabinets requires precision and attention to detail. Here are some tips and tricks to help you achieve a professional-looking finish:
Use a Level to Ensure Straight Cuts
When marking the cut lines, use a level to ensure that each line is straight. This will help ensure that the pieces fit together properly and that the finished product looks neat and tidy.
Use a Tape Measure to Measure Angles Accurately
If you are making angled cuts, use a tape measure to accurately measure the angles. It is important to be precise when measuring the angles to ensure that the pieces fit together perfectly.

The Ultimate Guide to Cutting Crown Molding for Cabinets
Cutting and installing crown molding for cabinets can be a tricky task. However, with the right tools and techniques, it can be accomplished with relative ease. Follow these steps for a successful DIY crown molding project:
Preparing the Area
Before starting the project, prepare the area by removing any existing molding and cleaning the surfaces. This will make it easier to install the new molding and ensure a neat, professional-looking finish.
Making the Cuts
Once the area is prepared, it’s time to make the cuts. With a miter saw, you can make straight, angled, and compound cuts. If you are working with curved pieces, use a coping saw instead. When making the cuts, make sure to take your time and follow the marks precisely.
Installing the Molding
Finally, it’s time to install the crown molding. Apply the adhesive to the back of the pieces and then secure them to the cabinets using nails and/or wood glue. Once the pieces are in place, allow the adhesive to dry completely before proceeding.
Conclusion
Cutting and installing crown molding for cabinets may seem like a daunting task, but with the right tools and techniques, it can be done with relative ease. By following the steps outlined in this guide, you can create a beautiful, professional-looking finish for your cabinets. Installing crown molding on cabinets can instantly elevate the look of any kitchen, bathroom, or living space.