
Introduction
Curling your hair with a straightener can be intimidating if you’ve never done it before. However, once you learn the basics and practice a few times, you’ll be able to create beautiful, long-lasting curls with ease. In this article, we’ll explore how to curl hair with a straightener for beginners, including identifying the best hair type for curling with a straightener, understanding the basics of using a straightener to create curls, gathering necessary supplies and preparing hair for styling, practicing creating curls on a mannequin head or doll, dividing hair into sections and beginning curling, and finishing the look with hair spray and accessories.
Overview of Curling Hair with a Straightener
Using a straightener to curl your hair is simple and easy once you get the hang of it. The key is to use a high-quality straightener with adjustable temperature settings so that you can control the heat and avoid damaging your hair. To achieve perfect curls, start by separating your hair into small sections and then wrap each section around the straightener. Hold the straightener in place for a few seconds and then slowly pull the straightener away. This will create a beautifully curled look that will last all day!
Benefits of Using a Straightener for Curling
Using a straightener for curling has many benefits. It’s an affordable option compared to other styling tools like curling irons, and it can help you create a variety of looks from tight ringlets to loose beachy waves. Additionally, you can use a straightener to create both natural and more formal styles, making it versatile enough to use for any occasion. Finally, straighteners are generally easier to use than curling irons, making them a great choice for beginners.
Identifying the Best Hair Type for Curling with a Straightener
When it comes to curling your hair with a straightener, not all hair types are created equal. To achieve the best results, it’s important to identify what type of hair you have so you can adjust your technique accordingly. Here are a few factors to consider when determining the best hair type for curling with a straightener:
Thickness of Hair
If your hair is thick, it may be difficult to get the curls to hold. In this case, you should use a higher heat setting to ensure that the curls hold. Additionally, you may need to use a larger straightener to accommodate the thickness of your hair.
Length of Hair
Hair that is longer than shoulder length is best suited for curling with a straightener. This is because longer hair holds curls better. If your hair is shorter than shoulder length, you may find that the curls don’t last as long.
Texture of Hair
The texture of your hair also plays a role in how well your curls will hold. If your hair is naturally coarse or wavy, it’s best to use a lower heat setting to avoid damaging your hair. If your hair is fine or straight, you can use a higher heat setting to ensure that the curls hold.

Understanding the Basics of Using a Straightener to Create Curls
Before you begin curling your hair, there are a few basics you should understand about using a straightener to create curls. Here’s what you need to know:
Types of Straighteners
There are several types of straighteners available on the market, from traditional flat irons to tourmaline ceramic models. Each type of straightener has its own advantages and disadvantages, so it’s important to do your research to determine which one is best for your hair type and styling needs.
Setting Heat Levels
Most straighteners come with adjustable heat settings, so it’s important to set the heat level correctly to avoid damaging your hair. Generally speaking, fine or damaged hair should be curled at a lower heat setting, while thicker or coarser hair can handle a higher heat setting. It’s also a good idea to start with the lowest heat setting and gradually increase it until you find the right level for your hair.
Techniques for Curling
Once you’ve identified the best heat setting for your hair, it’s time to start curling. There are several different techniques you can use to create different types of curls. For example, if you want tight, defined curls, you can wrap small sections of hair around the straightener and hold it in place for a few seconds before slowly pulling the straightener away. If you want looser, more natural-looking curls, you can wrap larger sections of hair around the straightener and hold it in place for a few seconds before slowly pulling it away.

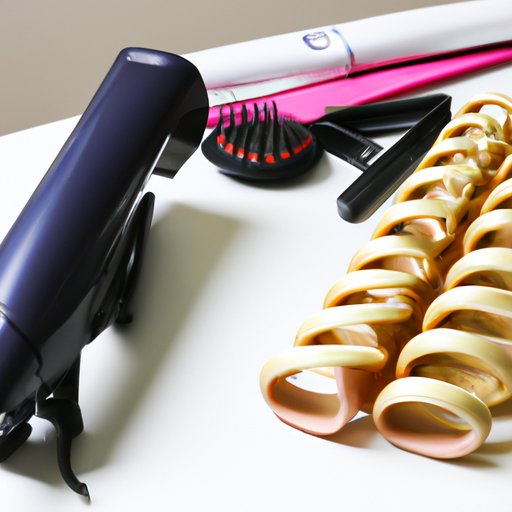
Gather Necessary Supplies and Prepare Hair for Styling
Before you begin curling your hair with a straightener, it’s important to gather the necessary supplies and prepare your hair for styling. Here’s what you’ll need:
Types of Brushes
To achieve the best results, it’s important to use the right type of brush when curling your hair. A paddle brush or wide-tooth comb works best for creating smooth, even curls. Avoid using a brush with metal bristles, as these can damage your hair.
Heat Protectant Sprays
It’s also important to use a heat protectant spray before curling your hair. This will help protect your hair from the heat of the straightener and will make the curls last longer. Look for a product specifically designed for heat styling.
Sectioning Hair
Once you’ve gathered your supplies and applied heat protectant, it’s time to section your hair. Start by separating the top layer of your hair into small sections. For best results, make sure the sections are no larger than 1 inch in diameter. Then, clip the top layer up and repeat the process with the bottom layer of your hair.
Practice Creating Curls on a Mannequin Head or Doll
Now that you’ve prepared your hair for styling, it’s time to practice creating curls. Before you begin curling your own hair, it’s a good idea to practice on a mannequin head or doll. Here’s what you need to do:
Preparing the Mannequin
Start by brushing the mannequin’s hair and applying heat protectant. Then, section the hair into small sections, just as you would with your own hair. Finally, clip the sections up to keep them out of the way while you work.
Practicing Different Curling Techniques
Next, practice different curling techniques. Try wrapping small sections of hair around the straightener and holding it in place for a few seconds before slowly pulling the straightener away. Experiment with different heat settings and techniques to achieve the look you want.
Adjusting Heat Settings
Finally, adjust the heat settings as needed. If the curls aren’t holding, try increasing the heat. If the curls are too tight, try decreasing the heat. Once you’ve achieved the desired look, you’re ready to move on to curling your own hair.

Divide Hair into Sections and Begin Curling
Now that you’ve practiced on a mannequin, it’s time to begin curling your own hair. Here’s what you need to do:
Separating Hair into Sections
Start by separating your hair into small sections. Make sure the sections are no larger than 1 inch in diameter. Clip the sections up to keep them out of the way while you work.
Starting at the Nape of the Neck
Begin curling your hair at the nape of your neck. Take one section of hair and wrap it around the straightener. Hold the straightener in place for a few seconds before slowly pulling it away. Repeat this process with each section of hair until you reach the crown of your head.
Working Around the Head
Once you’ve finished curling the back of your head, start curling the sides. Work your way up the head, curling each section of hair until you reach the front. When you reach the front, take extra care to ensure that the curls are even and uniform. Finally, curl the top layer of your hair to complete the look.

Finishing the Look with Hair Spray and Accessories
Once you’ve finished curling your hair, it’s time to finish the look with hair spray and accessories. Here’s what you need to do:
Types of Hair Sprays
To set your curls, it’s important to use a good quality hair spray. Look for a product specifically designed for holding curls in place. Be sure to follow the instructions for application to ensure that your curls stay in place all day.
Decorative Hair Accessories
Finally, add decorative hair accessories to complete the look. You can use clips, barrettes, or ribbons to add a touch of style to your curls. Just make sure that the accessories don’t interfere with the shape of the curls.
Final Touches
Once you’ve added the hair spray and accessories, it’s time for the final touches. Gently run your fingers through your curls to separate them and give them more volume. Then, step back and admire your work!
Conclusion
Curls are a great way to switch up your look and add some fun to your style. With a little practice and the right supplies, you can easily create beautiful, long-lasting curls with a straightener. Remember to identify the best hair type for curling with a straightener, understand the basics of using a straightener to create curls, gather necessary supplies and prepare hair for styling, practice creating curls on a mannequin head or doll, divide hair into sections and begin curling, and finish the look with hair spray and accessories. With these steps, you’ll be able to create gorgeous curls in no time!
Summary of Steps
In summary, curling your hair with a straightener is a simple and easy process. Start by identifying the best hair type for curling with a straightener, understanding the basics of using a straightener to create curls, gathering necessary supplies and preparing hair for styling, practicing creating curls on a mannequin head or doll, dividing hair into sections and beginning curling, and finishing the look with hair spray and accessories. With these steps, you’ll be able to create beautiful, long-lasting curls with ease.
Benefits of Curling Hair with a Straightener
Using a straightener to curl your hair offers many benefits. It’s an affordable option compared to other styling tools like curling irons, and it can help you create a variety of looks from tight ringlets to loose beachy waves. Additionally, you can use a straightener to create both natural and more formal styles, making it versatile enough to use for any occasion. Finally, straighteners are generally easier to use than curling irons, making them a great choice for beginners.