
Introduction
Connecting an ethernet cable to your laptop can be a great way to improve your internet connection speed and stability. But if you’re not familiar with the process, it can seem daunting. In this article, we’ll cover everything you need to know about connecting an ethernet cable to your laptop, from the basics of what an ethernet cable is and its benefits to step-by-step instructions, troubleshooting tips, and a comprehensive DIY guide.
What is an Ethernet Cable?
An ethernet cable is a type of networking cable used for connecting computers and other devices to each other or to a router that provides access to the internet. Ethernet cables are usually made of copper wires surrounded by a protective plastic sheath. They come in different lengths, colors, and speeds, depending on the type of connection you need.

Benefits of Connecting an Ethernet Cable to a Laptop
Connecting your laptop to the internet via an ethernet cable offers several advantages over using a Wi-Fi connection. First, an ethernet cable connection is more reliable than a Wi-Fi connection because it is less likely to be affected by interference from other devices in your home. Second, it offers faster speeds than Wi-Fi, so you can enjoy quicker downloads and smoother streaming. Finally, an ethernet connection is more secure than a Wi-Fi connection since it’s harder for hackers to access your data.
Step-by-Step Guide on How to Connect an Ethernet Cable to a Laptop
If you’ve decided to make the switch from Wi-Fi to an ethernet connection, here’s a step-by-step guide on how to do it.
Identifying the Ethernet Port
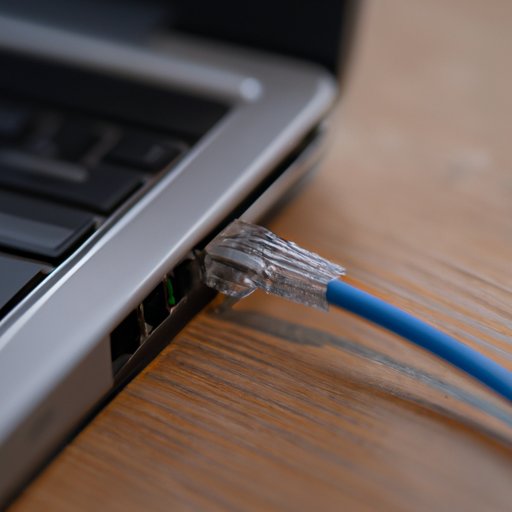
The first step is to identify the port on your laptop where you will plug in the ethernet cable. This is usually a rectangular port located on the side of your laptop. It may also be labeled “LAN” or “Ethernet.”
Connecting the Ethernet Cable
Once you’ve identified the port, plug one end of the ethernet cable into it. Then, plug the other end into the router or modem that provides your internet connection. Make sure the cable is firmly inserted into both ports.
Testing the Connection
Once you’ve connected the cable, you should test the connection to make sure it’s working properly. To do this, open the Network and Sharing Center on your laptop and click on Change Adapter Settings. If the connection is working correctly, you should see a new Local Area Connection listed. You can then open your web browser and test the connection by visiting a website.
Troubleshooting Tips for Connecting an Ethernet Cable to a Laptop
If you’re having trouble getting your ethernet connection to work, there are a few things you can try.
Check the Device Drivers
Make sure you have the latest device drivers installed for your laptop’s network adapter. You can download them from your laptop manufacturer’s website.
Check Network Settings
Make sure your network settings are configured correctly. This includes setting the correct IP address and DNS server.
Check the Cables and Ports
Make sure the ethernet cable is securely connected to both your laptop and the router. Also, check the ports on both devices to make sure they’re not damaged.

An Illustrated Guide to Connecting an Ethernet Cable to a Laptop
For those who prefer visual guides, here’s an illustrated walkthrough of how to connect an ethernet cable to your laptop.
Step-by-Step Illustrations
Follow these steps to connect your laptop to the internet via an ethernet cable.
- Locate the ethernet port on your laptop.
- Plug one end of the ethernet cable into the port.
- Plug the other end of the cable into the router or modem.
- Open the Network and Sharing Center and check for a new Local Area Connection.
- Test the connection by opening a web browser and visiting a website.
Common Issues and Solutions
If your connection isn’t working, here are some common issues and solutions.
- No Connection Detected: Check the device drivers, network settings, and cables/ports.
- Intermittent Connection: Try moving the router closer to the laptop or using a longer ethernet cable.
- Slow Connection: Make sure you’re using a high-speed ethernet cable.
A Beginner’s Guide to Connecting an Ethernet Cable to a Laptop
If you’re new to connecting an ethernet cable to your laptop, here’s a beginner’s guide to get you started.
Overview of Process
The process of connecting an ethernet cable to your laptop involves three steps: identifying the port, connecting the cable, and testing the connection.
Common Questions
Here are some common questions beginners might have when connecting an ethernet cable to their laptop.
- Which port do I use? Look for a rectangular port labeled “LAN” or “Ethernet.”
- Do I need a special cable? Make sure you’re using an ethernet cable designed for high-speed connections.
- How do I test the connection? Open the Network and Sharing Center and check for a new Local Area Connection.

DIY Guide on How to Easily Connect an Ethernet Cable to a Laptop
If you’re feeling confident enough to try connecting your laptop to the internet via an ethernet cable yourself, here’s a DIY guide to help you out.
Preparing for Installation
Before you begin, make sure you have all the necessary components. You’ll need an ethernet cable, a router or modem, and a laptop with an ethernet port. You may also need to install any necessary device drivers for your laptop.
Installing the Cable
Once you have all the necessary components, you can start installing the cable. Plug one end of the cable into the port on your laptop, and then plug the other end into the router or modem. Make sure the cable is firmly inserted into both ports.
Testing the Connection
Once you’ve connected the cable, you should test the connection to make sure it’s working properly. To do this, open the Network and Sharing Center on your laptop and click on Change Adapter Settings. If the connection is working correctly, you should see a new Local Area Connection listed. You can then open your web browser and test the connection by visiting a website.
The Ultimate Guide to Connecting an Ethernet Cable to a Laptop
For those who want a comprehensive guide on connecting an ethernet cable to their laptop, here’s a thorough guide that covers everything you need to know.
Overview of Components
Before you begin, make sure you have all the necessary components. You’ll need an ethernet cable, a router or modem, and a laptop with an ethernet port. You may also need to install any necessary device drivers for your laptop.
Configuring the Network Settings
Once you have all the necessary components, you can start configuring the network settings. This includes setting the correct IP address and DNS server.
Troubleshooting Tips
If you’re having trouble getting your ethernet connection to work, here are some troubleshooting tips. Make sure you have the latest device drivers installed for your laptop’s network adapter. Check your network settings to make sure they’re configured correctly. And make sure the ethernet cable is securely connected to both your laptop and the router.
Conclusion
Connecting an ethernet cable to your laptop can be a great way to improve your internet connection speed and stability. With this comprehensive guide, you now have all the information you need to get started.