
Introduction
Cleaning the fan on your laptop is an important part of keeping it running smoothly. Dust, dirt, and other debris can build up on the fan blades and vents, which can cause overheating and other issues. In this article, we’ll discuss how to properly clean the fan on a laptop, from using compressed air to applying cleaning solutions and more.

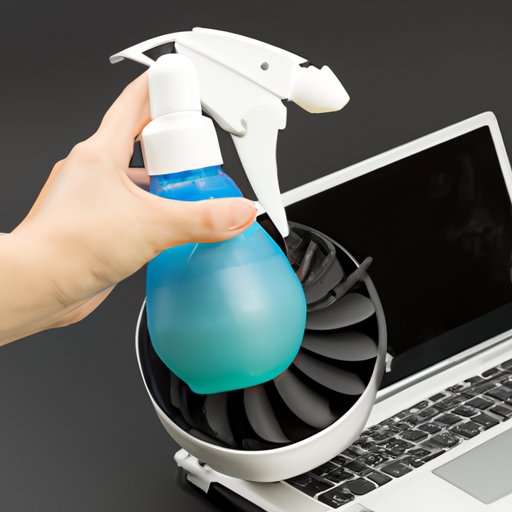
Use a Can of Compressed Air
The first step in cleaning the fan on a laptop is to use a can of compressed air. Compressed air is a pressurized gas that can be used to blow away dust and debris from tight spaces. It’s available at most hardware stores and online.
What is Compressed Air?
Compressed air is typically made up of nitrogen, oxygen, and other gases. It’s stored in metal or plastic containers that have a nozzle attached to them. When the trigger is pulled, the pressurized air is released through the nozzle and can reach into hard-to-reach places. It’s safe to use on electronic devices like laptops.
Steps for Using Compressed Air
- Start by unplugging your laptop from the power source.
- Shake the can of compressed air before using it.
- Hold the can about 6 inches away from the fan and vents.
- Press the nozzle down and spray the compressed air into the fan and vents.
- Move the can around the fan and vents while spraying to get all the dust and debris out.
- Once finished, turn the laptop upside down and tap it gently on the table.
- This will help dislodge any remaining dust and debris.

Apply Cleaning Solution to Soft Cloth
Once you’ve blown away all the dust and debris with the compressed air, it’s time to apply a cleaning solution to a soft cloth. This will help remove any stubborn dirt and grime.
What Cleaning Solutions are Appropriate?
When choosing a cleaning solution, make sure it’s non-abrasive and won’t damage the laptop. Mild dish soap or a specialized electronic device cleaner are good options. Avoid using harsh chemicals like bleach, as these could cause permanent damage to the laptop.
Steps for Applying Cleaning Solution
- Mix a small amount of the cleaning solution with lukewarm water.
- Dip the soft cloth into the mixture.
- Gently wipe down the fan and vents with the cloth.
- Make sure to get into all the nooks and crannies.
- Rinse the cloth and repeat the process if needed.
- Once finished, let the laptop air dry.

Unscrew and Remove the Fan
If the fan is still dirty after using the compressed air and cleaning solution, you may need to unscrew and remove it. This will allow you to get into all the crevices and ensure that the fan is completely clean.
What Tools are Needed?
Before unscrewing and removing the fan, you’ll need a Phillips head screwdriver and a pair of tweezers. You may also need a pair of needle-nose pliers if the screws are too tight to loosen with the screwdriver.
Steps for Unscrewing and Removing Fan
- Start by unplugging the laptop from the power source.
- Turn the laptop over and locate the screws that hold the fan in place.
- Using the Phillips head screwdriver, carefully unscrew the screws.
- Once the screws are removed, carefully lift the fan out of the laptop.
- Be careful not to damage any of the internal components.
Vacuum the Fan Blades and Vents
Now that the fan is out of the laptop, you can vacuum the fan blades and vents. This will help remove any remaining dust and debris.
What Attachments are Needed?
You’ll need a vacuum cleaner with a brush attachment. The brush attachment will help loosen any dirt and debris stuck to the fan blades and vents.
Steps for Vacuuming Fan Blades and Vents
- Attach the brush attachment to the vacuum cleaner.
- Carefully move the brush over the fan blades and vents.
- Be careful not to damage any of the internal components.
- Once finished, use the vacuum cleaner to suck up any remaining dust and debris.
Dip Cotton Swab in Rubbing Alcohol
If there are still traces of dirt and grime on the fan blades, you can dip a cotton swab in rubbing alcohol and use it to clean them. This will help remove any stubborn dirt and grease.
What Materials are Needed?
You’ll need a bottle of rubbing alcohol, cotton swabs, and a bowl of warm water.
Steps for Cleaning Fan Blades with Rubbing Alcohol
- Start by filling the bowl with warm water.
- Dip a cotton swab in the rubbing alcohol.
- Carefully rub the cotton swab over the fan blades.
- Make sure to get into all the nooks and crannies.
- Once finished, dip the cotton swab in the warm water to remove any remaining rubbing alcohol.
Reassemble the Fan and Test the Laptop
Once the fan is clean, put it back in the laptop and reattach the screws. Make sure the screws are tight but not too tight, as this could damage the fan. Then plug the laptop back in and test it to make sure it’s working correctly.
What Parts are Needed?
You’ll need the Phillips head screwdriver, the fan, and the screws.
Steps for Reassembling and Testing Laptop
- Start by lining up the fan with the holes in the laptop.
- Carefully insert the screws into the holes and tighten them.
- Be careful not to overtighten the screws.
- Once finished, plug the laptop back in and turn it on.
- Let the laptop boot up and check to make sure it’s working correctly.
Conclusion
Cleaning the fan on a laptop is an important part of keeping it running smoothly. In this article, we discussed how to properly clean the fan on a laptop, from using compressed air to applying cleaning solutions and more. We hope this article has been helpful in showing you how to clean the fan on your laptop.
Summary of Article
This article provided an in-depth guide on how to clean the fan on a laptop. It covered the use of compressed air, cleaning solutions, vacuums, and rubbing alcohol. Tips and steps for each step were included.
Final Thoughts
Cleaning the fan on your laptop is an important part of keeping it running smoothly. By following the steps outlined in this article, you should be able to effectively clean the fan on your laptop and keep it running optimally.