
Introduction
A dryer duct is a piece of ventilation equipment that helps to remove lint, dust, and other debris from the dryer. It is important to regularly clean the dryer duct in order to prevent build-up of lint and other debris, which can be a fire hazard. This guide will walk you through the steps of how to clean a dryer duct safely and effectively.

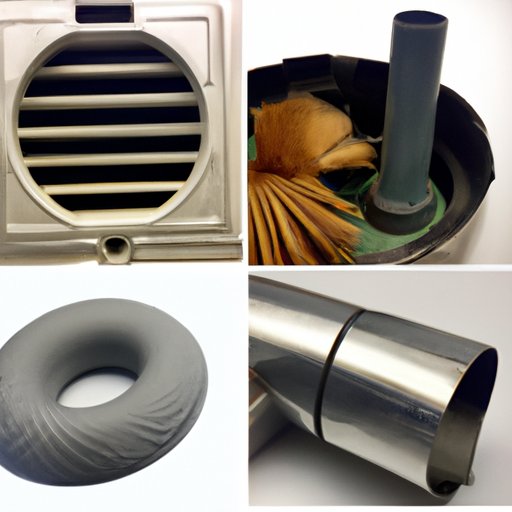
Prepare the Dryer Duct for Cleaning
The first step in cleaning a dryer duct is to prepare the area. You will need to unplug the dryer from the wall and then move it away from the wall so that you have easy access to the back of the dryer. Next, disconnect the vent hose from the back of the dryer and set it aside.
Vacuum Out the Dryer Duct
Once the dryer is disconnected, you will need to attach a vacuum attachment to the end of the vent hose. Carefully insert the vacuum into the duct and turn it on. Vacuum out all of the lint and debris that has accumulated in the duct. Be sure to use the right attachments for the job, as some vacuums are not powerful enough to clean out a dryer duct.
Use a Brush to Clean the Dryer Duct
After vacuuming out the dryer duct, you will need to use a long brush designed for cleaning dryer ducts. Insert the brush into the duct and carefully scrub the sides. This will help to loosen any stubborn lint or debris that may still be stuck to the walls of the duct. Once you are done brushing the duct, be sure to vacuum out any debris that may have been loosened by the brush.

Clean the Exterior of the Dryer
In addition to cleaning the dryer duct, you will also need to clean the exterior of the dryer. Wipe down the exterior of the dryer with a damp cloth and remove any lint or dirt that has accumulated on the outside of the dryer. Also, be sure to clean the lint trap, as this can become clogged with lint over time.

Check and Replace the Dryer Vent Cap
The last step in cleaning a dryer duct is to check and replace the dryer vent cap. Check the vent cap for any damage and replace it if it is damaged. Once you have a new vent cap installed, test it to ensure it is working properly.
Conclusion
Cleaning your dryer duct is an important part of regular maintenance. By following these steps, you can safely and effectively clean your dryer duct so that it is free of lint and other debris. Remember to regularly clean the dryer duct in order to reduce the risk of a fire caused by a buildup of lint.